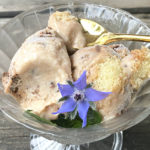
Tiramisu Ice Cream
Tiramisu Ice Cream made in Thermomix® (or without) is a very upscale fine-dining luxurious recipe for an unforgettable "company's coming dinner" on a warm Summer Eve.
Ingredients
Ingredients for the Chocolate Espresso Swirl
- 160 grams strong Espresso, room temperature
- 25 grams Grand Marnier (Rum or other favourite liqueur)
- 60 grams dark Cocoa Powder (I used Fry's)
Ingredients for Mascarpone Cream
- 8 large know-your-farmer eggs
- 300 grams granulated sugar
- 500 grams Mascarpone
- 160 grams Lady Fingers
Instructions
Instructions for the Chocolate Espresso Swirl
-
Make the strong espresso and set aside to cool
-
Place espresso, rum and cocoa into mixing bowl and mix to combine for 30 seconds at speed 2
-
Transfer to a small bowl and set aside
Instructions for Mascarpone Cream
-
Cover inside of a 2-litre serving bowl with plastic wrap (2.2 Liter insulated Thermomix Serving Bowl is perfect) and place in freezer to chill (this will aid in the freezing and curing of the ice-cream, later)
-
Insert butterfly whisk into mixing bowl, add eggs and sugar and whisk 10 minutes at speed 4
-
Remove butterfly whisk and add mascarpone and mix for30 seconds at speed 3 (use spatula to move ingredients from bottom of bowl around blade and mix for another 30 seconds from speed 3-4 until ingredients are creamy and smooth throughout
-
Add Lady Fingers and mix for 15 seconds on reverse speed 2 with spatula inserted through hole in lid of bowl to ensure ingredients stay near the blade
-
Pour half of the cream mixture into the prepared and chilled 2-litre container
-
Distribute half the "set-aside swirl mixture" over the cream and mix gently with a spoon to create a variegated effect
-
Pour remaining cream into the bowl and drizzle remaining swirl in a decorative fashion over the cream and gently swirl it to create a variegated effect
-
Seal the container with a lid and wrap tightly for freezer, then freeze for at least 10-12 hours (no peeking)
-
Remove the pan from the freezer 15-20 minutes before serving to enable easier scooping
Recipe Notes
Now that we have made this recipe a few times, the best advice is in the recipe proper - and I prefer fewer ladyfingers. They are denser than the lightly whipped mascarpone cream, and though both are blended together and layered in the container together, the ladyfingers do sink when freezing.
If you use a flatter container that will solve the problem as there will be more of an equal distribution of ingredients, but with a double batch and the perfect 2.2 liter serving bowl to fill with this recipe, the ladyfingers tend to sink and when the top of the bowl is eaten, the bottom of the container is notably more "biscuity" and "less creamy".
Like setting a jello with suspended ingredients, I could go in at 6 hours and move things around, but that would affect the swirl albeit not likely too dramatically. I haven't tried this yet. But, I believe it is a very good solution.
The better solution seems to be less ladyfingers. How many less? Hmmm. I think I will try about 1/3 less first go round and add 110 grams ladyfingers. I'll let you know how it goes. I was just compelled to write an AFTERWORD in the notes section of this recipe as we love this recipe but the density of the ladyfingers in the bottom needs to be resolved for me. Others in the family disagree. So, there you have it. Let us know how it goes!
SO worth it!