Ntala offers Extraordinary Cheese Making Classes
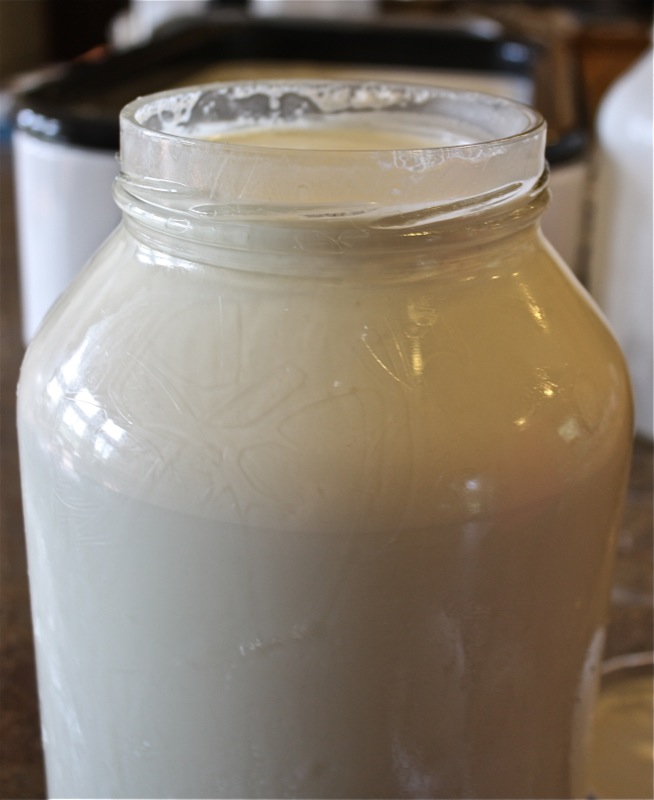
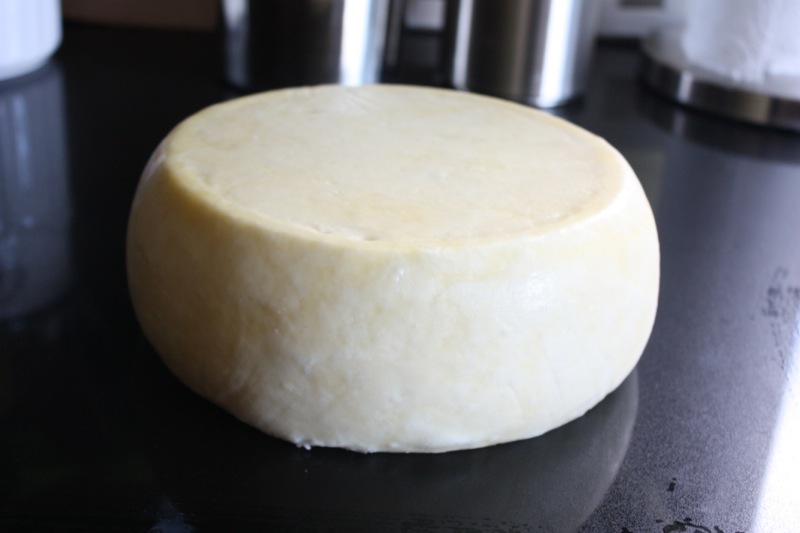
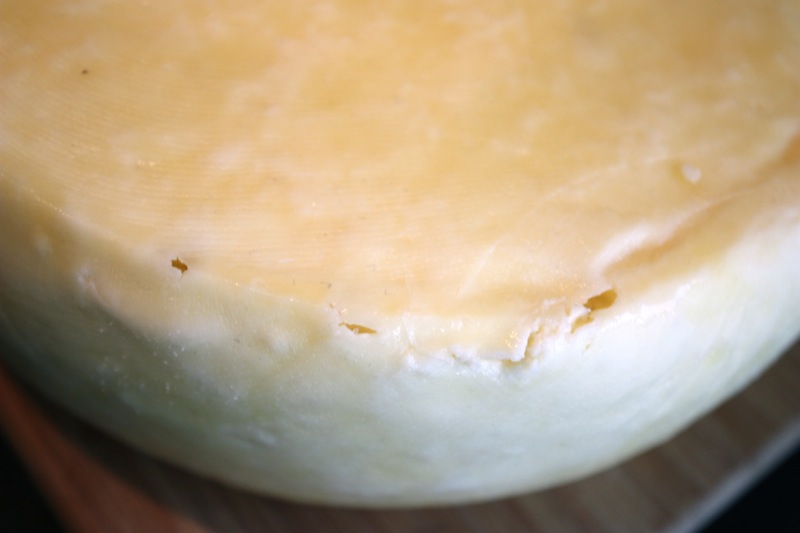
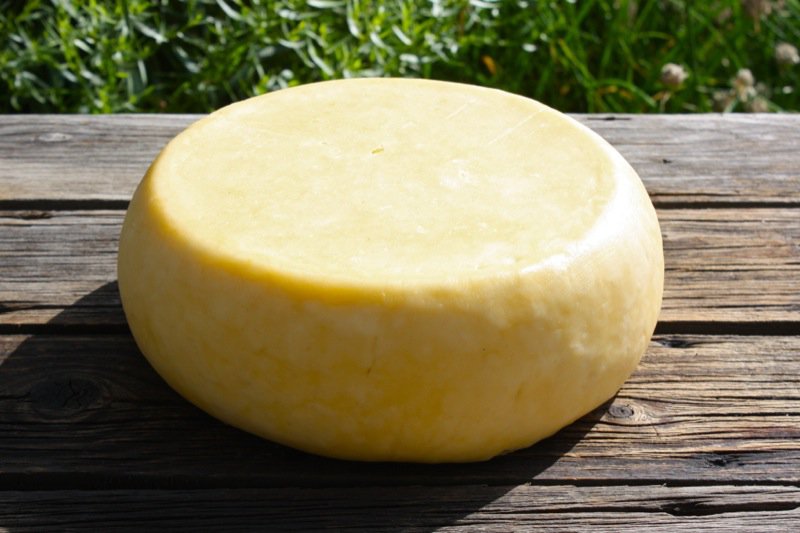
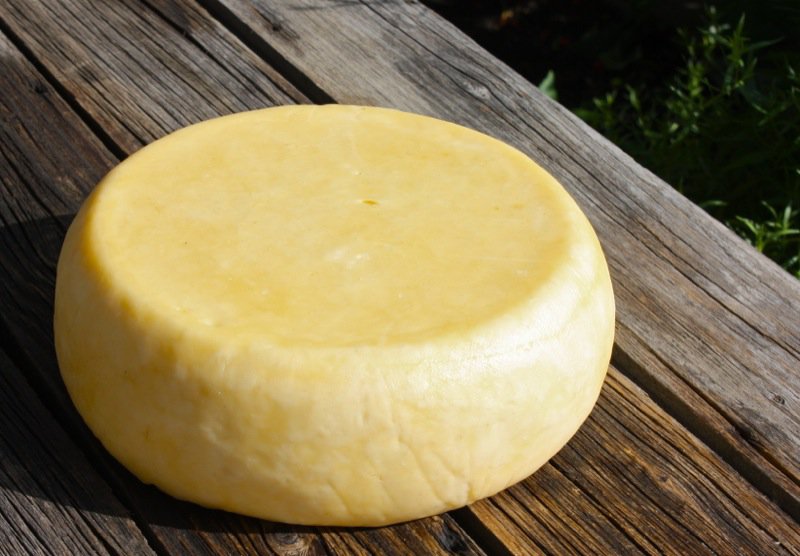
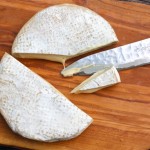
Talk about a gorgeous golden globe of honey hued buttery goodness. One can only make artisan cheese like this with fresh milk that comes from a grass fed and conscientiously raised cow. The colour difference between this Caerphilly and the Welsh Caerphilly Cheese (my first Caerphilly) I made which was really white, also with really good milk, says it all. Yet, I did not use the same recipe, or process, to be fair.
There is nothing like making home made artisan cheese at a farm where the milk comes from.
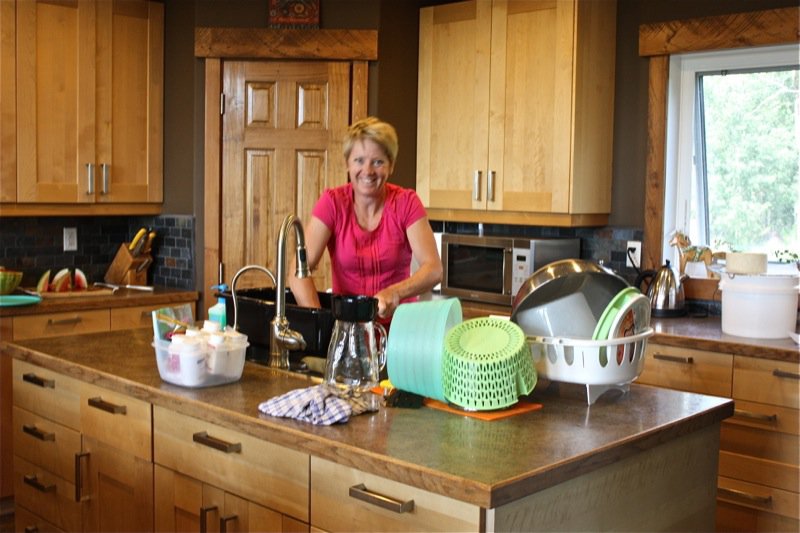
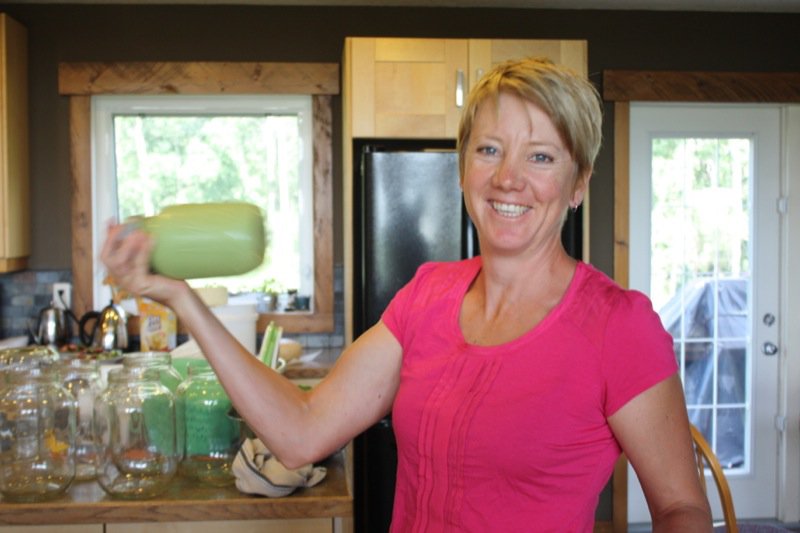
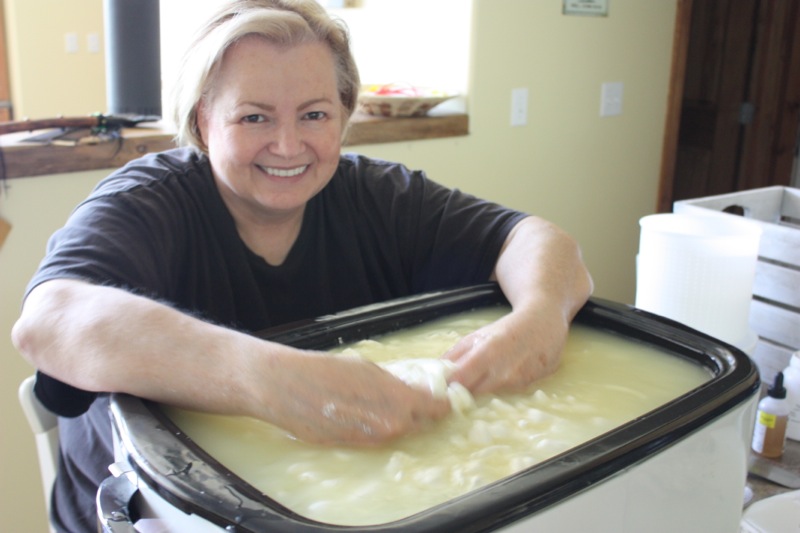
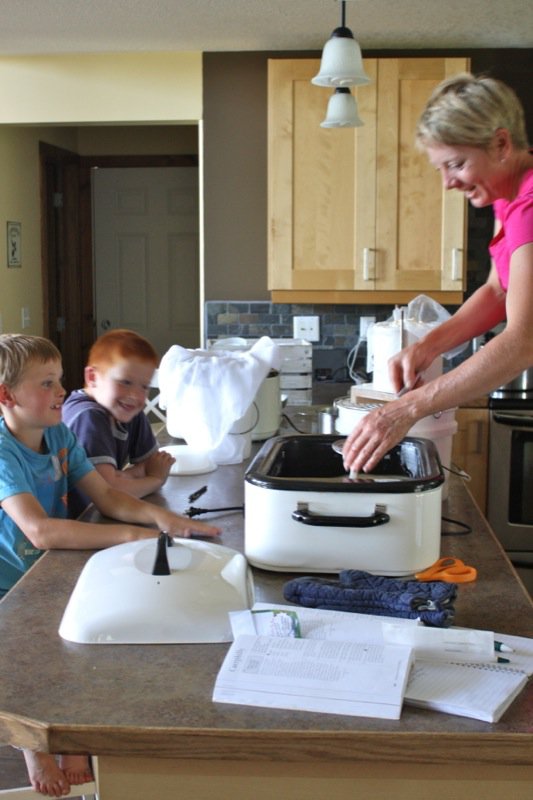
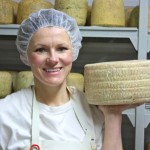
Ntala, of Crazy Mare Ranch, is an accomplished artisan cheese maker and she has begun to offer cheese making classes at her farm. She is a woman of many talents: mother of two, cheese maker, farmer, hair dresser, home remodeler and an Olympian Biathlete (cross country skiing and shooting). I met her through Cheesepalooza and have enjoyed many of her incredible artisan cheeses. This gal has it goin’ on.
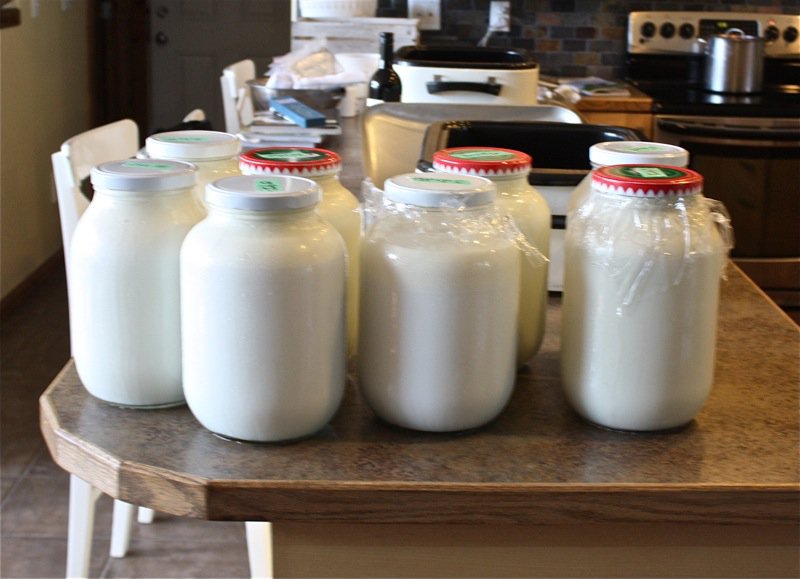
Do you see the thick cream resting atop the gorgeous milk? Ntala is unstoppable: a tiny little gal with the strength of a someone much larger and the energy of a young child. I must admit that being on her lush green ranch in the fresh country air renewed my spirit and powered me with a little burst of energy. I longed to live there. It was quiet and expansive and uncontaminated by the spoils of urban living. And there is so much work to do. No time for lazing around pondering one’s problems. So much satisfaction to be had through accomplishments achieved. And Ntala and family have much to be proud of.
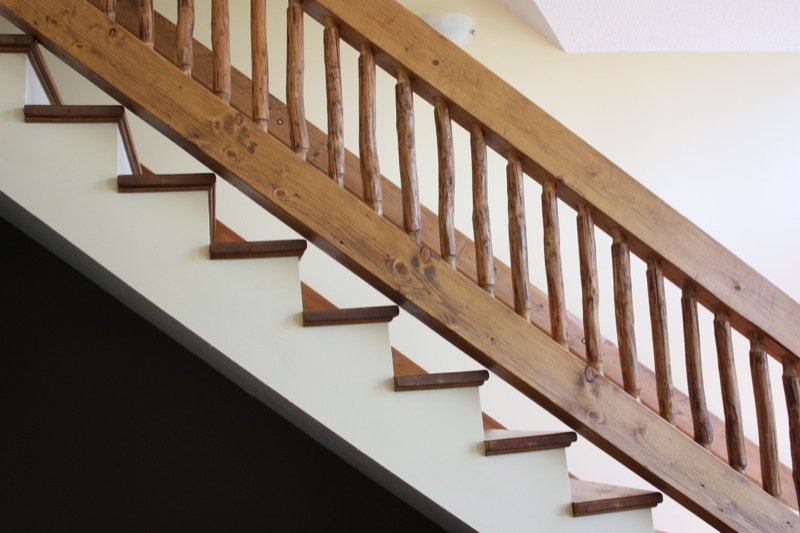
Talk about homesteading. They moved onto this property, lived in a trailer and then built this house from scratch. Yes, they hired a contractor to frame it and someone else to do the dry-walling. The rest they completed on their own, and it took only one year. The staircase above is one example of their attention to detail. It is an incredible home. Perfect for Cheese Making Classes.
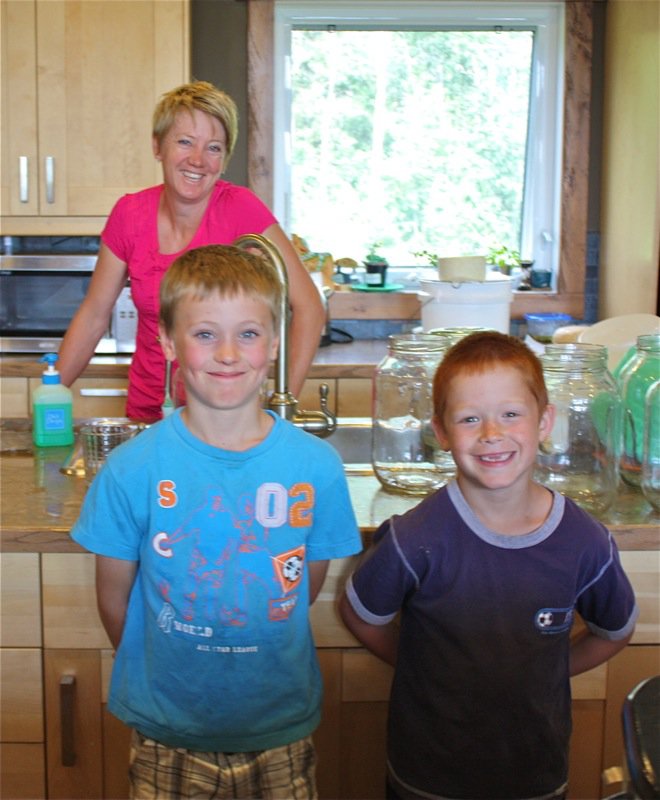
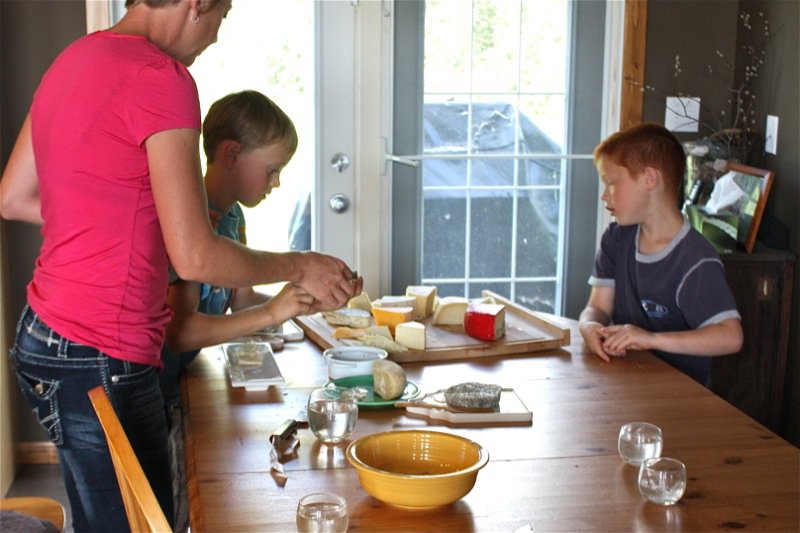
Ntala has goats that she milks daily. She makes her own cheese a couple of times a week and has her own “real” cave. We were so busy this day that we didn’t have time for a tour. I got lost finding her home (though it is not hard to find), arrived an hour late and she had an appointment to do a gal’s hair as soon as we were finished making our cheese – so, next time I will get the tour. Her son, Henrik, and his cousin, Ryan, joined us for the day.
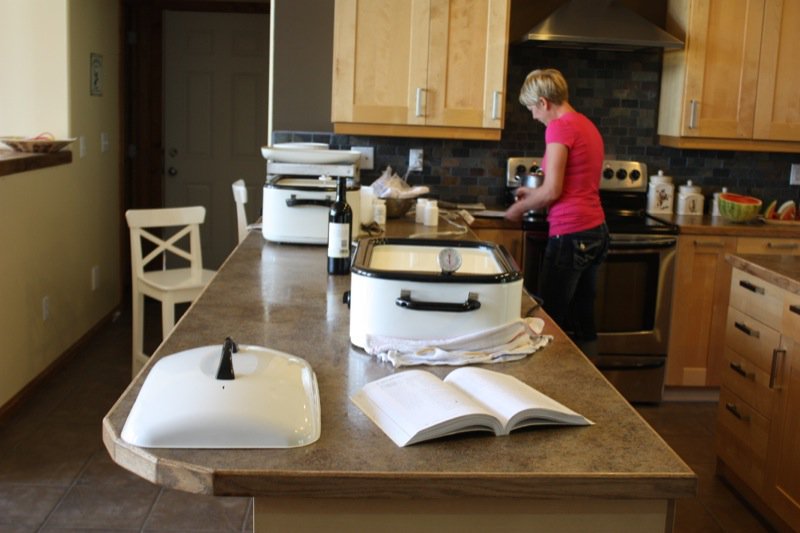
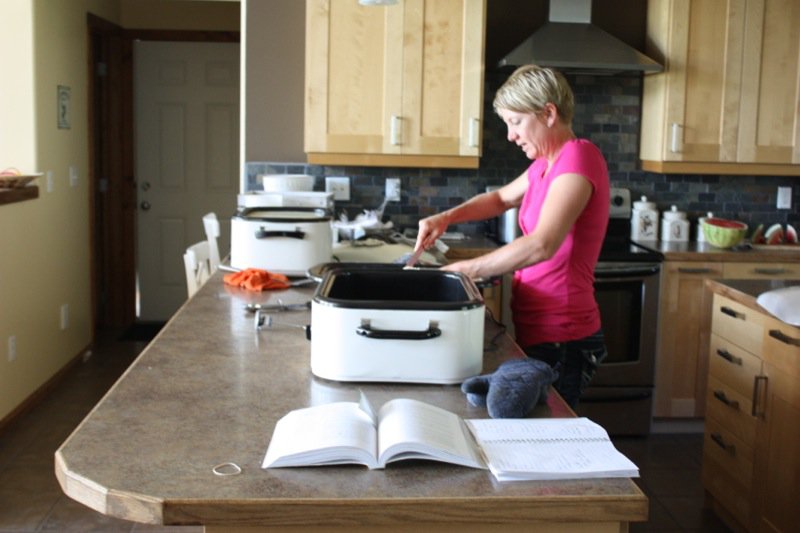
The 18 foot long counter, center island and long country kitchen table make this space ideal for classes. I am looking forward to coming out with a group next time. Ntala usually doesn’t use her turkey roaster to make her cheese in, but knows that I do, and when she teaches her classes uses a variety of vats and turkey roasters.
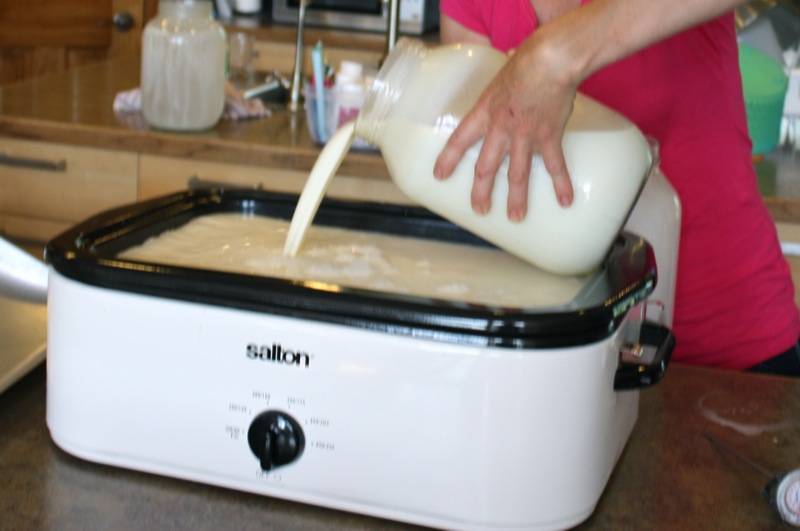
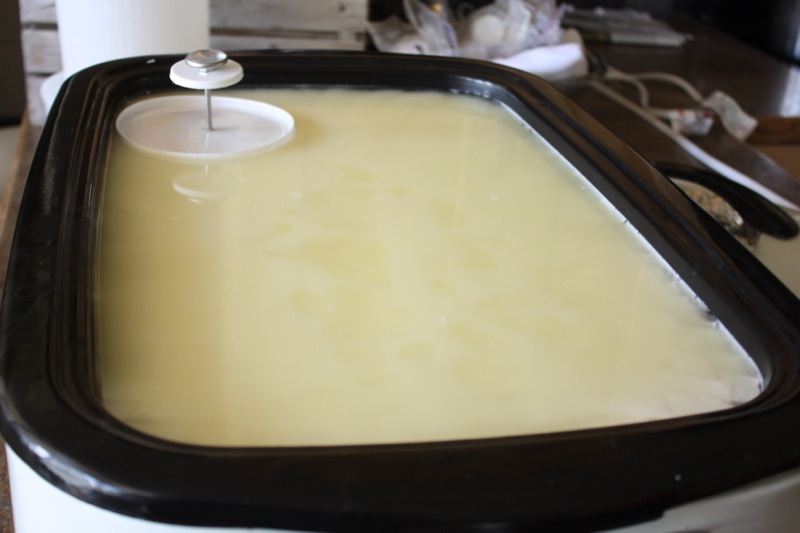
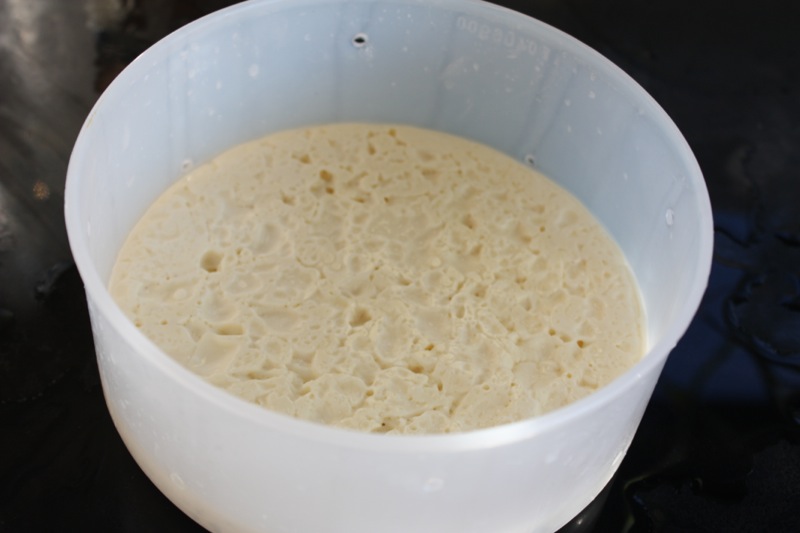
The milk had heated to temperature, the culture had been added and ripened.
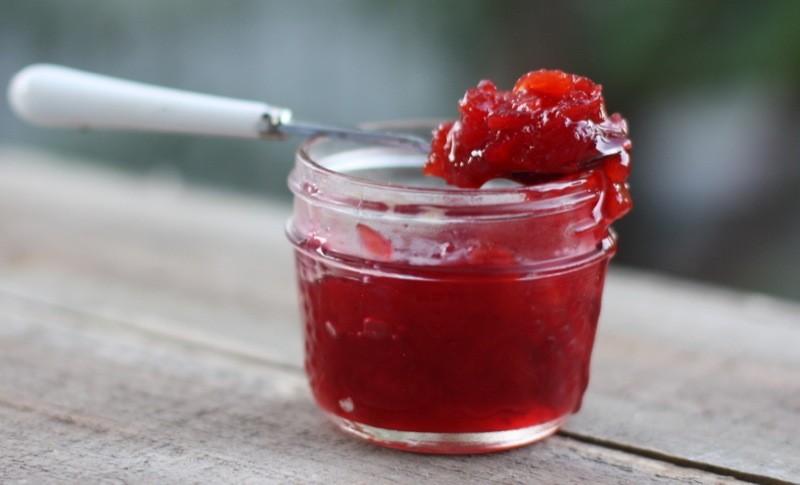
The rennet has also been added, stirred in and is now congealing so that we can later test for a clean break, and cut the curd. Meanwhile, how about a Cheese Tasting? I had been trying to organize one with the Cheesepalooza gang at my house in Edmonton, but it just wasn’t happening, so I hauled my cheesed out to Ntala’s for a tasting. She brought out some cheeses she had been aging for the tasting and what a lovely moment it was with the boys.
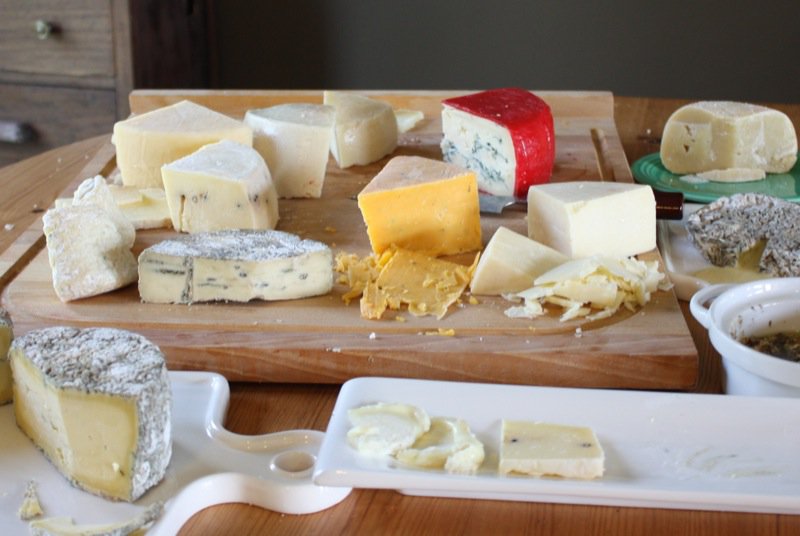
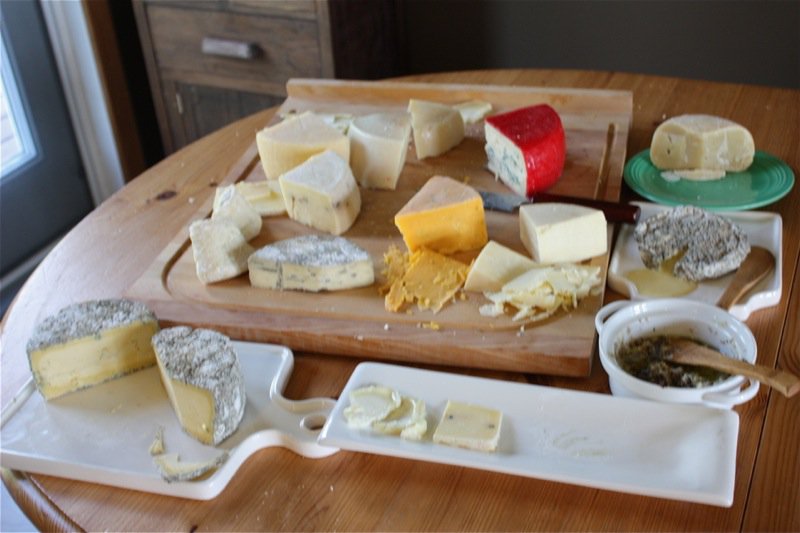
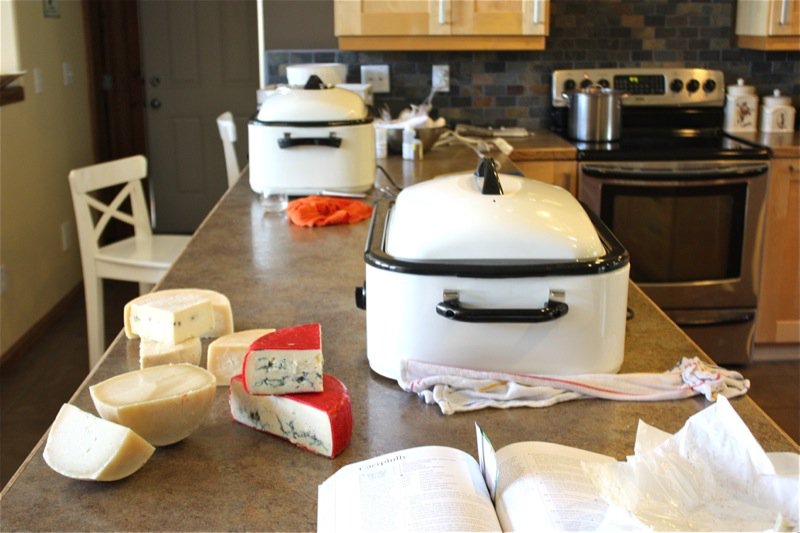
Just to give you a little window into the ability of Ntala’s cheese making prowess:
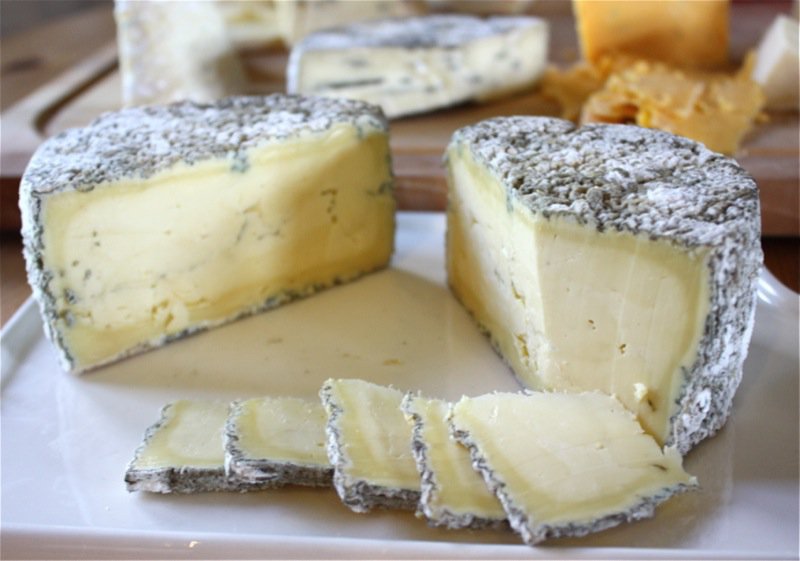
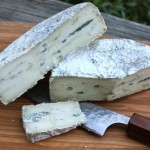
Stilton
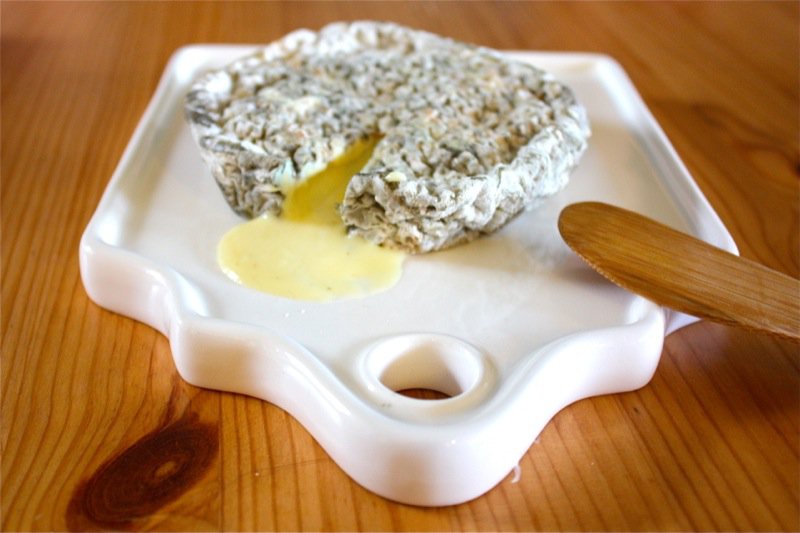
Buttermilk Blue
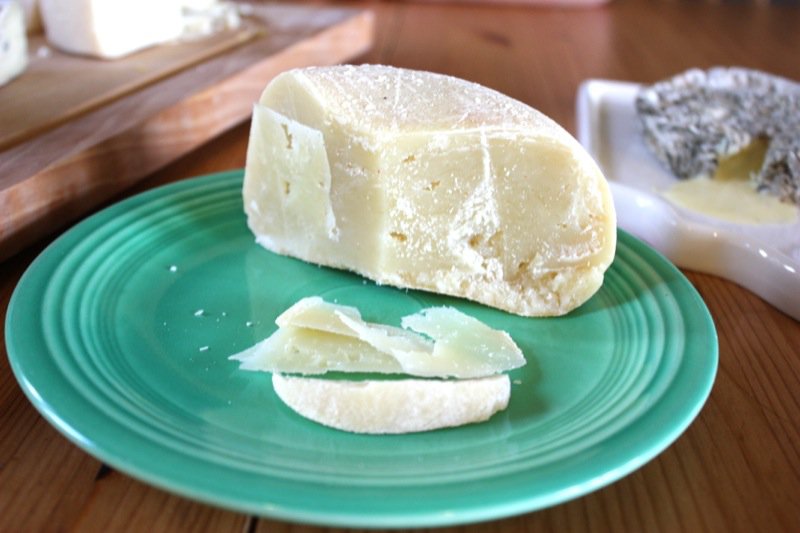
Mountain Tomme
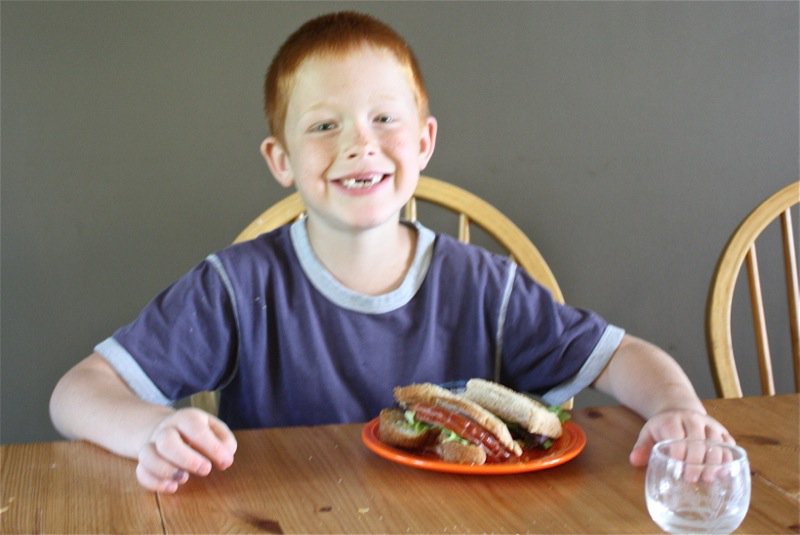
And then there was lunch. Gotta feed the growing boys…
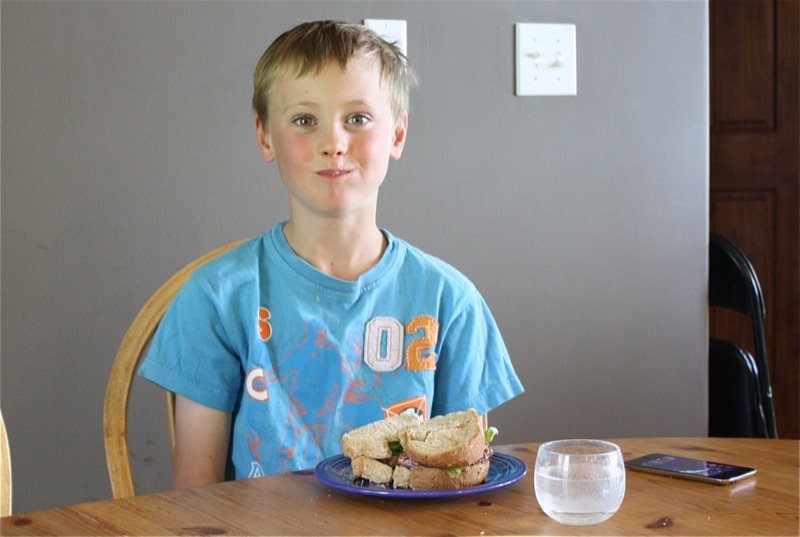
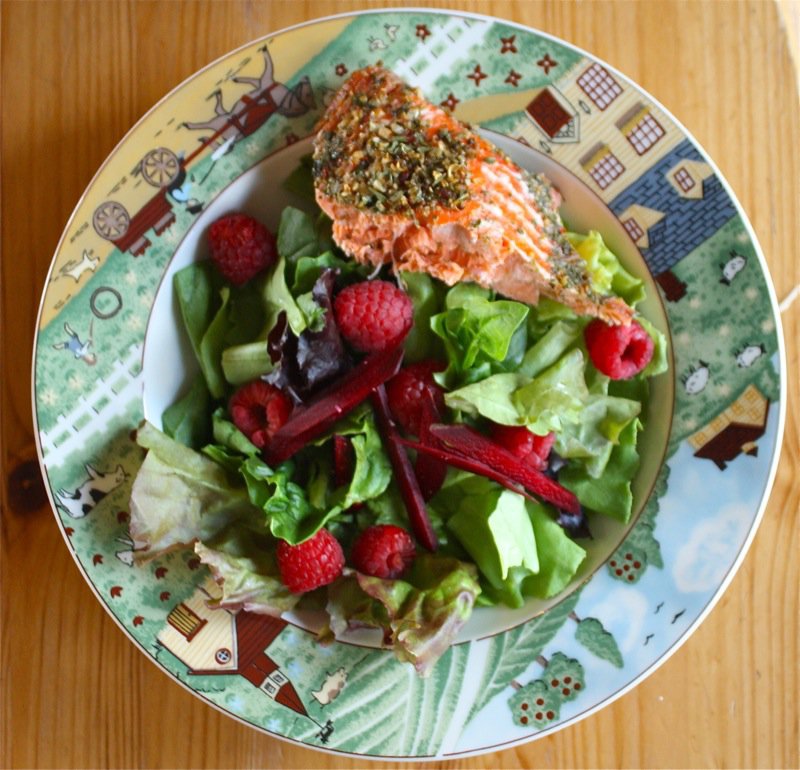
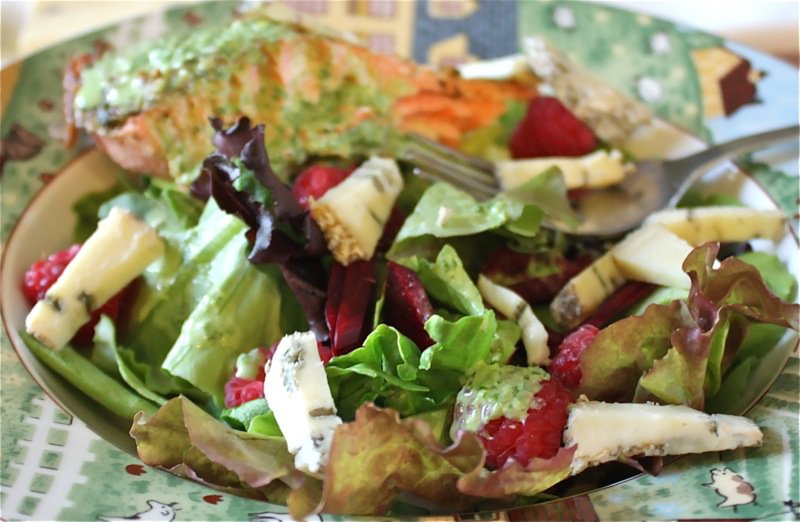
And what a gorgeous lunch she had prepared for us: this is not the kind of lunch that you should expect for the regular cheese making classes. She had a yogurt herb dressing over a fresh mixed lettuce garden salad with better, raspberries and blue cheese (she chose her Stilton; I chose my Buttermilk Blue) with herb crusted wild Sockeye salmon. It was such a pleasure to sit admist the massive board of cheeses to taste, in a kitchen making our own cheese, eating a freshly harvested bowl of Summer salad.
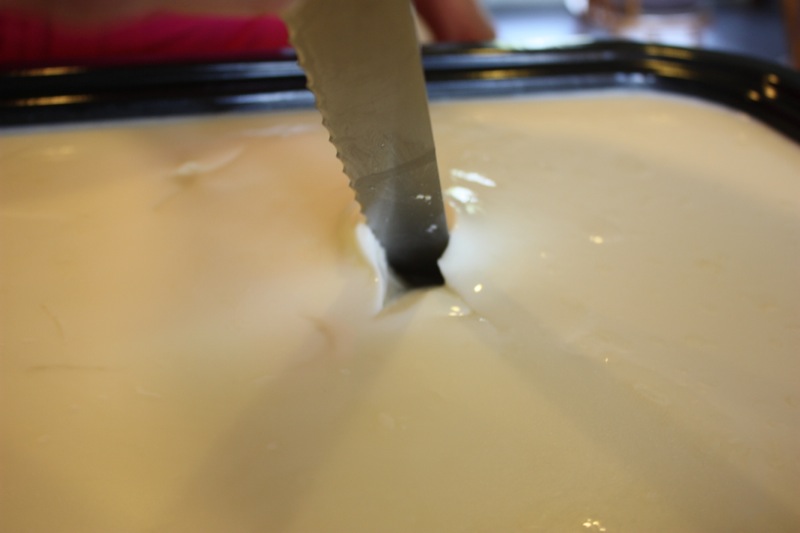
Not yet a clean break.
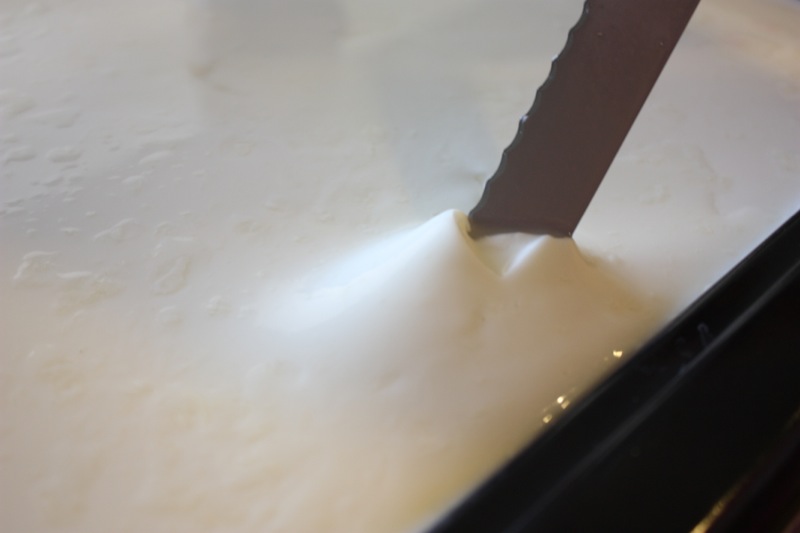
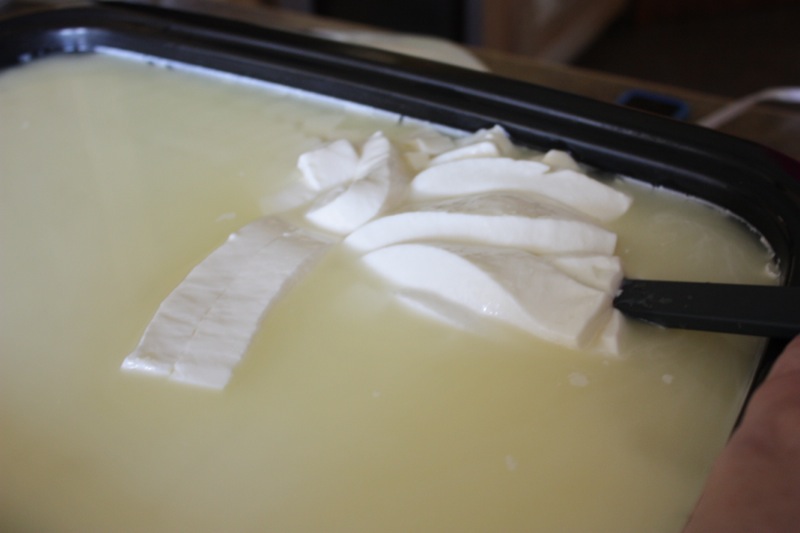
Clean break: ready to cut the curd.
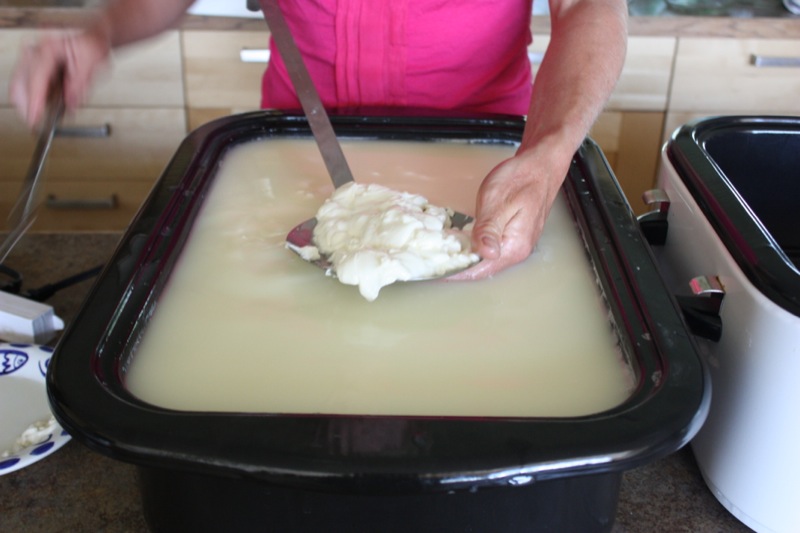
Ntala was 15-20 minutes ahead of me. Her vat heated her milk faster. Her curds had been cut, rested and she was now stirring them.
Mine are just cut and resting.
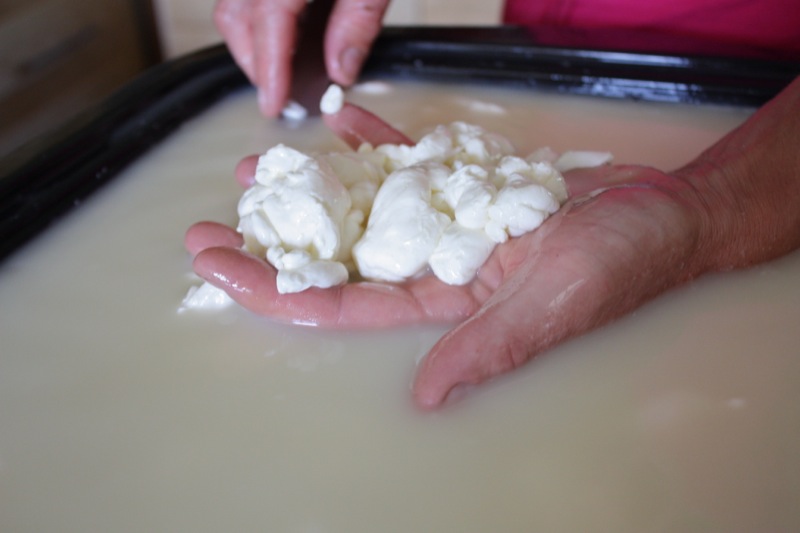
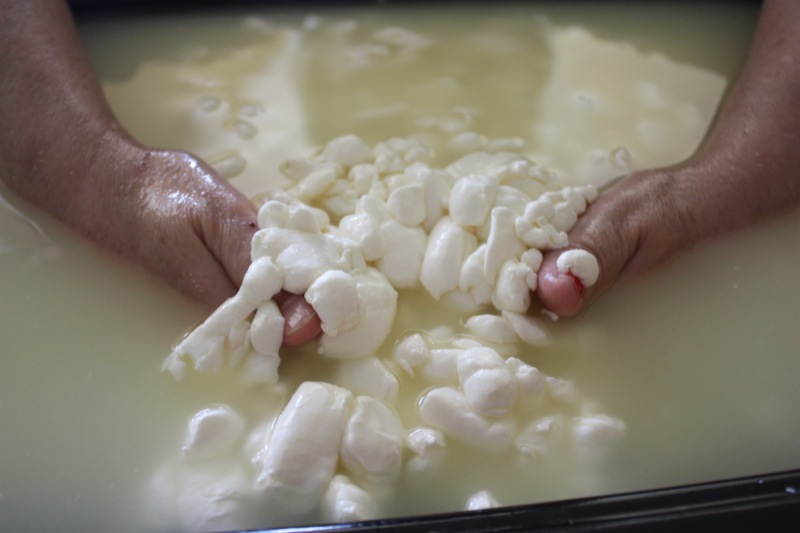
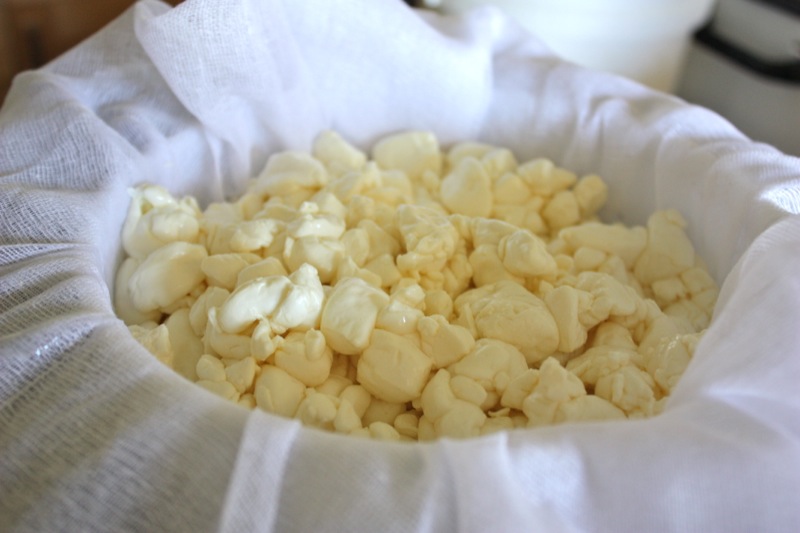
Gorgeous curd.
We both like to stir the curd with our hands during the last part of the process.
Almost ready to pack into the mould so time to get everything put away and clean up.
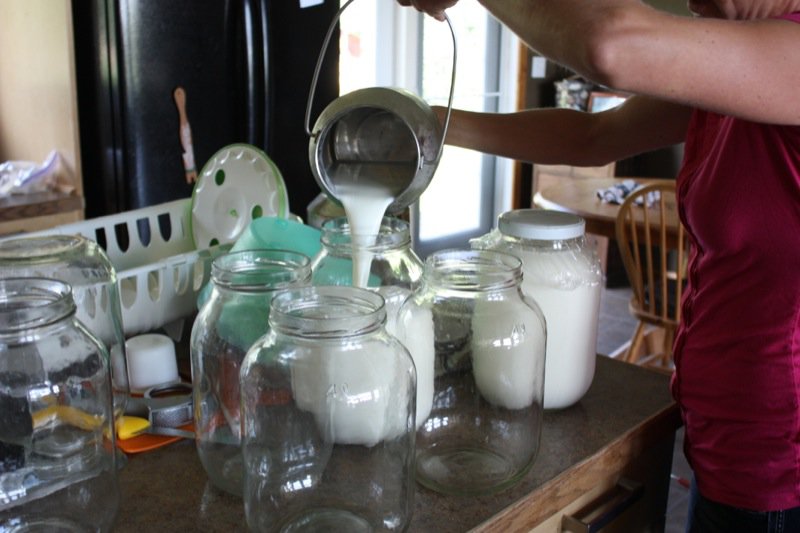
Guess who did all of the heavy work? Love those stainless steel jugs.
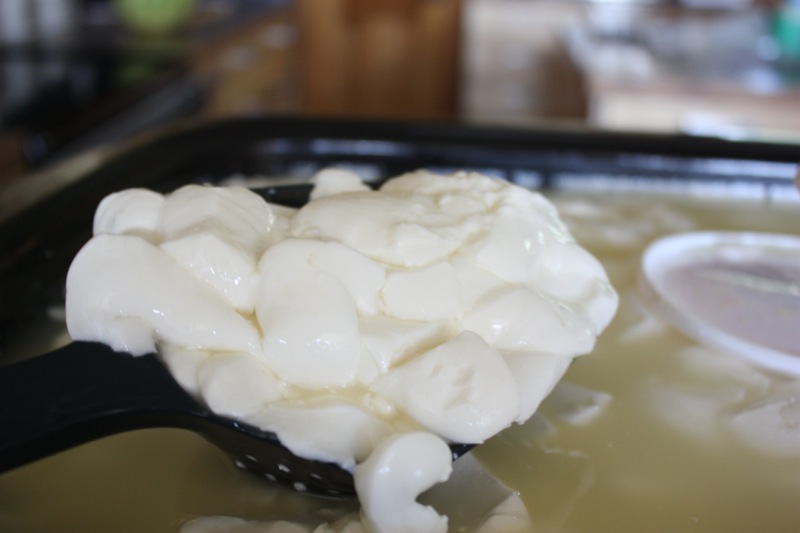
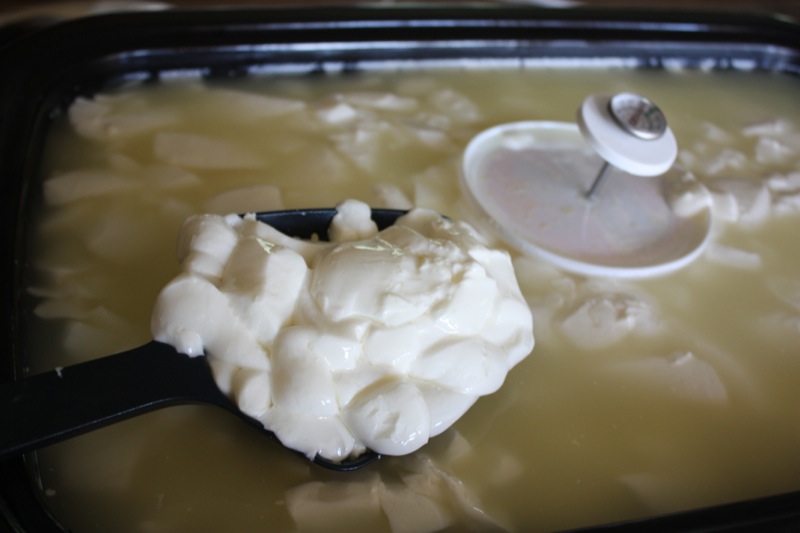
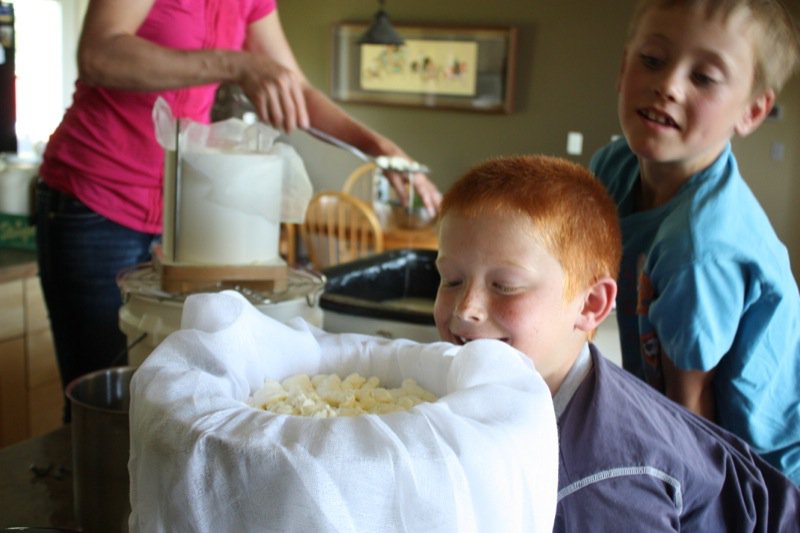
Removing the whey to expose the curd.
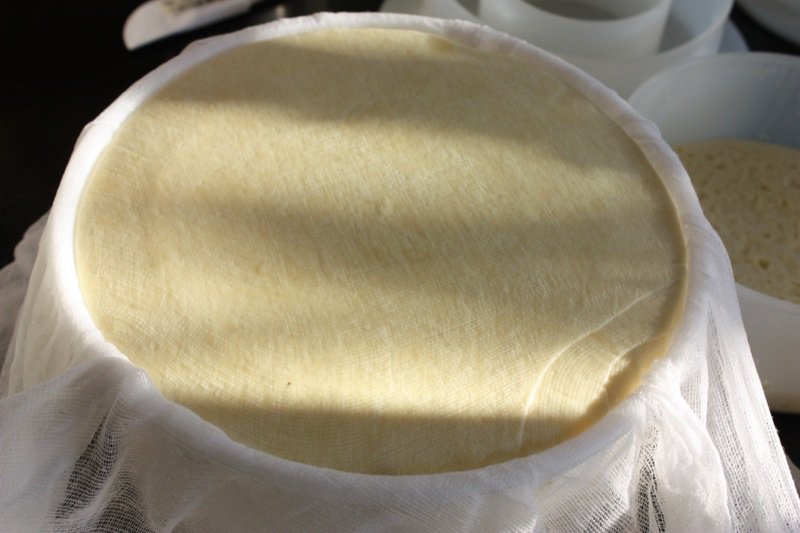
Scooping the curd into the sieve: pillowy, yellow and lush.
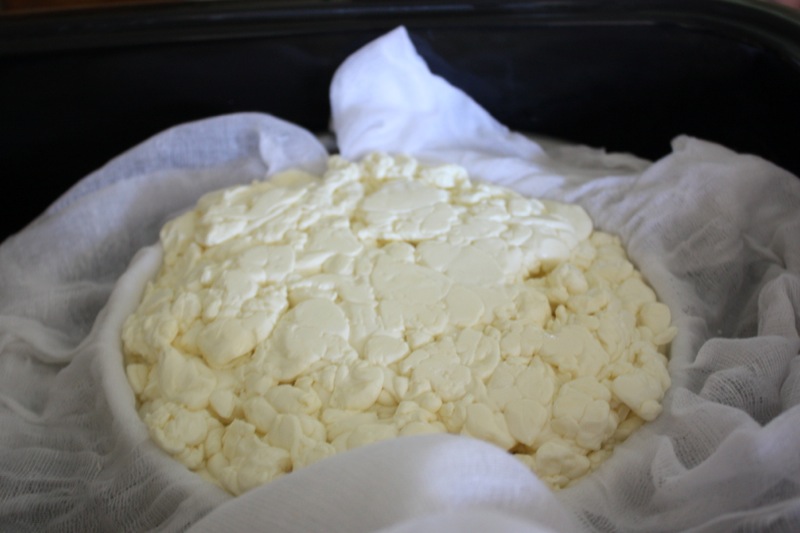
I actually had too much curd to fit into my large Tomme mould. That is a first. I pressed and pressed, yet could not fit the last bit in. I always used the same amount of milk, so this milk had a higher curd yield than I have had ever before.
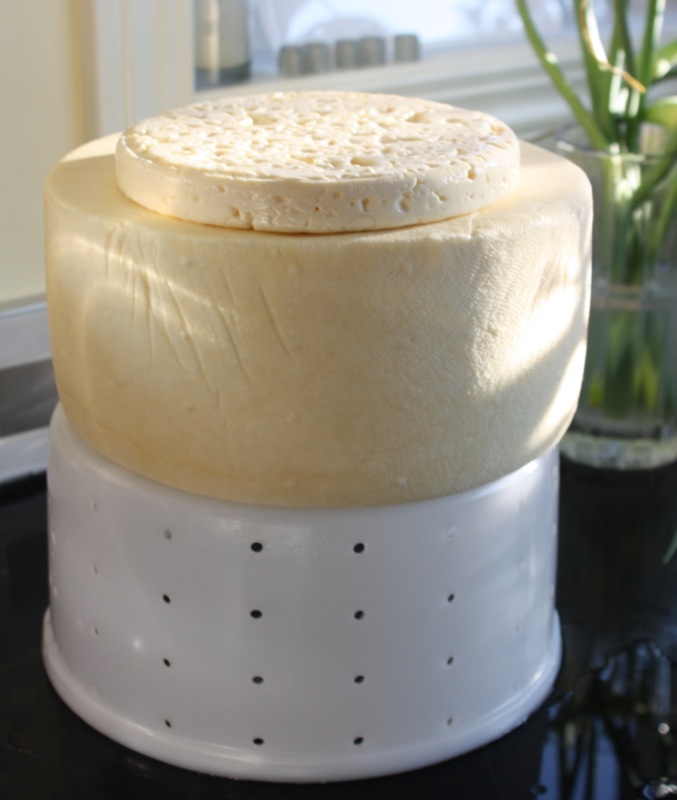
The curd was pressed thirty minutes and then turned to be pressed overnight… except…
I was driving home and couldn’t press the cheese for about 90 minutes.
I slipped the remaining curd into the smaller mould, and just melted it later… it was “OK”.
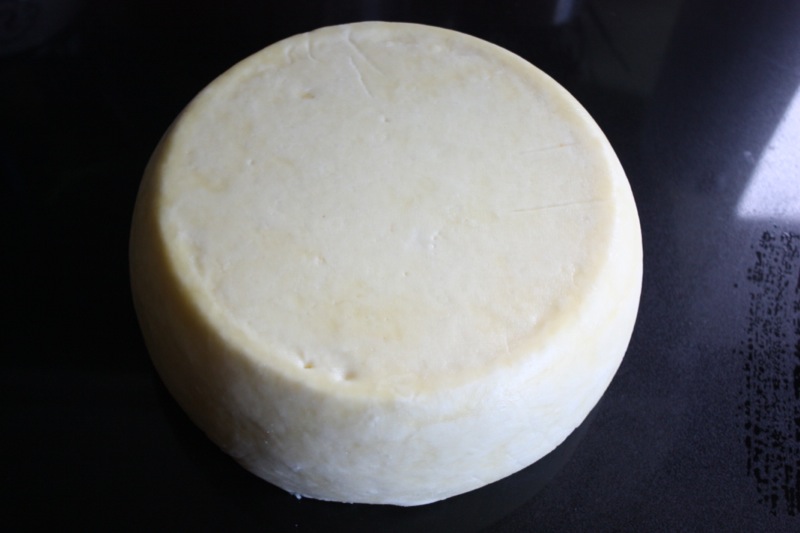
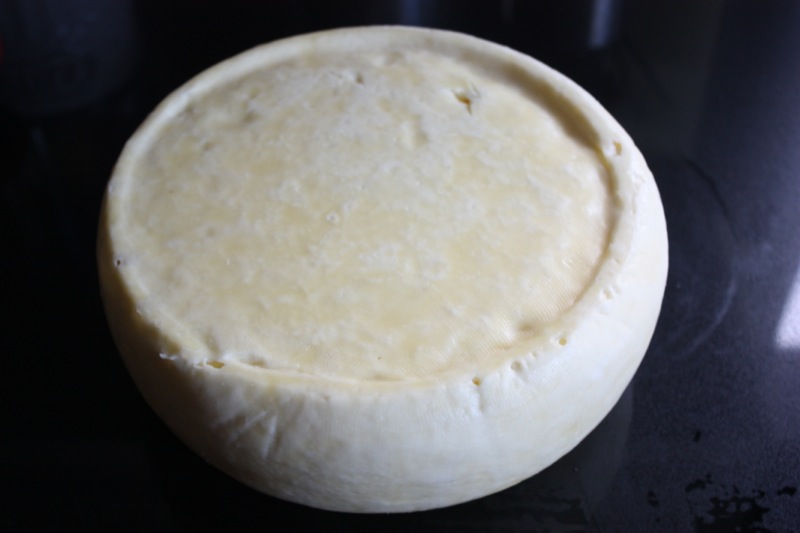
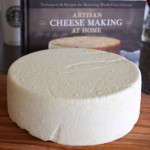
The next day, the cheese looked gorgeous, and went into the brine.
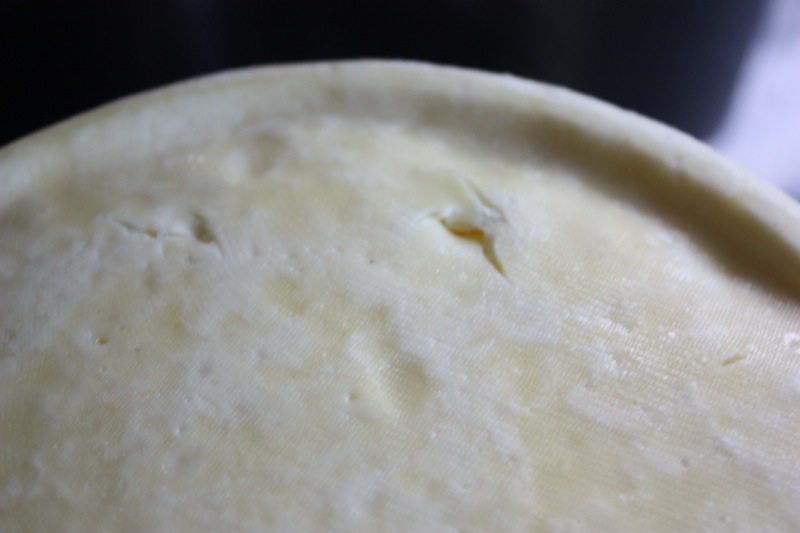
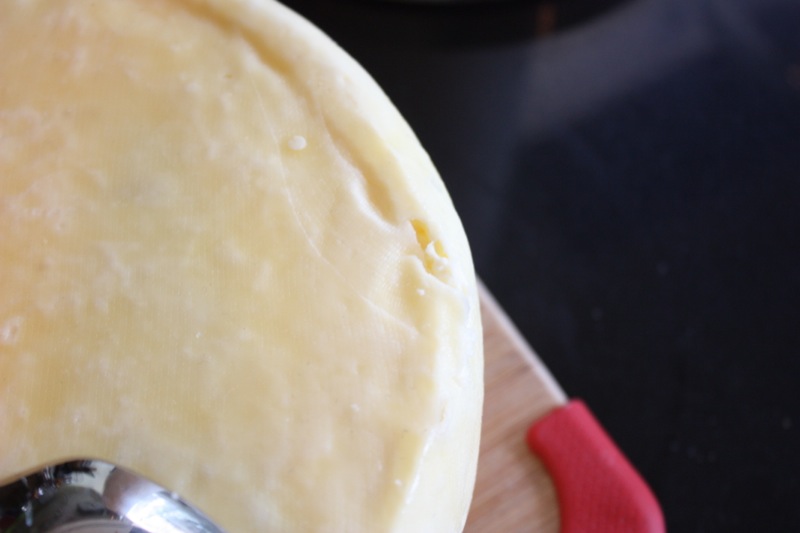
When it came out of the brine, the “rind” was loose around the edges of the bottom, I could see little holes in the surface on this one side, and there were little burping noises when I pressed the sides of the cheese.
The small disc was pressed with its own weight. It smelled yummy, but was very rubbery.

Below, you can clearly see the air pockets under the rind.
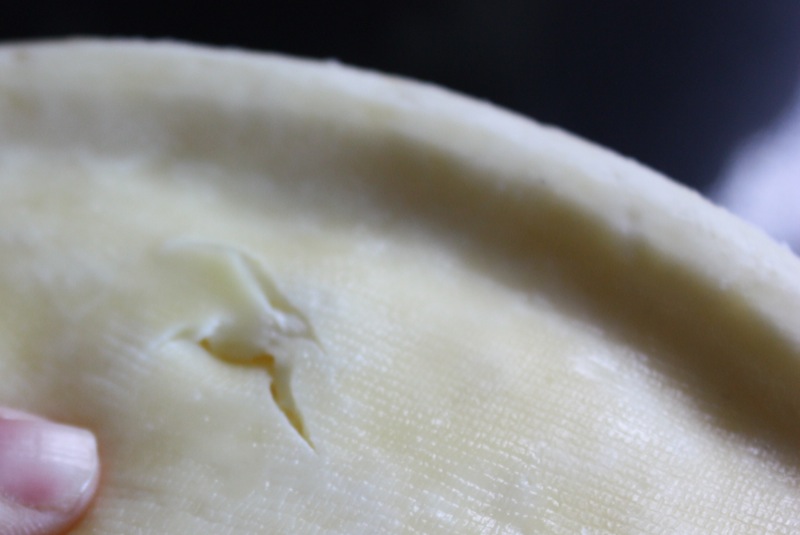
I peeled one back, to investigate.
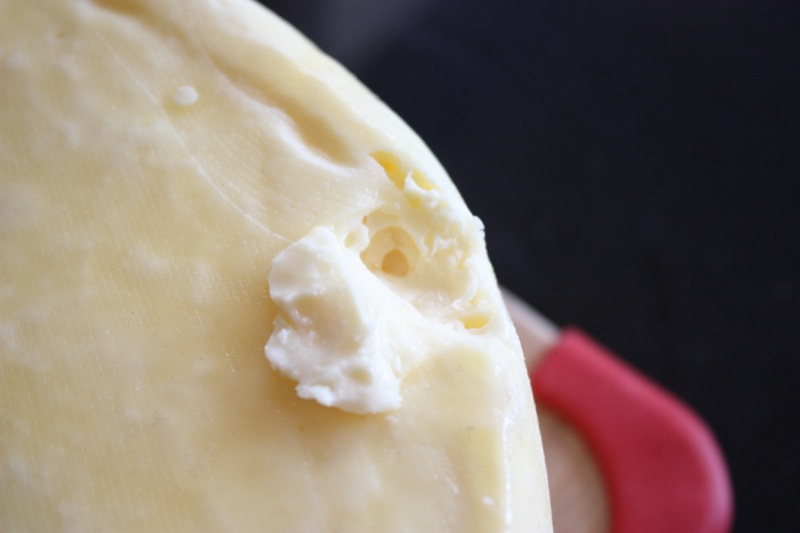
Then replace it.
Though it had been brined, there was no brine inside of the cheese. It sat on the counter, turned daily, until Monday: 5 days. It was on a wooden board and I was turning it until the board was almost dry at the last turn. At this point, I had planned to vacuum pack it to age it for 3 weeks. However, none of my vacuum packaging bags were large enough. So, it is in my vat, aging in the traditional manner.
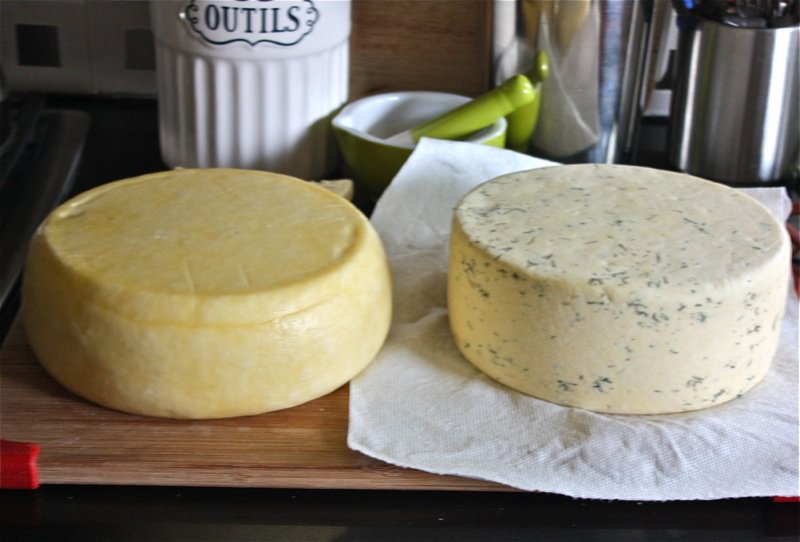
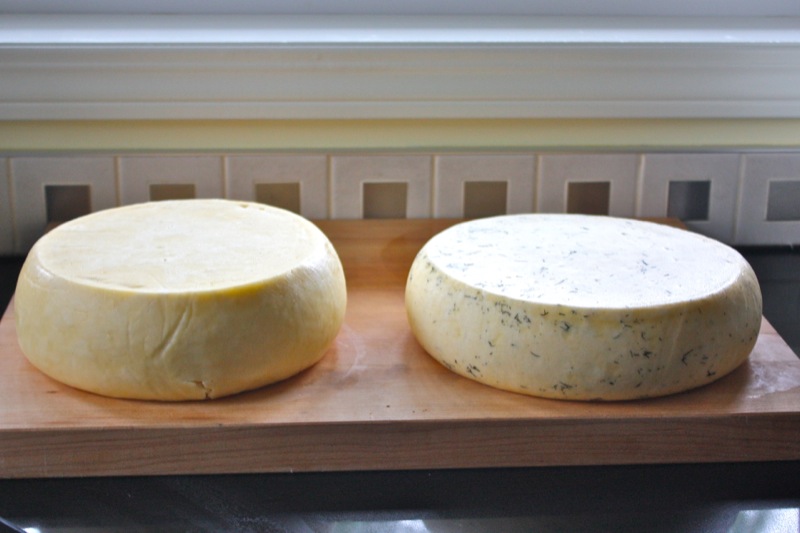
Vacuum packaging will keep the cheese longer. It will not age in the traditional Caerphilly fashion: gorgeous mouldy grey leathery rind with a soft yellow paste around it and a white center. Aged in the traditional fashion, the cheese will not last as long. The dill Havarti I made a couple of days later has just come out of the same mould I made the Caerphilly in, above, so you can see how the Caerphilly has changed shape. Below, a couple of days later, the Havarti is clearly a softer cheese and has expanded considerably.
Last photo before the aging cave. I was quite worried about the burping and loose rind; however, the lengthy air drying seems to have tempered that and the cheese is looking, feeling, and smelling great.
Now, we wait. Turning daily.
Ntala Quintilio is an excellent cheese making instructor. I would highly recommend taking one of her classes and I would love to attend again, myself. If any one is interested in getting a group of people together, please let her know… or, sign up at her website so you don’t miss out on her class offerings. Currently, she organizes classes as the interest arises. If you are interested, but don’t have a group to go with, just let her know.. and between us all, we will make it happen.
The Crazy Mare Ranch Ntala & Kevin Quintilio
58517 Range Road 60, RR2
Barrhead, AB T7N 1N3
(780) 305-2377
ntalaquintilio@hotmail.com
www.crazymareranch.ca
Canadian version of Welsh Caerphilly Cheese
Ingredients
- 16 quarts whole milk
- ¼ teaspoon mesophilic culture
- ¼ teaspoon Aroma mesophilic culture
- ¾ teaspoon calcium
- ¾ teaspoon liquid rennet
- 18 % Saturated brine (5 parts water to 1 part salt)
- wax optional
Materials:
- thermometer
- non-reactive double boiler that will hold 16 litres
- large tomme mould
- cheese cloth
- slotted spoon
- long spatula for cutting the curd
- draining mats
- aging cave
Instructions
- Take your milk out of the fridge one to two hours ahead of making the cheese, depending upon the size of the milk containers (the larger, the longer)
- Sterilize all equipment and counterspace
- In a hot water bath over medium heat, warm milk to 90°F/32°C stirring gently; turn heat off
- Sprinkle cultures over surface and let hydrate for 5 minutes; then mix well using an up and down motion to fully incorporate without breaking the surface
- Cover and let ripen for 30 minutes maintaining the temperature of 90°F/32°C
- Dilute calcium chloride in ¼ cup cool water if not using raw mile; add to milk and using the same up and down motion to fully incorporate without breaking the surface, then do the same with the rennet (calcium chloride must go first)
- Cover and sit, maintaining a temperature of 90°F/32°C for 45 minutes, or until the curd gives a clean break; if necessary, sit an extra 5-10 minutes
- Ensure a clean break, then cut the curd into ½ inch cubes; let stand for 5 minutes to firm, maintaining temperature
- Turn heat back on and slowly heat curds to 95°F/35°C over 30 minutes: adjust heat as necessary to ensure it takes 30 minutes to warm the curd to this temperature, stirring slowly to ensure uniform curds
- Cover and hold curd for 45 minutes, maintaining temperature
- Prepare mould with wet cheese cloth; place prepared mould underneath cheesecloth lined colander to catch the warm whey: this will warm the mould
- Fill mould with curds, piling them higher in the centre; pull cloth up neatly over the curds and fold snuggly over the top with as few wrinkles as possible
- Put on the top or the follower; press at medium weight for 30 minutes
- Turn over, redress cheese and place back in the mould other side up; continue pressing at medium pressure for several hours, or overnight
- Remove cheese from press; unwrap and place in brine solution for 20 hours, turning over after 10 hours
- Remove from brine; dry on a cheese mat placed on a cheese rack at room temperature for 2 to 3 days, or until dry to the touch (turn twice a day)
- (Go to #20 for waxing option now, or) Place cheese on a clean cheese mat in a ripening container inside the cave; ripen at 50°F-54°F/10°C-12°C 85% humidity turning daily maintaining humidity by adjusting the lid in the ripening container, as necessary
- After about 2 weeks a whitish grey mould should appear; continue turning daily until a thicker crust forms
- After about 4 weeks, the cheese will begin to soften just under the crust, possibly becoming runny: eat it within 2 to 3 months (it will not keep as long as the waxed version)
Waxing Option: After #16, coat cheese with 2-3 layers of cheese wax; ripen at 50°F-54°F/10°C-12°C for three weeks at which point the cheese will be ready to eat (Age longer for a sharper flavour.)
Will update as the cheese ages.


There was a cheesemaking class in the south Okanagan in the Spring. I ws sorry to have missed it.
Valerie
I just love making cheese!
🙂
V
Hi
I am new to cheesemaking but I want to make a Caerphilly, as I understand you can eat it fairly soon. (I want to test my skills!)
Most of the recipes I see for this cheese involve cheddaring. (Which appears to be quite frightening to me as a novice ). I see your recipe does not include the cheddaring. Is the cheddaring absolutely necessary to produce a good Caerphilly (yours looks delicious, incidentally!)
Hope you can advise
Ian
HI, Ian
Actually, my best recipe did require cheddaring and I have very specific photos of you doing it. Ian will walk you though it if you get his twitter and connect with him the day you will be making it. (Much Ado About Cheese). It is his recipe we made – BEST. CHEESE. EVER. Certainly in this terrior, not even close to the traditional Welsh Caerphilly – but a faboulous recipe – and yes, you can eat it within 2-3 months….or sooner.
🙂
Happy Curds! V