• Home
  • About
    • Privacy Policy
    • Work with Me
    • Media Kit
    • Evolv Health: Valerie’s Story
    • Personal Stories
    • Press
    • Year in Review
  • Thermomix® Independent Consultant
    • Thermomix® Independent Consultant
    • Client Testimonials
    • Recipes Developed by Valerie
  • Projects
    • Cheesepalooza
      • Cheesepalooza Challenges
      • Cheesepalooza Participants
      • Preparation for Cheesepalooza!
      • Basic Ingredient and Supply List
      • Ingredient and Matierial Suppliers
    • Dueling Daughters Project 2014
    • Eat Alberta
    • Gramsy Glimpses
      • Gramsy Glimpses Vignettes
    • Project 2019: Valerie’s Personal Evolv Health Story
    • Project 2017: Cooking in the Kitchen With….
      • Completed Project 2017 Posts: Cooking in the Kitchen With….
      • Project 2017: Cooking in the Kitchen With… PARTICIPATE
      • Project 2017: Cooking in the Kitchen with….Schedule
    • Slow Food Edmonton Tastings
      • Participate!
    • The Canadian Food Experience Project
      • Participate!
      • Participants
      • Challenges and Round Ups
      • Canadian Food Heroes Series
  • Events
    • Baby Shower
    • Food Blogger Meetings
    • Promotions
    • Restaurant Reviews
    • Reviews (Products, Books, and Events)
  • Philosophy
    • In a Nutshell
    • Local Produce/Producers
    • Slow Food
    • Teaching
  • Travel
    • Bosnia
    • British Columbia
    • California
    • Croatia
    • Culinary Tourism
    • Farmer’s Markets
    • France
    • Greece
    • Hawaii
    • Italy
    • Louisiana
    • Maritime Provinces
    • Massachusetts
    • Mexico
    • Montenegro
    • Nova Scotia
    • Prince Edward Island
    • Quebec
    • Serbia
    • United Kingdom
    • Utah
  • Trends
  • Store
  • Privacy Policy
  • Privacy Policy for A Canadian Foodie
  • Valerie’s Image

A Canadian Foodie

Canadian Food Recipes; Preserving Canadian Food Practices

  • A La Carte
    • Appetizers
    • Drinks
    • Evolv Health Reboot Recipes
      • Reboot Phase 1 Mains
    • Garnishes
    • Salads
    • Sauces Dressings Rubs
    • Sides
    • Soups and Stocks
  • Breakfast & Brunch
  • Cheese
    • Blue/Stinky
    • Firm
    • Fresh
    • Hard/Pressed
    • Cheesepalooza Challenge
    • Cheesepalooza Round Up
  • Desserts
    • Cakes
    • Cookies, Bars and Squares
      • Christmas Cookies
    • Ice Cream, Sorbets and Frozen Yogurt
    • Icings/Frosting and Pastry Creams
    • Other
    • Pies and Tarts
    • Puddings
    • Sweets and Treats
  • Doughs and Crusts
    • Biscuits
    • Bread Buns and Flatbread
    • Crackers
    • Donuts, Frybreads and Such
    • Dumplings etc
    • Pasta
    • Pastry
  • Mains
    • Beef
    • Casseroles
    • Chicken/Duck/Goose/Turkey
    • Marinades and Rubs
    • Pasta Dishes
    • Pork
    • Potluck
    • Savory Pies Pastries
    • Seafood and Fish
    • Stews
    • Vegetarian
    • Veal
    • Wild Game
    • Wraps Pizzas Casual Food
  • Seasonal
    • Autumn
    • Spring
    • Summer
    • Winter
    • Holiday
      • Christmas
  • Gardens
    • Foraging
    • My Garden and From My Garden
    • Preserves
    • Zone Three Harvest
  • Tastings
  • Kids
  • Canadian Food
    • Atlantic Provinces
    • Canadian Aboriginal Food
    • Canadian Berries
    • Canadian Cakes
    • Canadian Doughs
    • Canadian Drinks
    • Canadian Fish
    • Canadian Food Heroes
    • Canadian Food Main
    • Desserts
    • Grandma Maude’s Family Recipes
    • Mom Helen’s Famous Family Recipes
    • Canadian Products
    • Sunday Suppers
    • Wild Food

Cheesepalooza Challenge Seven: Homemade Gouda or Havarti

February 3, 2013 by Valerie Lugonja 24 Comments

From Artisan Cheese Making at home, Chapter 3, page 94

Believe me. Truly. If I can do this, SO CAN YOU!

The Task for our seventh Cheesepalooza Challenge:

If you have made it before, we challenge you to please do it again, “Mary’s way”, link to your other gouda cheese making experiences, debriefing them all. Let us know what you think. Which recipe works best for your palate and your locality: Mary’s or the other ones you have used?

If you have never made it before, you will find that you will learn a new technique with this cheese: washing the curd! Anything new is a bit initimidating, but just read the recipe a few times and you will be able to do it! Then, take lots of photos and notes as you go, and write about your experience.

IMPT: You will need wax for this cheese,  but you do have time to order it now as your cheese ages a bit before waxing.

Optional Recipes to add value to your first month (only if you choose):

There are a few other recipes in Chapter three we suggest you explore and share through the month, if you want to make more than the Gouda:

  • Havarti,
  • Edam,
  • Fontina

Each one can be basically eaten young, or aged to 2-3 months.  Sweet washed curd cheeses are sometimes a challenge.

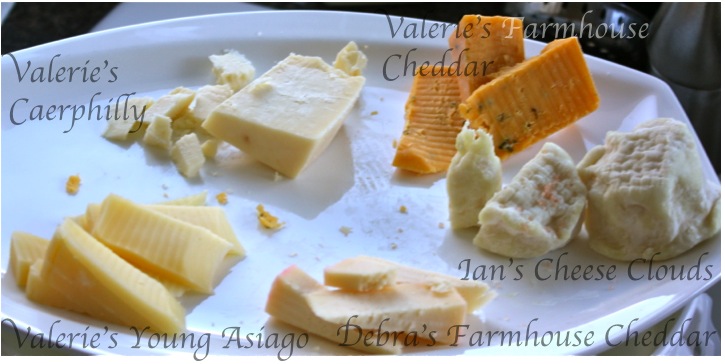
Please include simple Tasting Notes at the bottom of each post (later, after you taste your cheese) so we can have a frame of reference to understand your cheese a bit better:

Tasting Notes:

  • Appearance:
  • Nose (aroma):
  • Overall Taste:
  • Sweet to Salty:
  • Mild (mellow) to Robust to Pungent (stinky):
  • Mouth Feel: (gritty, sandy, chewy, greasy, gummy, etc.):

Let the fun begin!

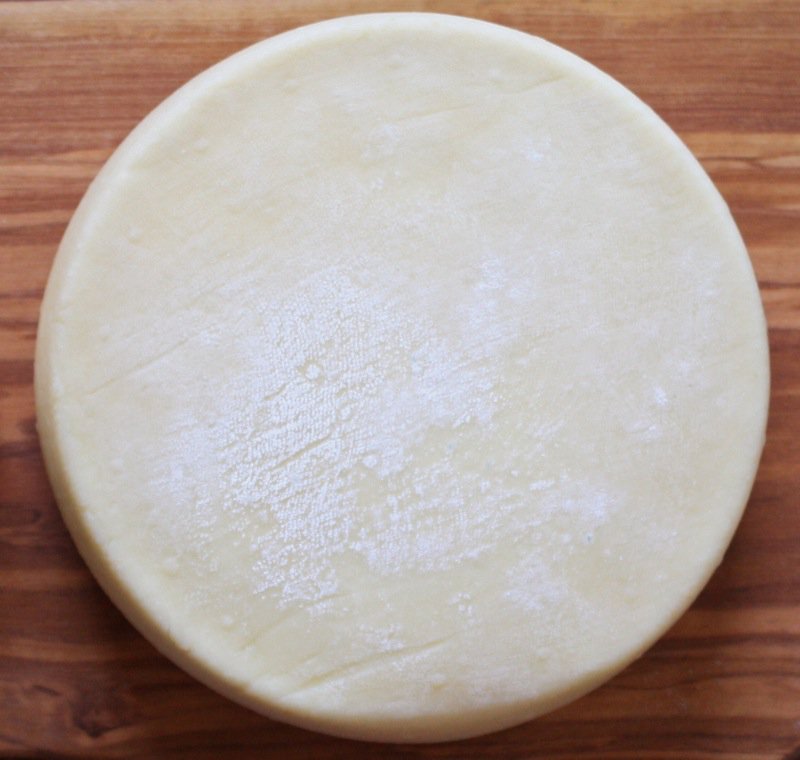
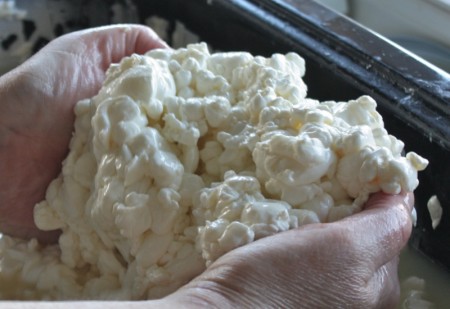
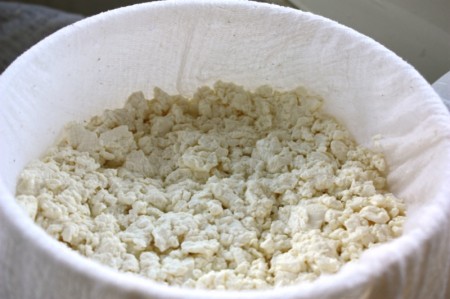
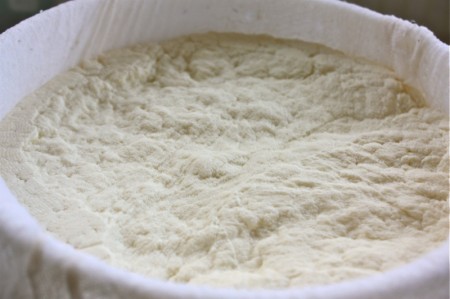
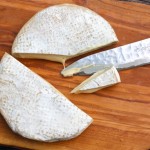
Addie, Deb and I got together on this day to each make our Gouda. Ian was not able, but available via phone! Phew! All three of us found this cheese to be very straight forward, and similar to all of the other cheeses we had made until the washing of the curd. See the beautiful break in the cheese below? Cutting the curd went well, and then it rested.

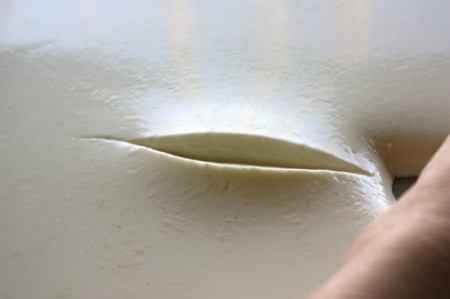
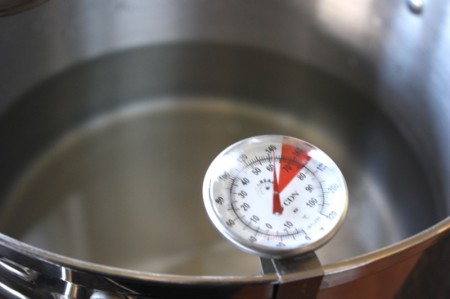
The long gelatinous columns of curd after the resting of the cut curd consistently send shivers of excitement through me. As soon we put the milk on to heat, we also put the water on to heat.

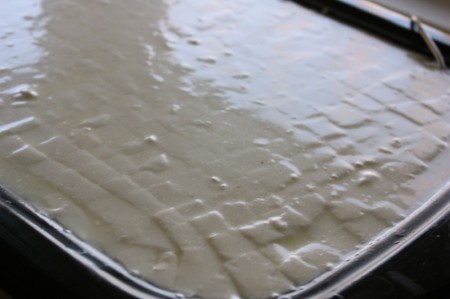
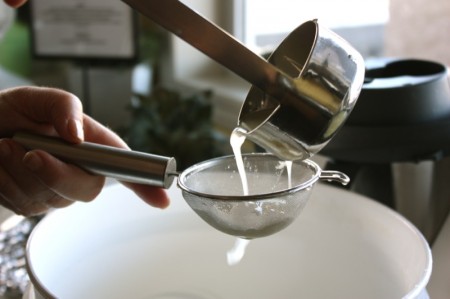
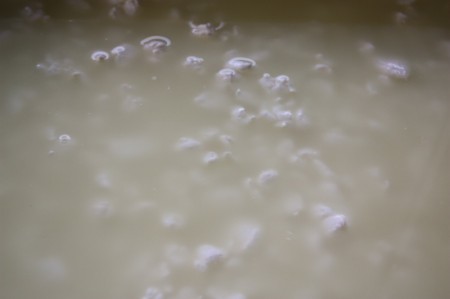
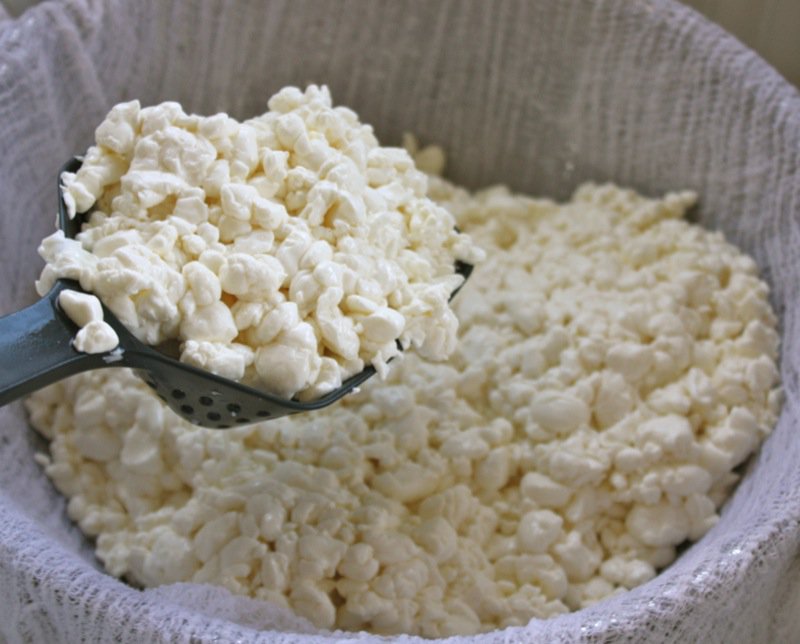
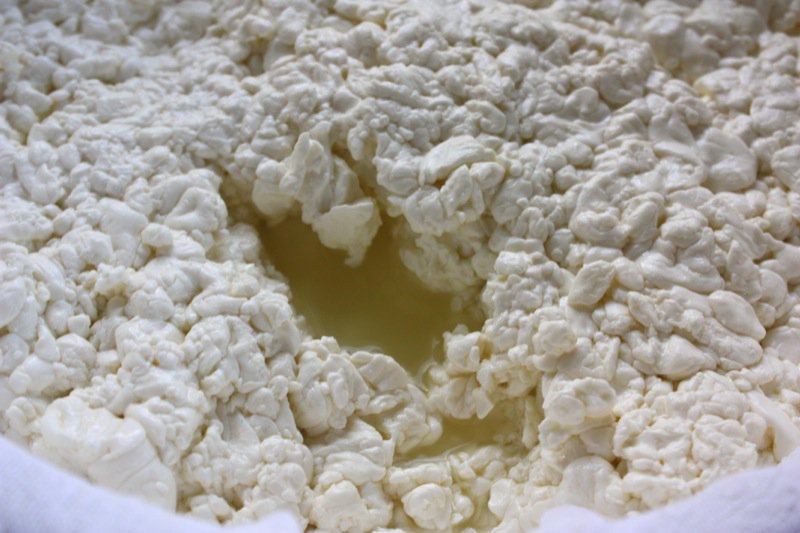
After stirring the curds for 5 minutes, and then resting them for 5 minutes, I started ladling off the whey and replacing it with an equal amount of the 140°F water until the temperature of the curd reached 92°F. I believe it took me well over 10 cups of water to get the curd to this temperature. A lot more than two!

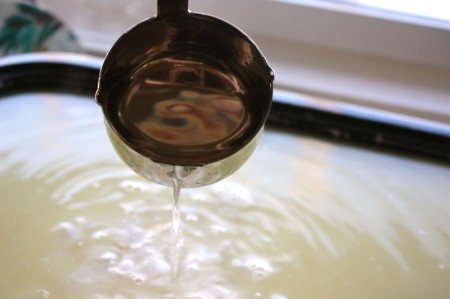
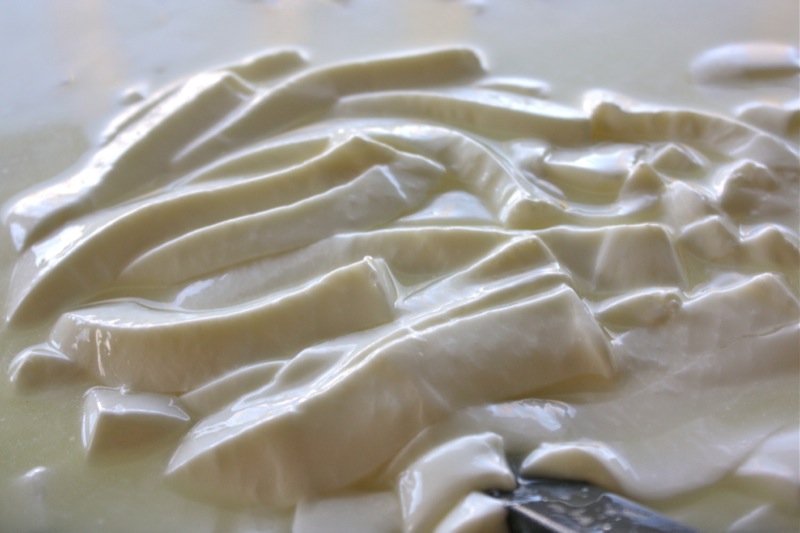
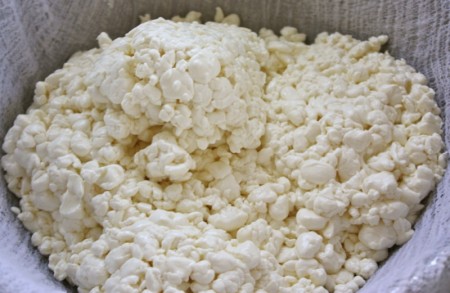
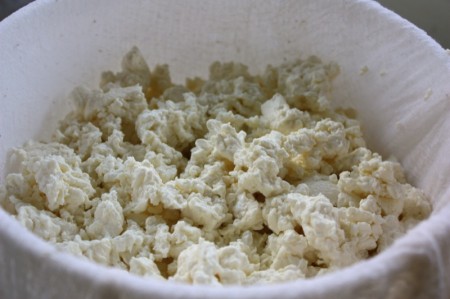
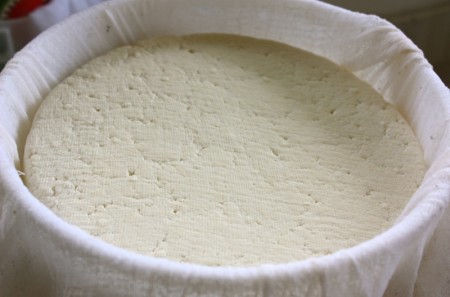
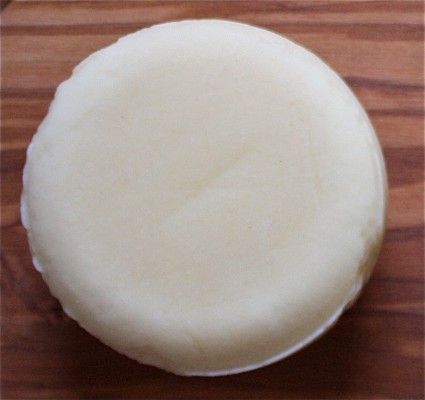
I then stirred the warmer curd for 10 minutes and let it settle again. You can see, above, right how the curds look after this amount of time. Ladling off enough water to expose the curds this time, I added back the amount of 140°F water it took for the curd temperature reach 98°F which wasn’t really that much. The temperature rose quite quickly. The curds settled for 10 minutes and were to knit together. Below, left is how the curds looked before resting for 10 minutes.

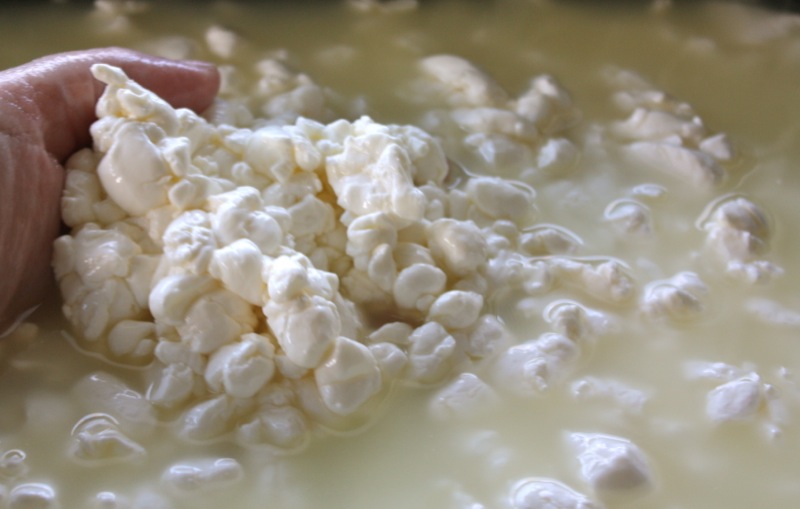
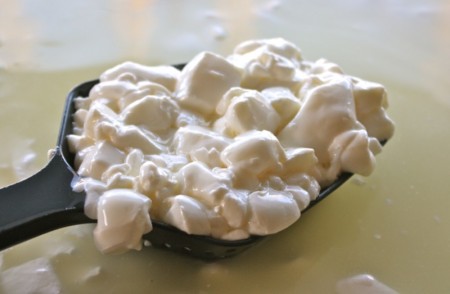
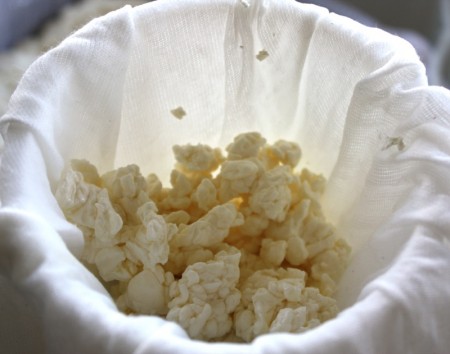
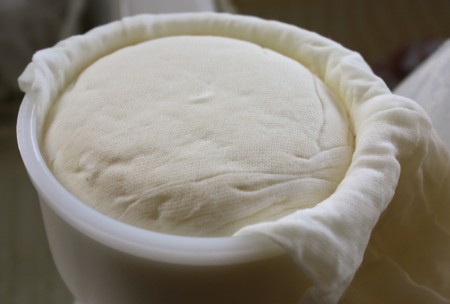
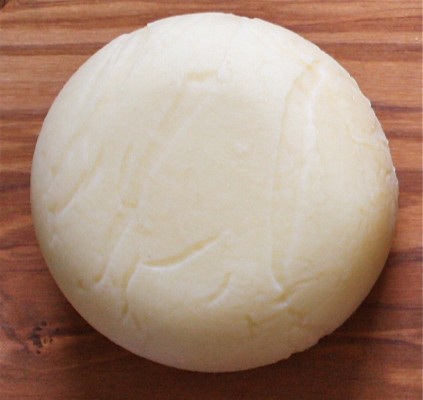
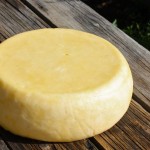
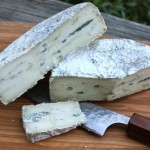
After resting for 10 minutes, you can see the curds are knitting together, to a degree and that they are much smaller and look more like the size of small beans. I ladled them out of the whey and into a cheese cloth covered colander.

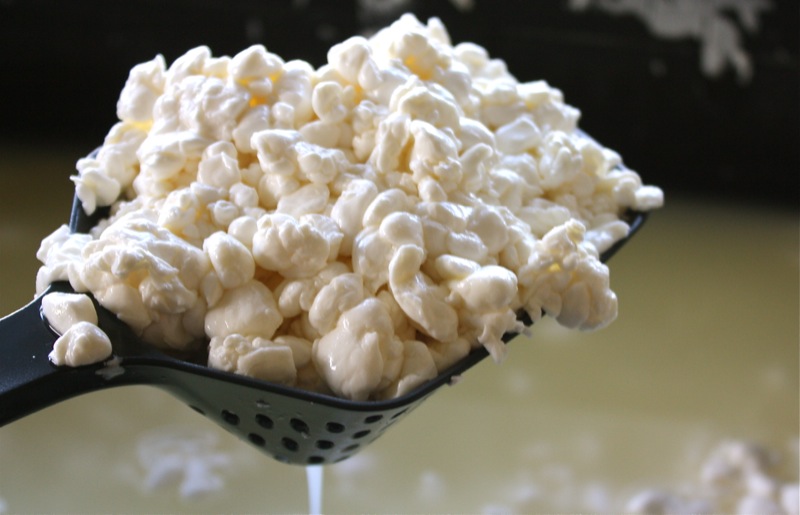
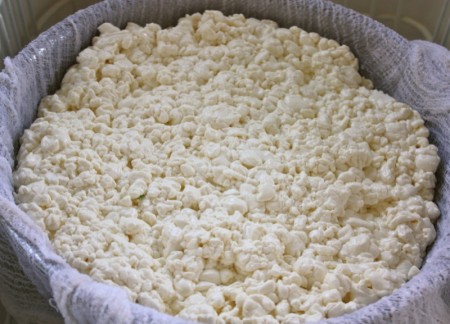
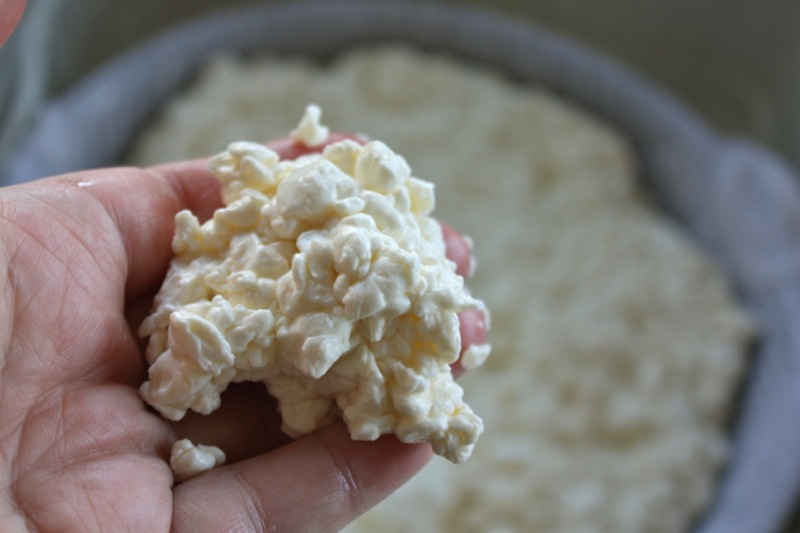
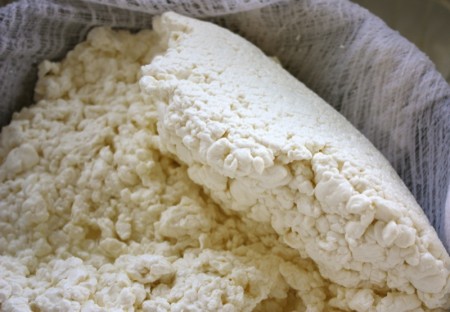
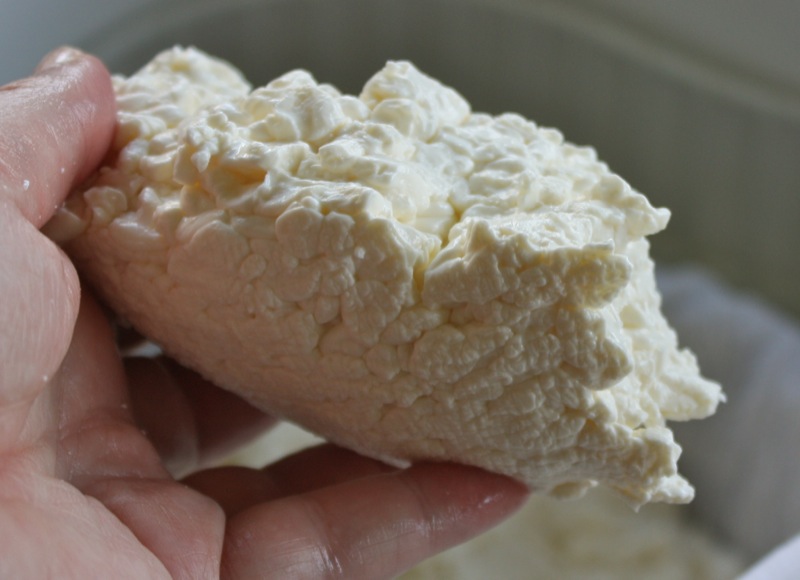
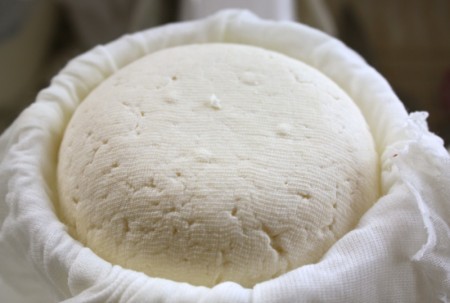
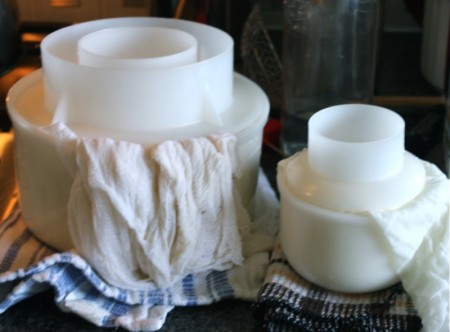
You can see, above, left, how the curds are actually knitting together. They rested for 5 minutes, and then, similar to the process of the Caerphilly at this time, I ripped shards of the curd off into one inch sections and placed them into the lined tomme mould.

 
The longer the curd rested, the more knitted it became and the better tear I could get. You can see the torn bits in the mould to the left, below, and I have pressed them to continue to release the whey, in the right. I was amazed at the why that was still draining from this curd after the resting, then the tearing and resting again.
 
 
Once most of the whey was released, I sealed up the moulds and placed weights on them. I used one tomme mould and the small 500g Gouda mould I had purchased from Glenngary to make my 2 discs. Below, left, you will see the curd after the first 30 minute press; to the right, it is turned over for the 10 hour press.
 
 
After the overnight press, the cheese came out of the moulds beautifully and went into the brine. I didn’t photograph the books I used to press the cheese with, nor their time in the brine. Below, right is the cheese out of the brine, beginning the air-dry process. Below that, are the photos of both rounds ready for the cave after air drying; I took a photo of “right side up” and then “the other side up”.
 
 
The discs are now ready for waxing. I am thrilled with their look and feel. I can tell the small Gouda was probably ready for waxing a few days ago as it has much less give than the large round.
 
 
Above, you can see both sides of each round. Now for my very first experience waxing. Deb brought over her wax as I ordered mine late. It melted very fast and with ease. It dried immediately upon contact with the cheese and cannot really be “brushed around” or moved too much. I recall when at Sylvan Star, they waxed with a sponge and a fine brush of some sort. Obviously, waxing is a whole other technique that I now need to learn to do. It was really fun, and though I love artisan looking foods, mine are a bit too awkward for me to be “proud” of: new learning curve! It was a blast, though! (After reading this post, Ian sent me a link for how to wax cheese!)
 
 
Recipe Correction
We did use the exact recipe from Mary Karlin’s Artisan Cheese Making at Home, so we will not copy that here; however, there is an important correction that you must make. This doesn’t appear on the PDF corrections on her site, but we discovered it as we were making the cheese and Addie’s i-book had different information (as is often the case) from the hard cover book. Obviously, it is easier to correct an i-book. On page 95, number 3 where it reads “…add enough 110°F water to bring the curds t0 98°F…” it should read: “…add enough 140°F water to bring the curds t0 98°F…”.
 
We always eat when we make cheese and the lunch was good, but the cheese sharing is always incredible. Here is the one from this day!
 
Ian’s Washed Curd Cheeses
 
Ian has completed TWO posts for washed curd cheese! If you would rather make a Havarti made using Mary’s recipe which Ian found to be really good and revealed it here, please do! I love Havarti and cannot wait to make this one, too!
 
Ian’s Reader’s Choice Gouda used Gianaclis Caldwell’s recipe, and was also an incredible success!
 
So, have fun this month, and LET”S MAKE CHEESE!
 
 
Reminders:
 
1. Don’t miss the 3 QT Stock Pot and ladle ALL CLAD Valentine’s Day Giveaway I am running for all Canadian Readers!
2. Smoky Valley Goat Cheese is offering Monthly Cheese Making Classes. If interested, lest me know in a comment below, and I will connect you with them!
Tweet5
Pin1K
Share12
1K Shares

Filed Under: Cheesepalooza Challenge, Hard/Pressed Tagged With: Cow Milk, Homemade Cheese

About Valerie Lugonja

Like what you see? SUBSCRIBE TO A CANADIAN FOODIE
Educator, Writer, Gardener and Traveler who believes in buying and eating locally, and most importantly cooking at home! As a brand new Gramsy, so be prepared to hear a lot about this new role in her life!
Please connect with Valerie to buy a Thermomix Machine!

« All Clad GiveAway for Valentine’s Day: 3 QT Stock Pot with Lid and Ladle
Kalua Pork Manapua »

You might also enjoy...

Making Welsh Caerphilly Cheese at Crazy Mare Ranch
Homemade Camembert: Porcini Infused
Cheesepalooza Tasting Four July 2013
Homemade Buttermilk Bleu Cheese
Cheesepalooza Challenge Eleven: Homemade Buttermilk Blue Cheese
Cheesepalooza Round Up Challenge Six: Asiago and Asiago Pepita

Comments

  1. Sarah Galvin (All Our Fingers in the Pie) says

    February 4, 2013 at 8:34 pm

    Love watching your cheese journey. One day soon I will follow.

    Reply
    • Valerie Lugonja says

      February 5, 2013 at 8:50 am

      Sarah!
      We would LOVE you to join us!
      🙂
      Valerie

      Reply
  2. Larry says

    February 5, 2013 at 9:06 am

    Hi Valerie, J is looking forward to this as I told him we are making a Prima Donna style cheese – one of his favourite cheeses. Quick question, it looks like you more or less doubled the recipe to 14-16 l, correct?

    Reply
    • Ian says

      February 5, 2013 at 10:43 am

      But remember you don’t scale a cheese recipe the same way you would a normal baking or cooking recipe. The same amount of culture should work for a larger batch or up by 1/8 tsp.

      Reply
    • Valerie Lugonja says

      February 5, 2013 at 11:00 am

      Hi, Larry!
      Yes, I doubled the recipe exactly. My “vat” holds exactly 16 litres. Lucky me!
      🙂
      Can’t wait to read about your cheese!
      🙂
      V

      Reply
      • Larry says

        February 5, 2013 at 2:01 pm

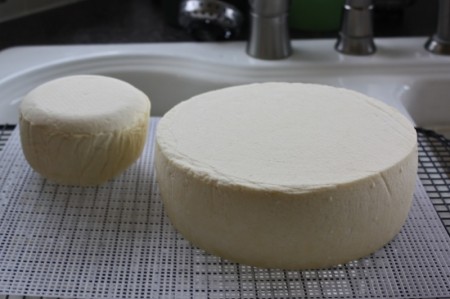
        Thanks! When I made the caerphilly and used the 8 inch tome mood with 8 l of milk the wheel was around 1 inch thick, which is on the thin side, so for this I wanted to have a thicker wheel.

        Ian – oops I doubled everything for the Asiago!

        Reply
        • Valerie Lugonja says

          February 5, 2013 at 8:05 pm

          Hi, Larry,
          When I double the recipe – I tend to double everything – but an extra litre or two, no. I think that is another error in Mary’s book. It should read a 5 inch tomme mould for the 8 litre milk recipes. The same think happened to Stephanie and Lori Anne from Clockwork Lemon. They ended up with two really thin rounds. I got the nice thick Asiago Pepato AND the smaller mould that I aged for a short while with out the Peppercorns out of my one batch.
          :
          V

          Reply
  3. Ian says

    February 5, 2013 at 10:42 am

    Hi Valerie,

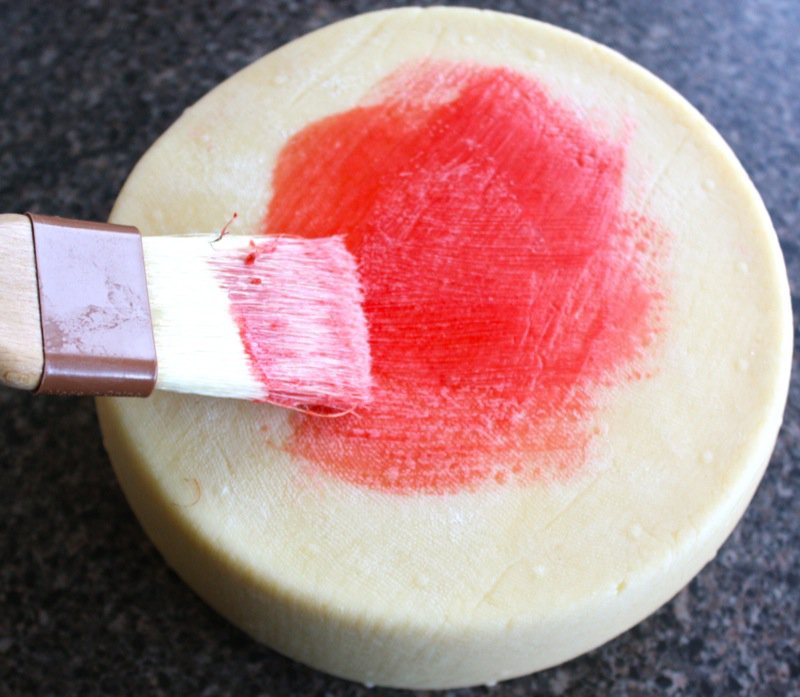
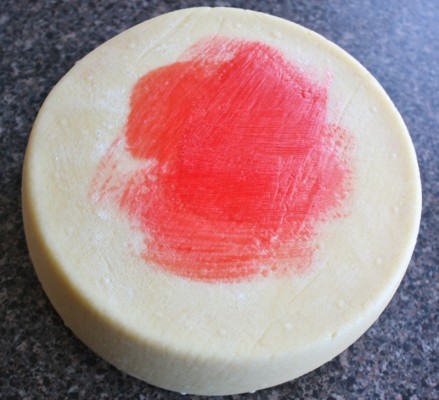
    I noticed that you said you had issues with the wax drying on contact with the cheese. There are several things you can do.

    1. Get cream wax and use it as an under coat then use the cheese wax. That may help

    2. Dipping – Take your melted wax and then dip part of the cheese in the wax, let dry, then dip the other part let dry, then rotate 90 degrees and repeat.

    Here is a better explination

    http://gnowfglins.com/2011/06/06/how-to-wax-cheese/#

    Reply
  4. Nic says

    February 5, 2013 at 2:11 pm

    Looking good Valerie! It’s Havarti for me this month as I have some Gouda and Edam in the fridge already 🙂

    Reply
    • Valerie Lugonja says

      February 5, 2013 at 8:07 pm

      Hi, Nic!
      I am thrilled with my Gouda so far, but haven’t tasted it, yet! LOVE Havarti and Ian says Mary’s recipe is excellent, so that is on my “to do” list. Cannot wait to see how it comes out for you, too!
      🙂
      V

      Reply
  5. Stephanie says

    February 6, 2013 at 12:18 pm

    Yes! So excited for this one!

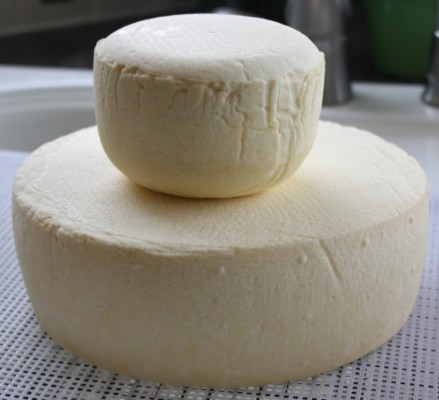
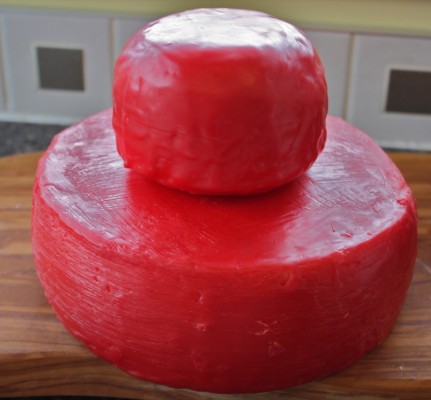
    Did you make a double batch of cheese? That looks like a huge wheel.

    Reply
    • Valerie Lugonja says

      February 6, 2013 at 5:37 pm

      Hey, Stephanie!
      My “vat” holds 16 litres, so I always make a double batch of these aged cheeses as they take so long to age… eating the cheese is never a problem, and I can test in younger and older!
      🙂
      V

      Reply
  6. Stephanie says

    February 6, 2013 at 12:21 pm

    oops, just read the comments and you already answered that question!

    Reply
  7. Anders says

    January 5, 2014 at 3:47 am

    Lovely looking cheeses! 🙂

    Where did you get the big mould + lid? The cheese looks so perfect! 🙂

    Kind regards Anders.

    Reply
    • Valerie Lugonja says

      January 5, 2014 at 9:02 am

      HI, Anders
      Glengarry Cheese Supply Company!
      V

      Reply
      • Anders says

        January 7, 2014 at 4:09 pm

        Could you tell me the name of the big mould? 🙂

        I guess it’s one of the W34 models (just can’t figure out which one)? http://glengarrycheesemaking.on.ca/moulds.htm

        Kind regards Anders.

        Reply
        • Valerie Lugonja says

          January 8, 2014 at 7:08 am

          Hey, Anders
          You know what, I cannot recall – but what I DO know, is that it is the BIGGEST one they have with the lid. There aren’t many with the chaser or lid. I may be wrong, but I think it is the huge Mountain Tomme mould… in any case, the biggest one with the lid. When you call to place your order, that is all you have to say. The gal on the phone is great.
          🙂
          V

          Reply
          • Anders says

            January 9, 2014 at 3:54 am

            Thx alot! 🙂

            I live in Denmark, so calling them might be a bit too prizy. 🙂

            Hopefully she will be just as sweet and helpfull when I e-mail them. 🙂

            Kind regards Anders.

            Reply
  8. Sean says

    April 23, 2014 at 11:27 am

    I’m the founder/moderator for Punk Domestics (www.punkdomestics.com), a community site for those of use obsessed with, er, interested in DIY food. It’s sort of like Tastespotting, but specific to the niche. I’d love for you to submit this to the site. Good stuff!

    Reply

Leave a Reply Cancel reply

Your email address will not be published. Required fields are marked *

Recipe Rating


This site uses Akismet to reduce spam. Learn how your comment data is processed.

Search

Thermomix® Independent Consultant; Executive Team Lead Alberta

Weekly Newsletter

Saturday Morning News

More Thermomix Recipes etc »

Alberta Beef: Know-Your-Farmer Garlic Stuffed Prime Rib Roast Beef

More ACF Famous Recipes or Specialties»

Classic French Coq au Vin

Classic French Coq au Vin with Step by Step Images of this Special Dish

More Winter Recipes »

Mom’s Meatloaf

More Recipes from my mom Helen »

Connect With Me!

  • Bloglovin
  • Email
  • Facebook
  • Instagram
  • LinkedIn
  • Pinterest
  • RSS
  • Twitter
  • YouTube
projects

My Post Archives

Come On In And Kiss the Cook

Educator, Writer, Gardener and Traveler who believes in buying and eating locally, and most importantly cooking at home! [Read More …]

Connect With Me

  • Bloglovin
  • Email
  • Facebook
  • LinkedIn
  • Pinterest
  • RSS
  • Twitter
  • YouTube
Margaret Semple's Traditional Scottish Oatcakes

Margaret Semple’s Traditional Scottish Oatcakes

More Canadian Recipes »

Lifetime Achievement Award

Canadian Web Blog Award 2013 www.acanadianfoodie.com FIRST

Vote-for-me
Best in Food NEW
This error message is only visible to WordPress admins

Error: No feed found.

Please go to the Instagram Feed settings page to create a feed.

Copyright © 2023 · Website by PoundPig