Traditional Piemontese Pasta: The Piemontese Version of Ravioli
Agnolotti are the Piemontese version of ravioli. Together with tortellini and anolini, agnolotti are one of the most famous types of Italian stuffed pasta and I was tickled to learn how easy they are to make. I was, and still am absolutely over the moon during and after this lesson. There is nothing like the acquisition of practical and applicable knowledge that can be immediately applied to enrich one’s life – and in this case, our family dinner plate!
As the word agnolotti dates back to the 12th century, it is believed by the people in this area that this is the first of the stuffed pastas to make it onto the Italian culinary scene. The story where the word first appears is that a Piemontese farmer worked hard to please his boss by giving him, in addition to various fresh foods, a precise number of agnolotti. After tasting these, I could see how one would use them for taxation purposes. The pasta is pillowy and soft with chewy edges filled with a bold, hardy burst of flavour. Nutritious, delicious and economical: that is my mantra.
Mouths agape when the taxi pulled up to Federico Crova’s home, touring through it to arrive in this kitchen was an equally unexpected pleasure.

The Legend of Agnolotti
The creation of agnolotti happened to celebrate the end of a siege. The Marquis asked his chef, Agnelot, to prepare an elaborate dinner, but when he realized that there wasn’t much in the pantry, Agnolot created a filling from leftovers and stuffed it into his egg pasta dough. The Marquis loved the dish and called it “agnolotti” in honor if the chef who invented it.
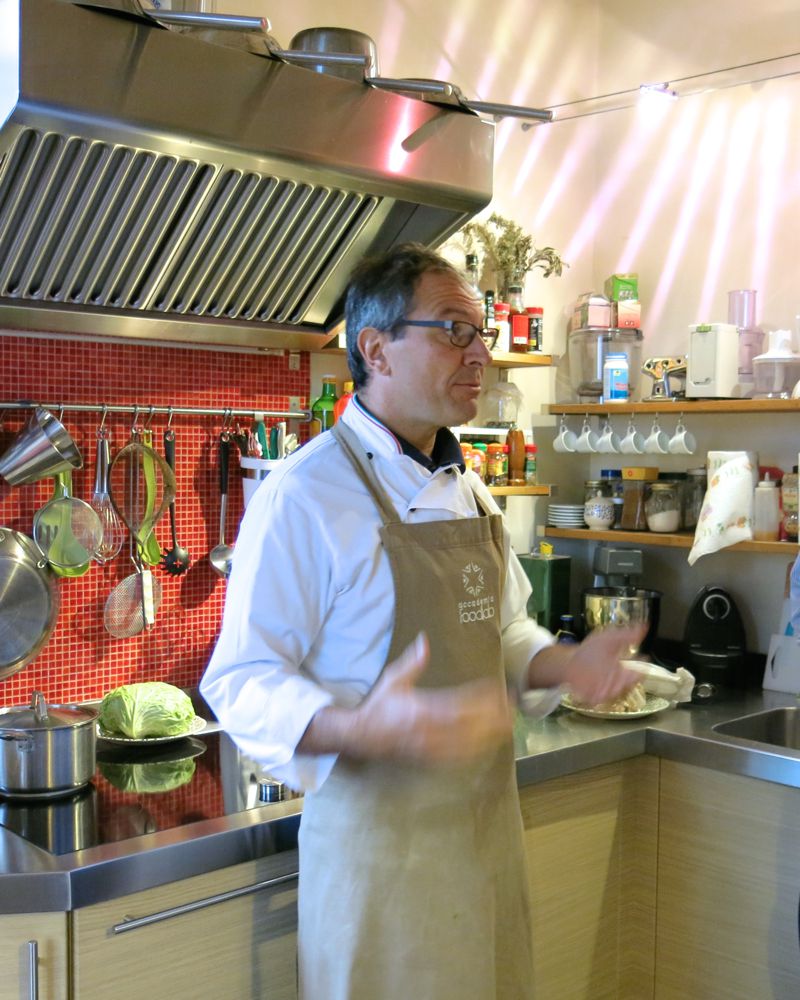
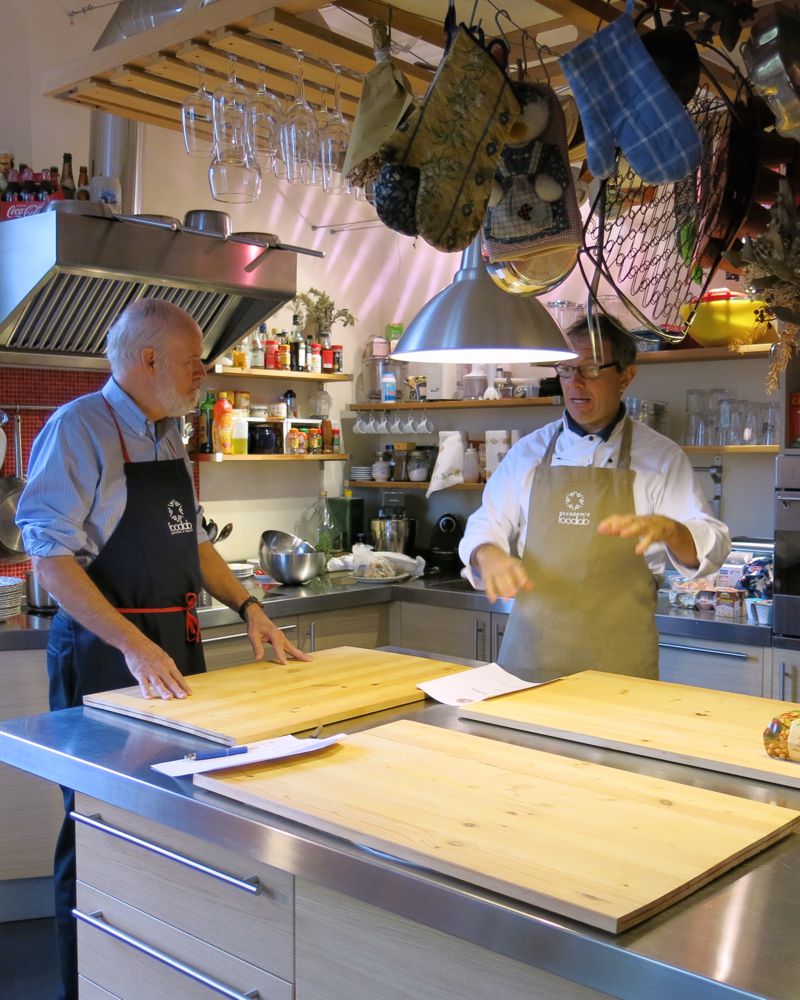
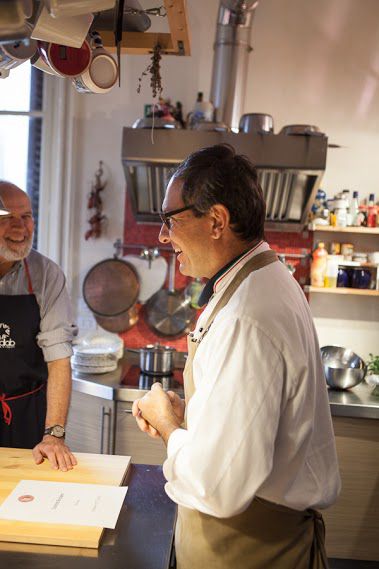
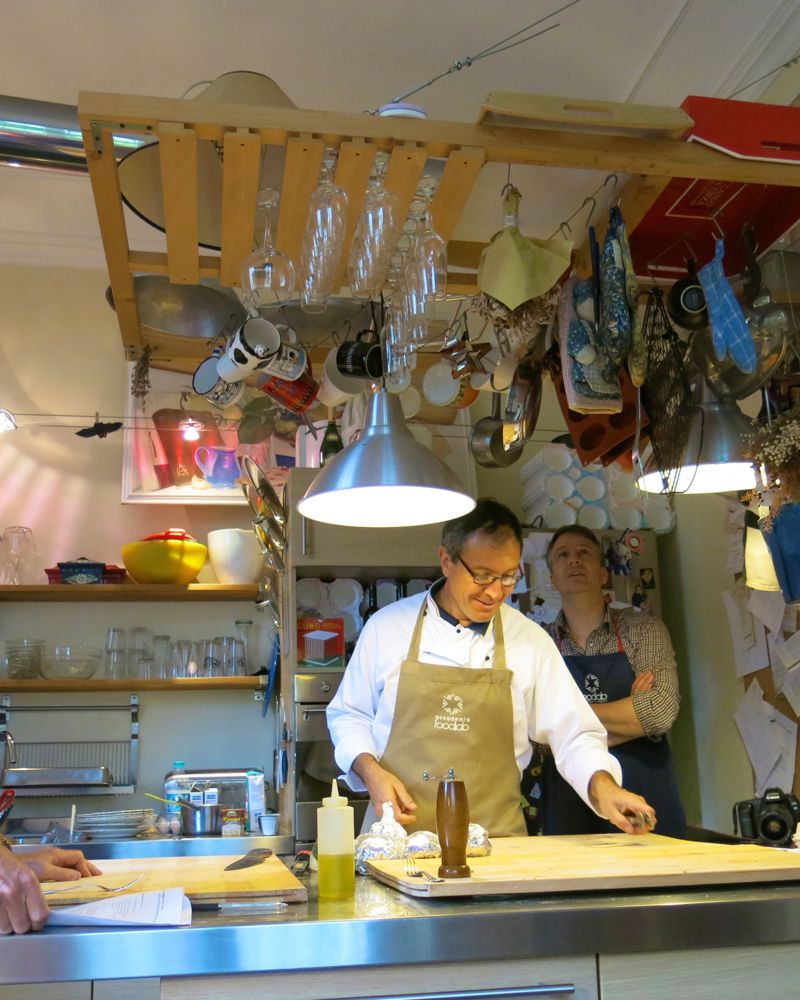
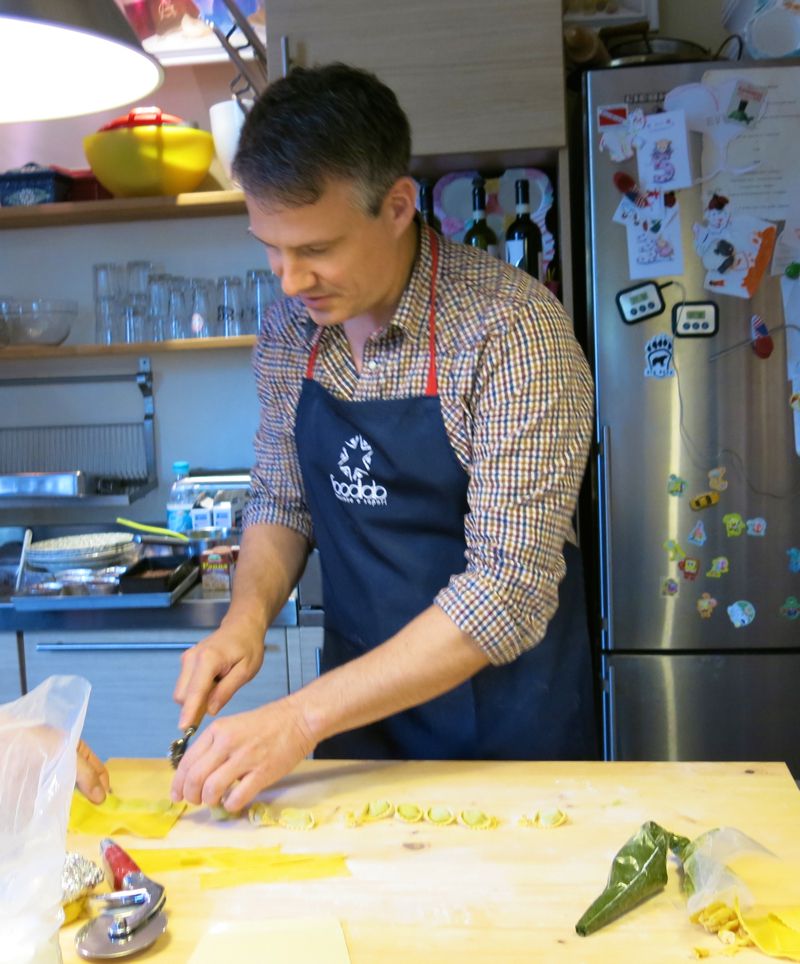
Federico is an excellent guide and will teach you with confidence. He is passionate about the food of his region and opinionated about how you should make it. He teaches you how to make food you will really eat and make. “Not that hand-rolling they do in Bologna where you might learn but will never make it again in your life. Today, I will teach you our recipes that you can really make at home when you leave.” I thought about this. I was initially excited to see the boards after one of the most phenomenal cooking classes in my life learning how to hand roll pasta in Bologna with Martina. I would love to take another couple hand rolling classes, yet he is right. I will rarely do that at home. I haven’t yet as I never got the boards made, and I will use a pasta maker to roll my pasta. He is absolutely right.
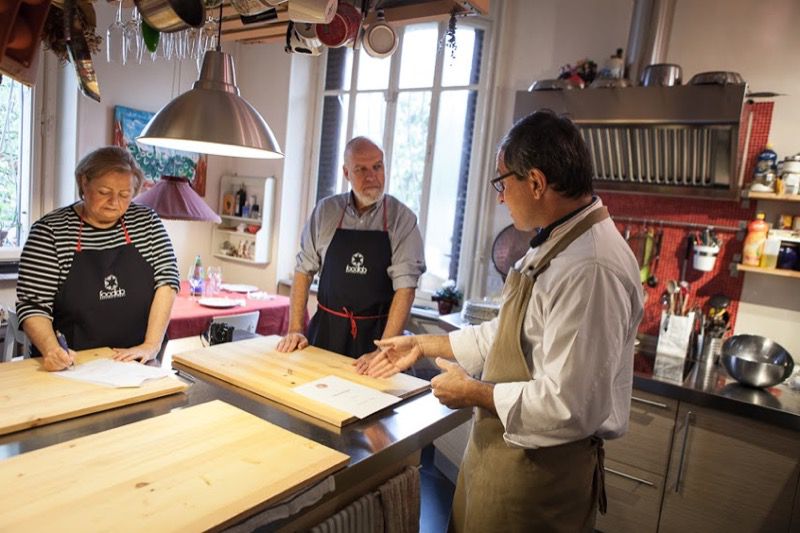
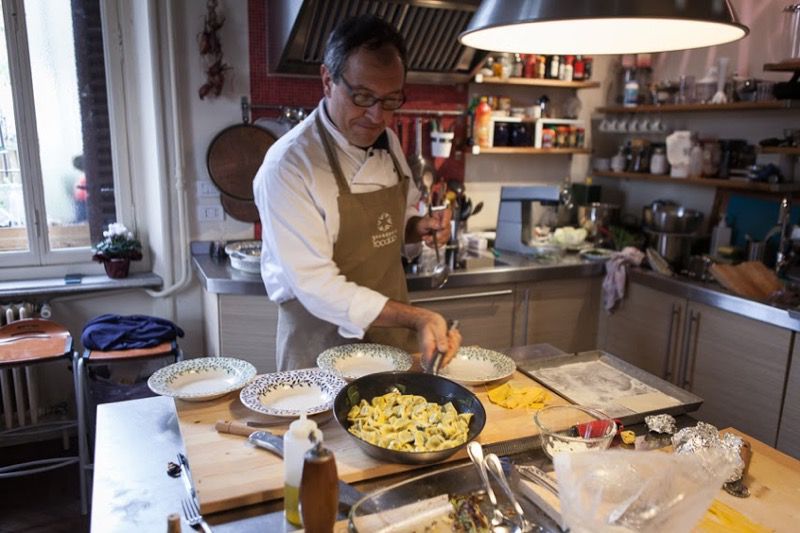
Cook in Italy with Federico Crova
After planning a day trip for Canadian Terra Madre Delegates while in Torino, I also planned a cooking class. The thought of being in Northern Italy without attending a cooking class was unfathomable. Fortunately, Jens and Dennis joined me, and what a wonderful experience this day was.
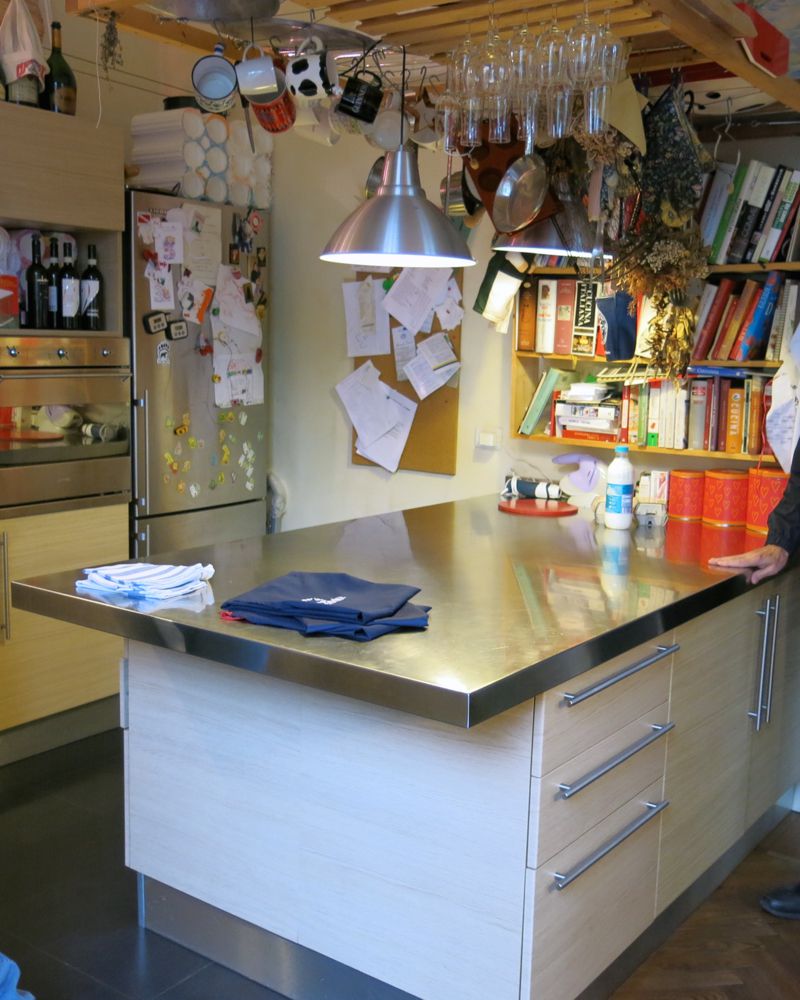
Federico Crova owns and operates Cook in Italy from his home and studio kitchen in Torino, Italy. We were able to take advantage of a class in his home with our small group. Love getting into Italian homes. He and his wife have refurbished this 200 year old home, but sadly, are moving to Geneva in the Spring. I will include his email at the bottom or this post for those of you interested in Italian cooking classes in Geneva. I would most definitely take another from him, where ever I was – keeping in mind, it would be traditional Piemontese food.
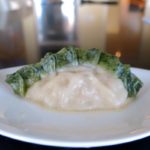
Our three course meal included an appetizer called caponet which is a traditional sweet cabbage roll filled with left over beef, traditional Piemontese Salami, herbs, a little garlic and vegetables typical of
the region. It is significantly different than any sweet or sour Eastern European Cabbage roll. Absolutely delicious and I look forward to making them at home. The agnolotti, which I will detail here, and
the Bunet Piemontese for dessert which is a chocolate custard with amaretti cookies and caramel.
Making Fresh Pasta with Eggs Piemontese Style
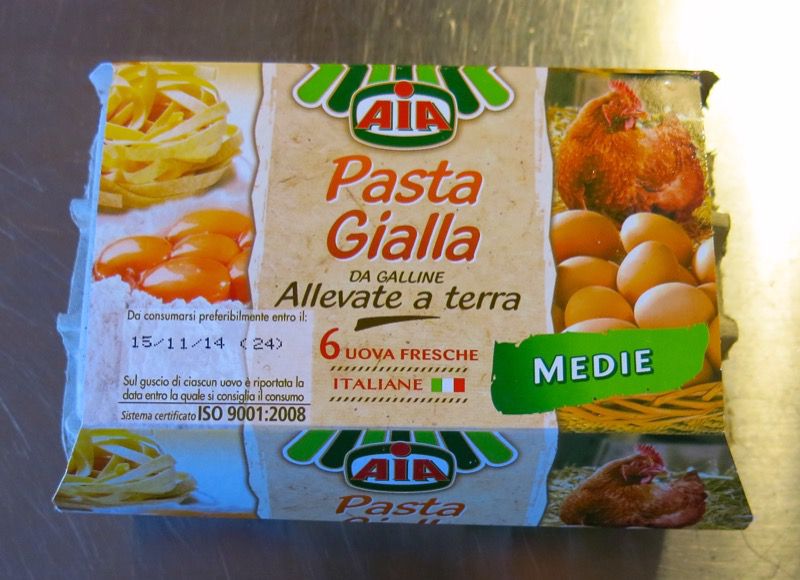
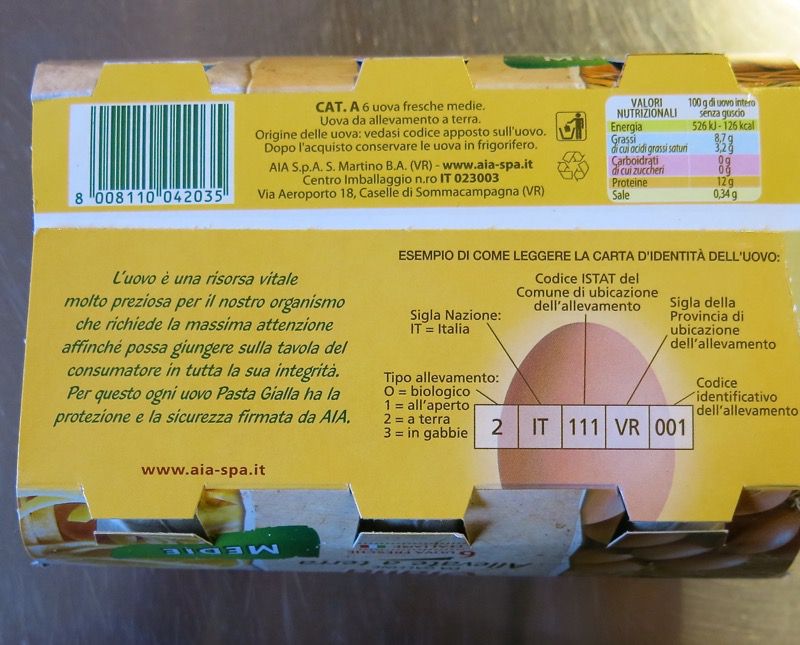
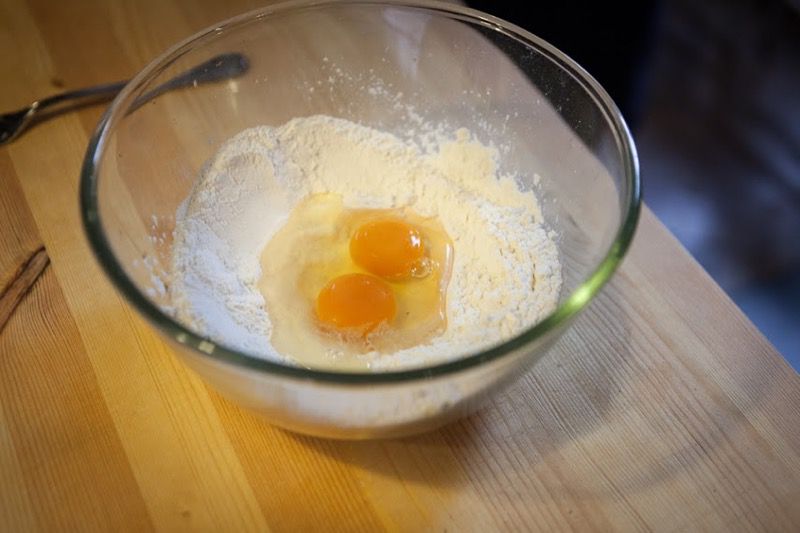
Northern Italy makes fresh egg pasta: eggs and flour. Southern Italy Italy makes dried pasta: water and flour. The fresh egg pasta is a religion in these parts and everyone belongs to the church. The eggs are specially raised in the region for pasta making as the yolk must be very high in beta carotene and a dark yellow, or orange colour, to create the characteristic golden pasta colour the region is famous for. Above is the box for pasta making eggs. Believe it. Eggs farmed and raised specifically for pasta making. You will see that each egg has a stamp on it. That is because every egg from every farm in the country is stamped so that the farm the egg came from can be identified. Italian people care about where their food comes from and know which farm it comes from, even if they buy it from a supermarket. The information inside of the egg carton, identifies the exact region and farm the eggs have come from and the information below, on the back, explains the components of the best pasta making egg.
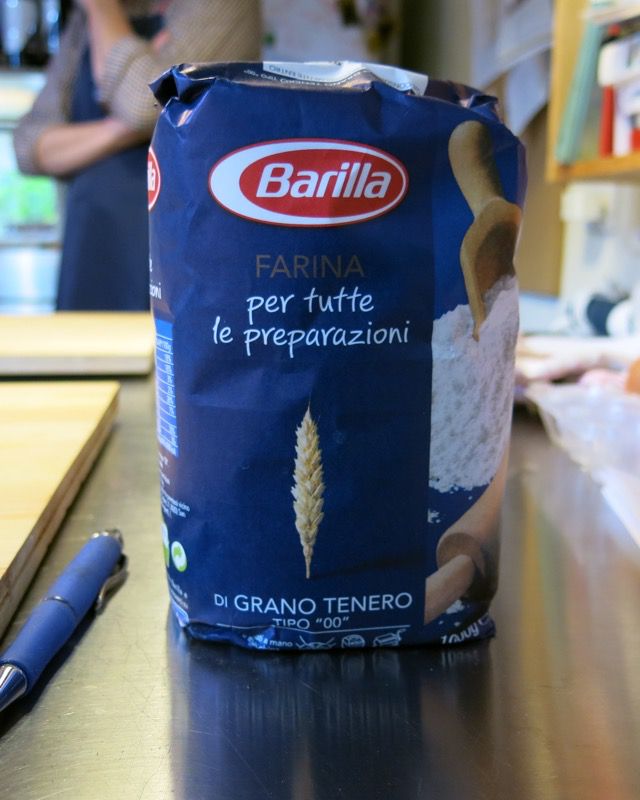
At Christmas in November last week, Lynn Crawford made pasta with regular flour. “You don’t need special flour to make pasta! All purpose flour works just fine!” While I adore a lot of the work Lynn does and have enjoyed many of her recipes, my experience and the belief of millions of Italians differs from her opinion. You absolutely need 00 flour to make exceptional hand rolled fresh egg pasta. The difference in texture, flavour and mouth feel is astounding. In Northern Italy, 00 flour is produced from soft wheat (grano tenero) and relatively low in protein which is preferred for making fresh pasta at home. There are different kinds of 00 flours, but the best for making pasta extracts only the heart of the wheat to create a flour that results in a light and consistent dough which melts in your mouth. The high quality starch and strong gluten are ideal for pasta and gnocchi, and also work well in pastry creams. This is the kind of 00 flour one must look for when making pasta, but they make it easy. It will usually have a picture of pasta on the front.
Though 100g of flour to one egg is the standard ratio for one serving of fresh pasta, the number of eggs drives the recipe. Decide how many eggs, and add more flour as, or if, needed. A basic large egg is the size used, but as eggs, altitude and weather affect pasta making, decide on the amount of eggs, and start with 100g of flour per egg. A little more flour may be needed. Interestingly, Jens used the other eggs set out for making the dessert in his pasta by mistake. It was a happy mistake for me, as the texture of his dough was quite different. It was firmer and would not easily absorb the amount of flour used.
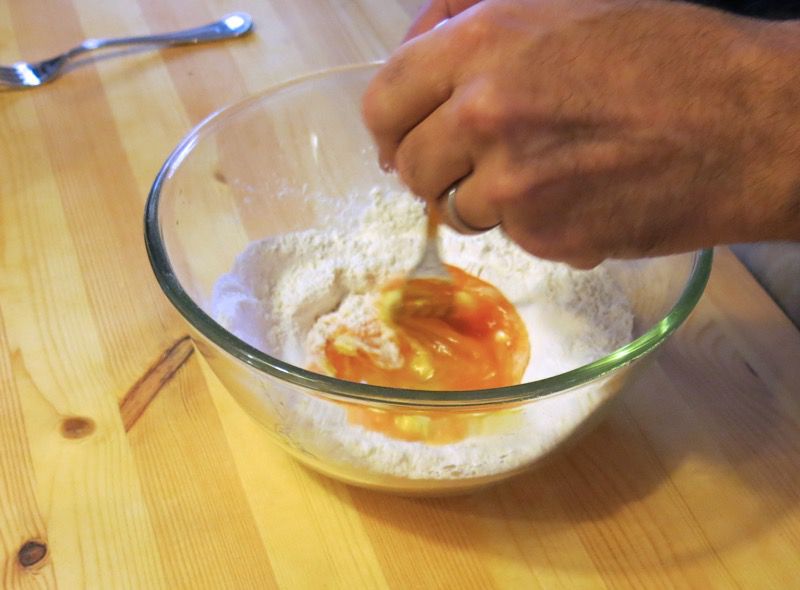
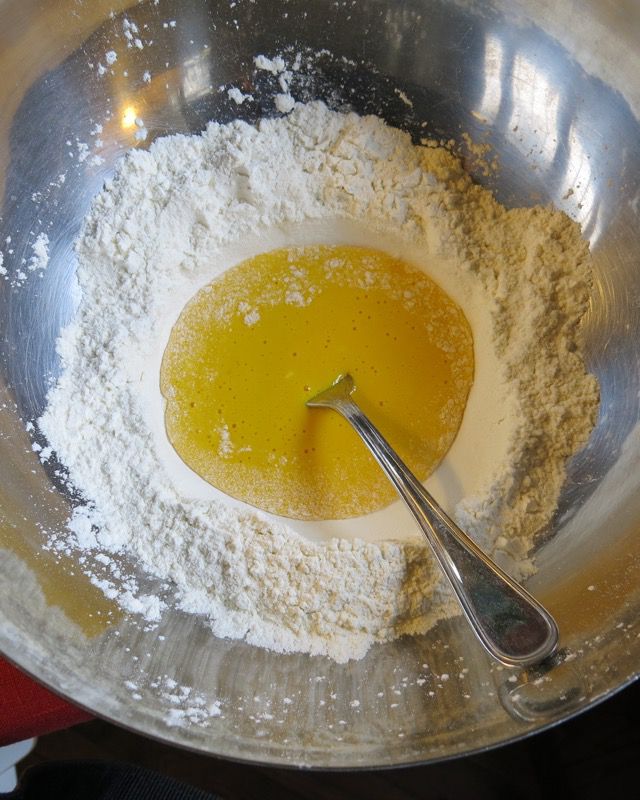
Stir, stir, stir, incorporating the flour little by little by little. There is no rush.
Salt is never in a fresh egg pasta dough. Add salt to the cooking water and to the filling. Never add salt to the dough. You see it coming together, above?
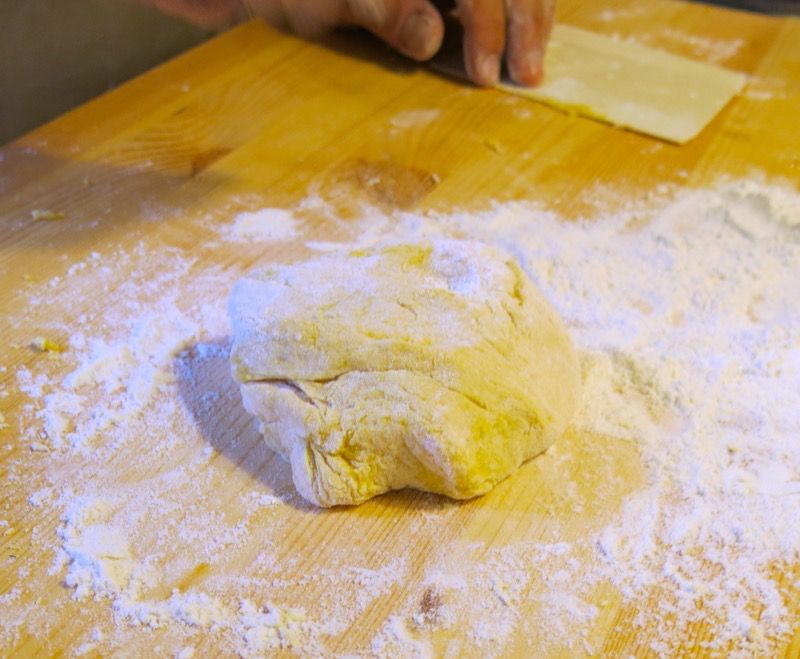
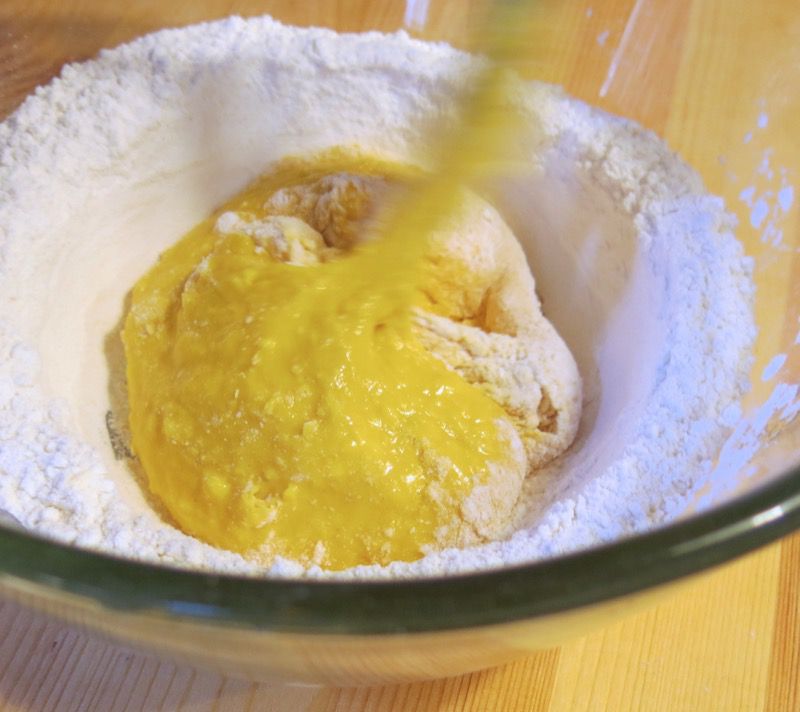
Keep turning it over and over with the fingers of one hand. It is ready to go onto the pasta board for more folding or kneading, to incorporate all of the flour. Remove the little harder bits, They do not incorporate well.
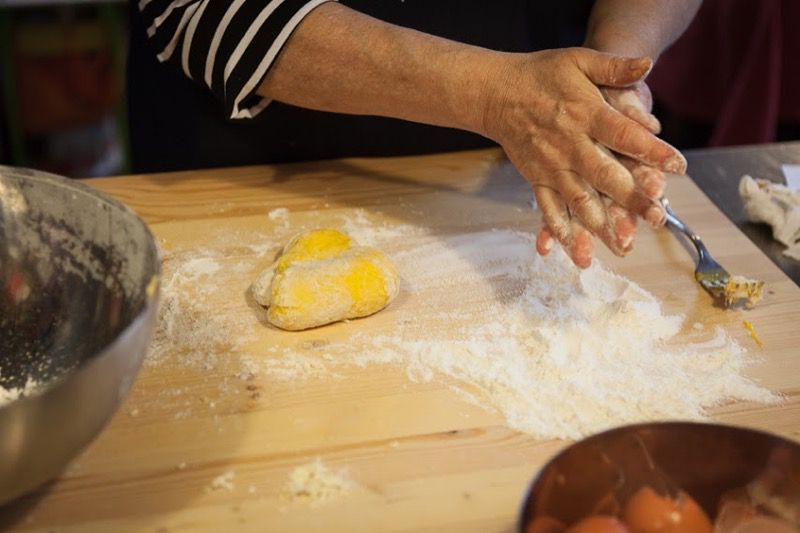
My dough was finished at this point, or very close to finished, as it was soft, but not at all sticky. I needed to get the texture smother via folding and kneading, but as this dough had to be stiffer for the roller, I was told to be sure to incorporate all of the flour. Honestly, I have made my fair share of doughs. I thought Federico was not paying attention and this point. I had incorporated almost all of the flour you see above and my dough was mighty stiff. I wasn’t sure I could get it to absorb any more flour, yet I was wrong. He came over and started to work my dough and got it to incorporate all of the flour into a smooth, golden globe with a lovely elastic pull. We covered it with foil and rested it in the fridge for 40 minutes while making the filling.
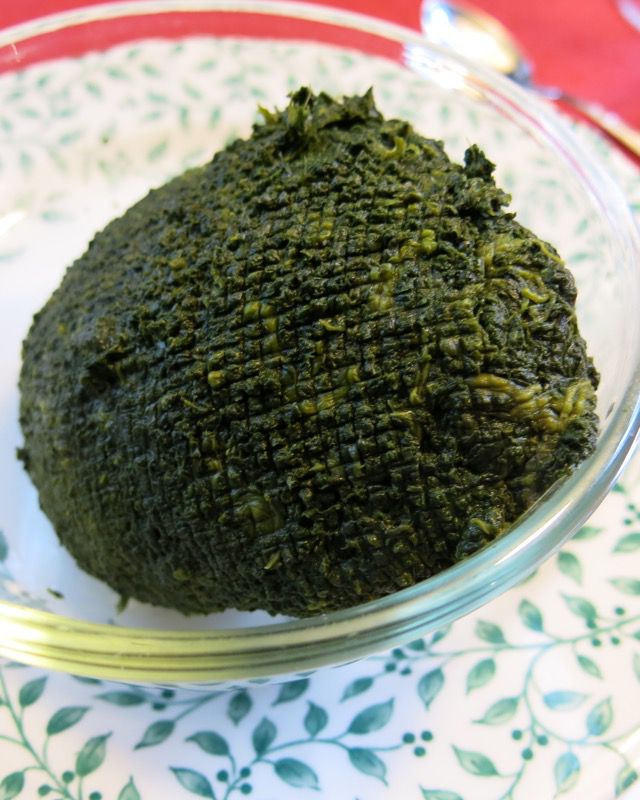
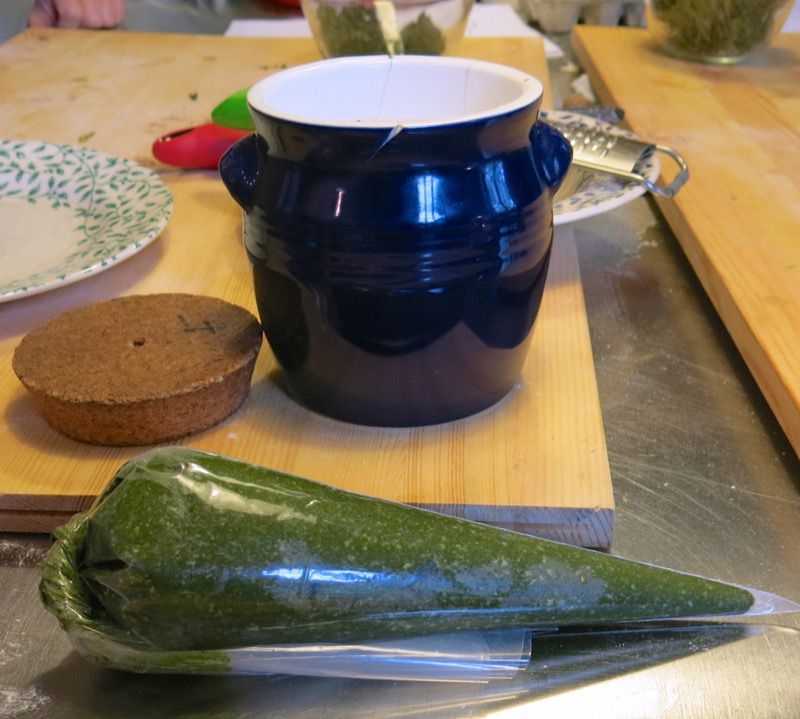
Spinach Filling for Agnolotti del Plin
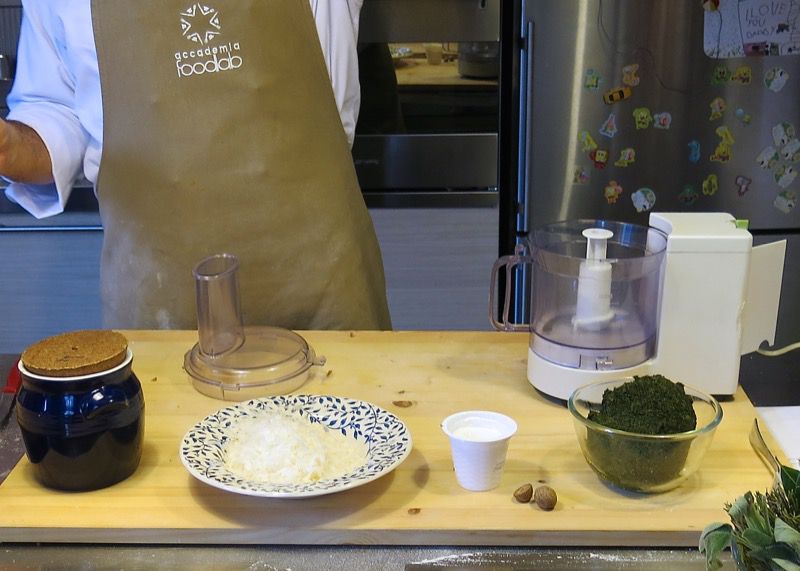
Mis en place, above.
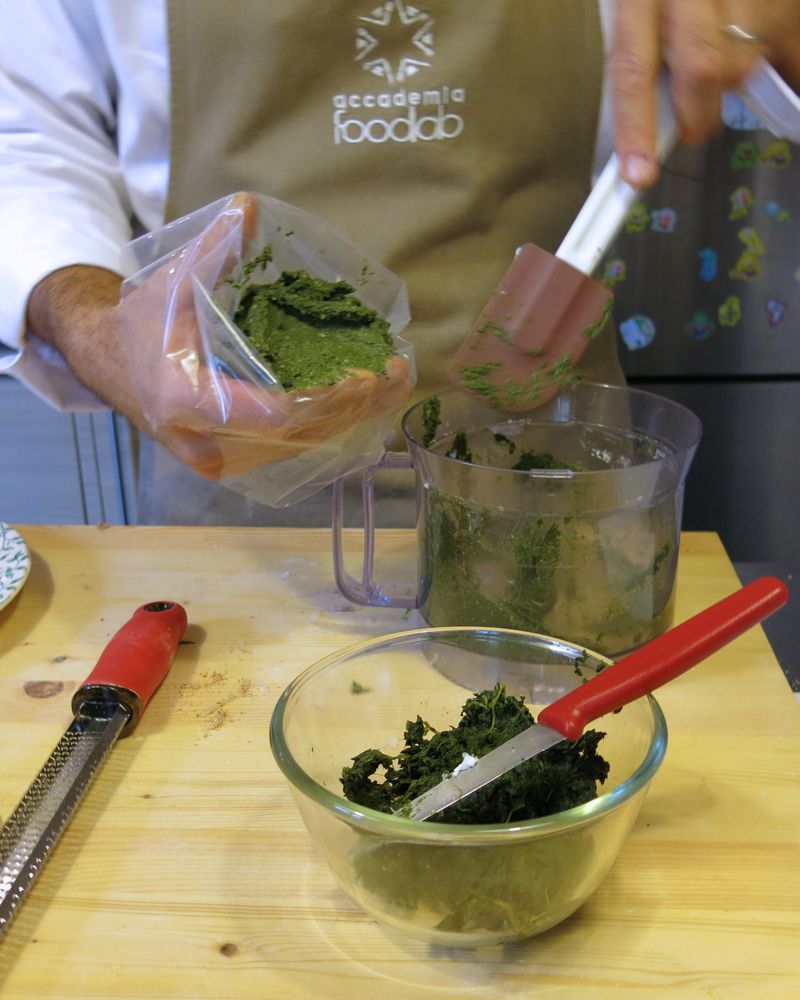
A massive wad of frozen spinach was thawed and squeezed until there wasn’t a drop of liquid left in it. He chopped it roughly.
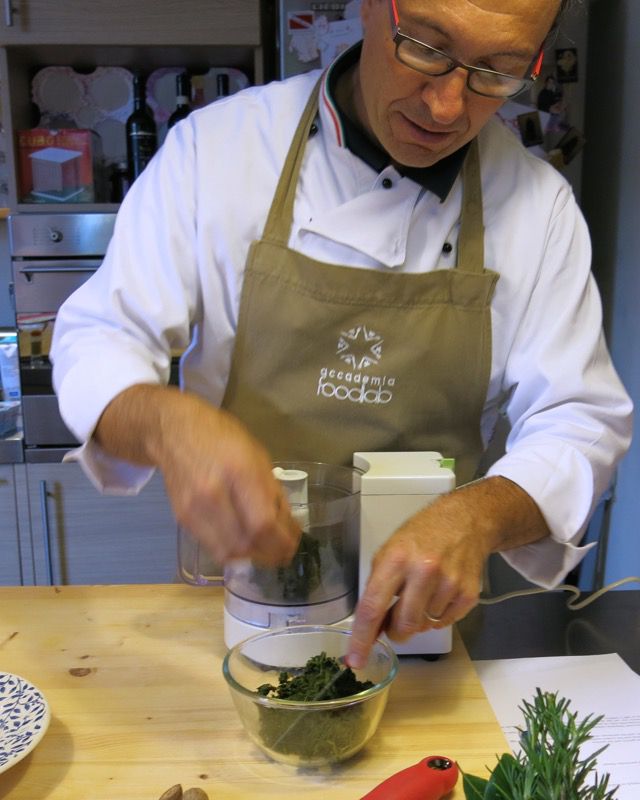
All ingredients go into the food processer (not the Thermomix, as according to Federico, only “…fat lazy Italian women buy these machines and think they make good food. They think they can make ristotto in those machines! Ah!” I said he was opinionated. I appreciate passion in anyone, but if I lived there, would challenge him to a side by side tasting – my risotto versus his, and use his own philosophy to justify the use of the Thermomix (not that it needs justifying). “I teach people to make fresh, nutritious delicious food from scratch that they won’t make unless they have this machine.” (Recall his comment about hand rolled pasta compared to machine rolled pasta?)
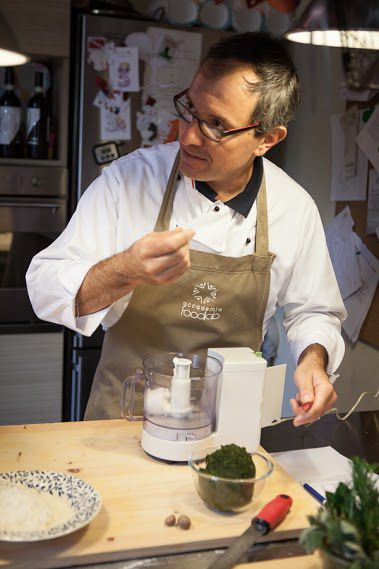
Like every great chef, he had us taste the ingredients, discuss, and then reseasoned the filling. The nutmeg was very subtle…yet the filling was powerful. Nothing subtle or bland about it.
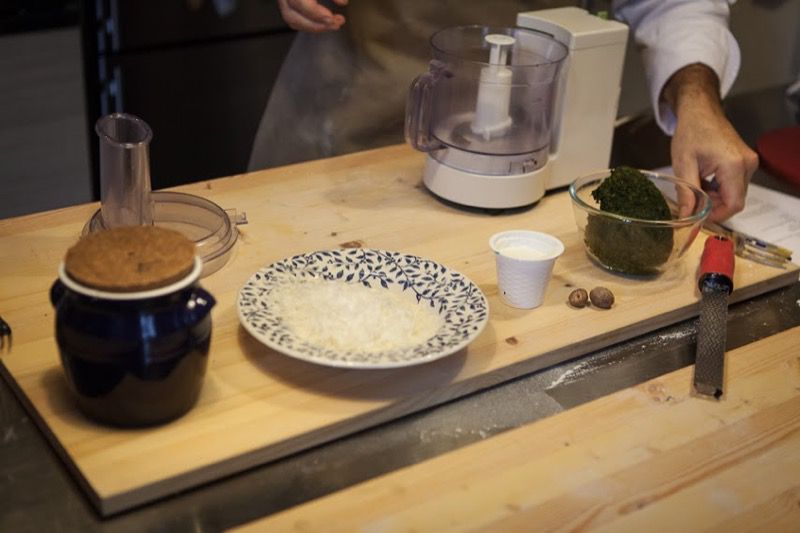
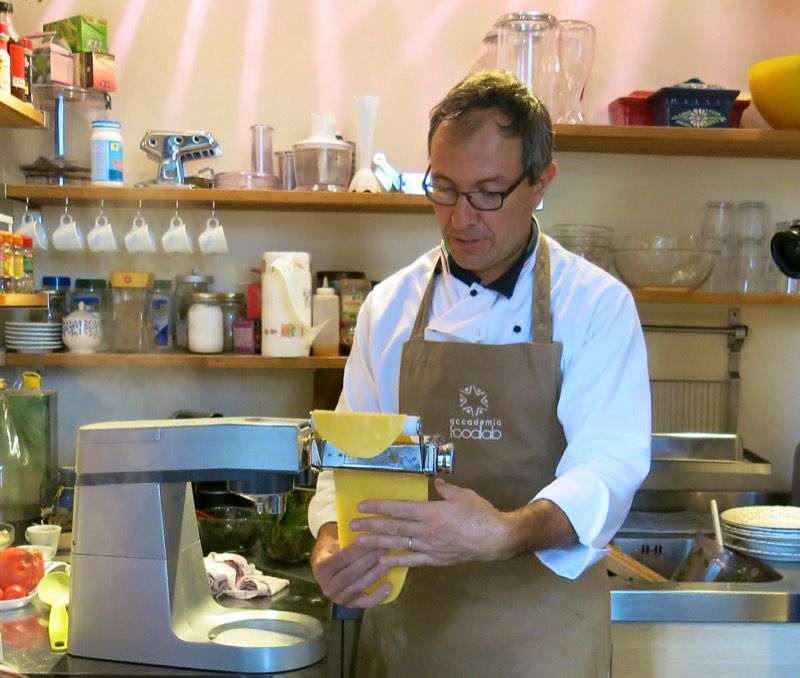
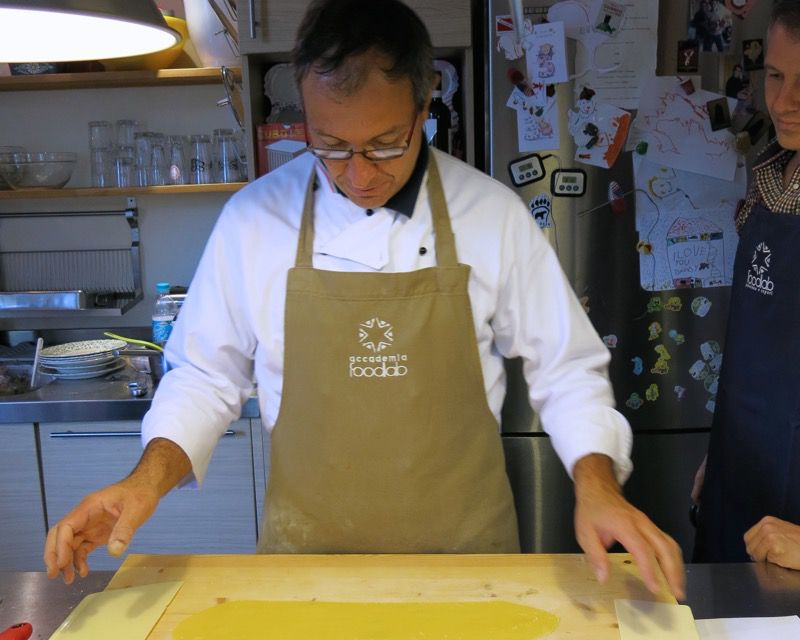
Filling made, dough rested, time to get rolling and filling it!
Rolling the dough for Agnolotti del Plin
Using 1/3 of each portion of dough, Federico rolled it out into a rectangle shape that would fit into the thickest opening of his pasta roller.
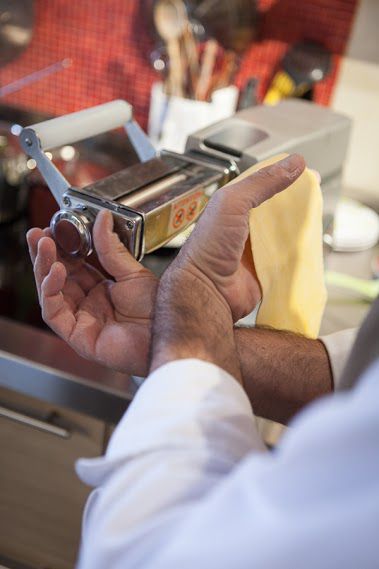
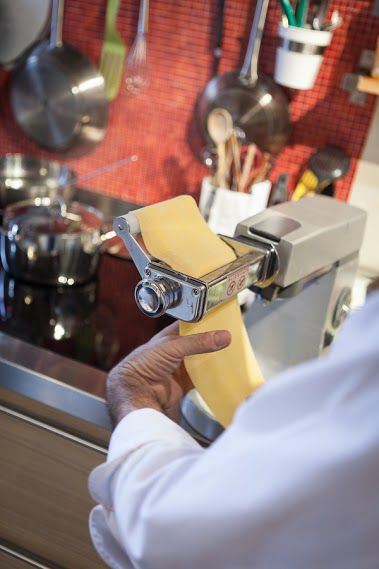
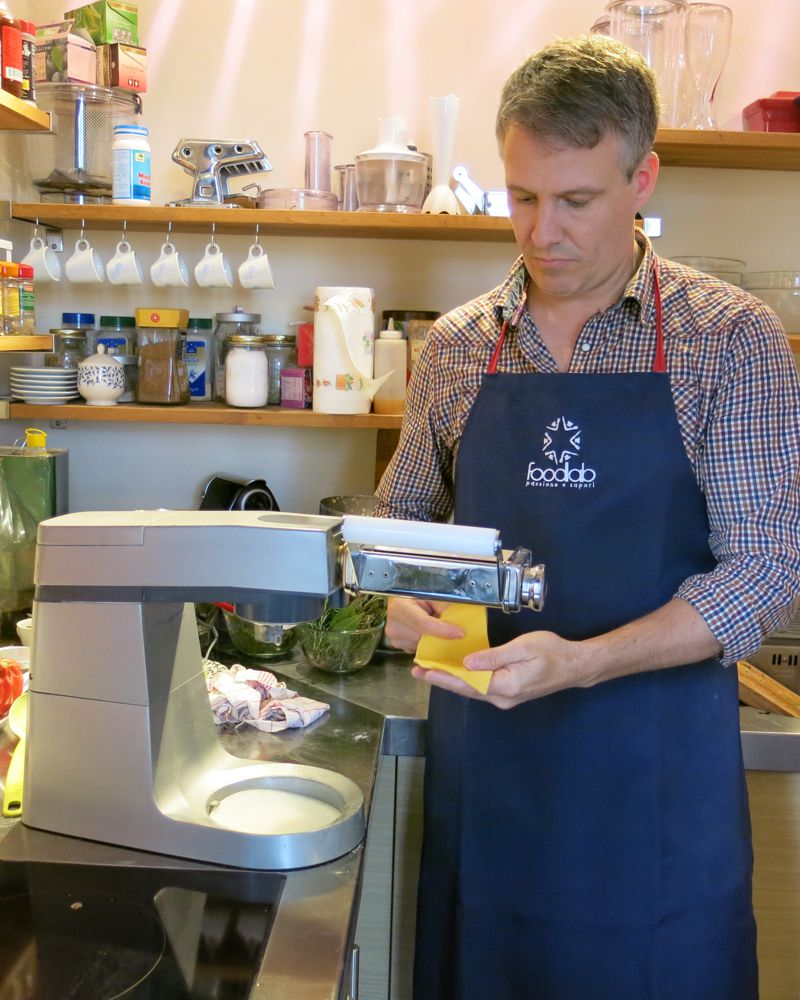
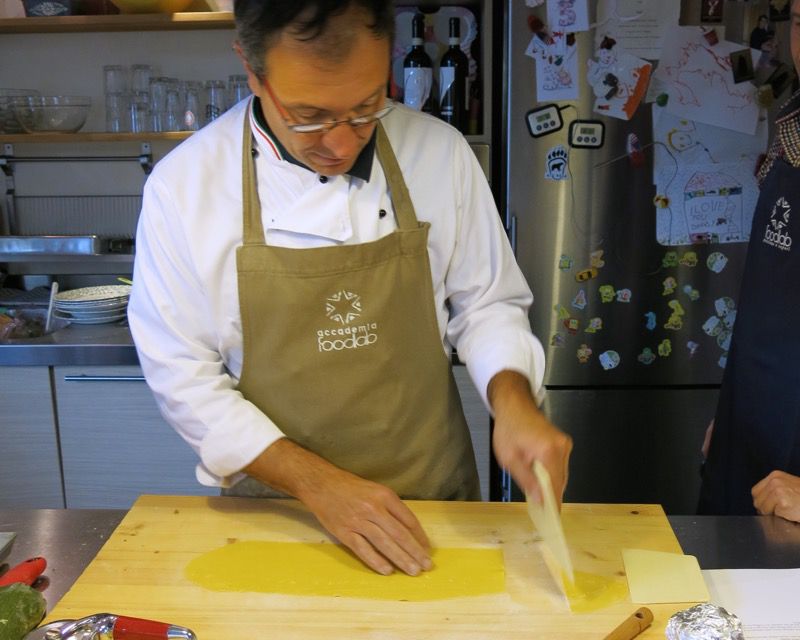
As each portion of dough was placed through each opening of the roller once, and the thinnest level, twice, the rolled dough was placed on the board, trimmed into a rectangle and then cut into 2 or three portions for filling.
Agnolotti del Plin: Piping the filling onto the rolled pasta dough
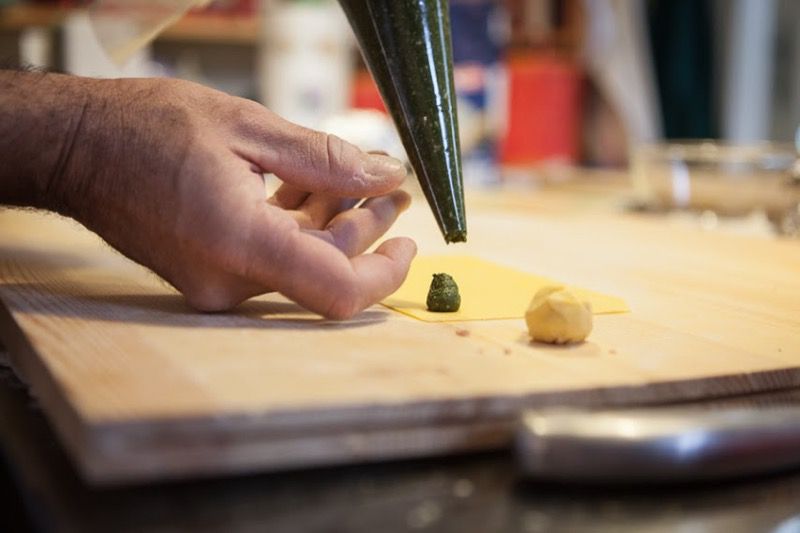
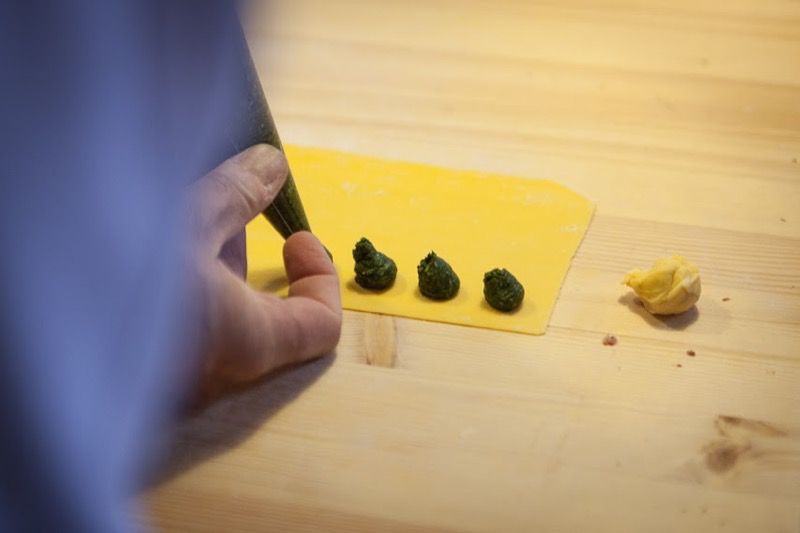
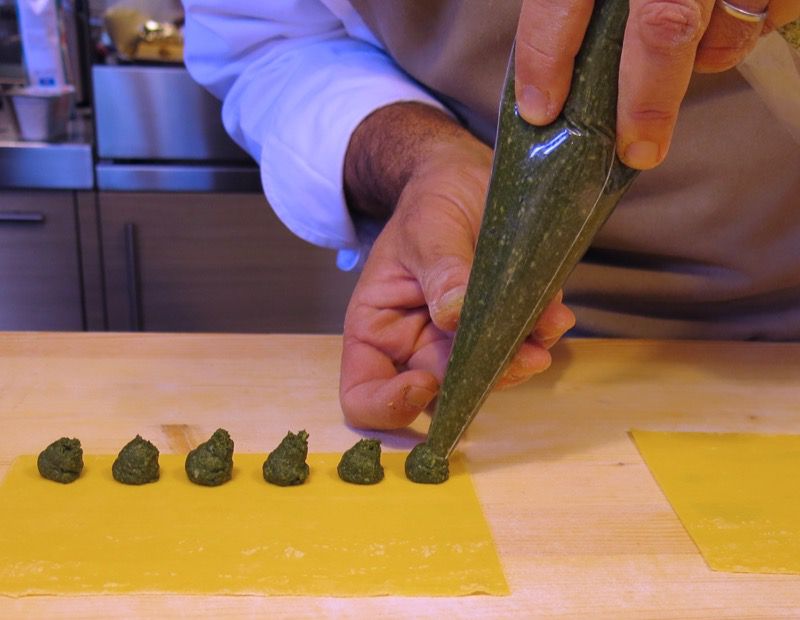
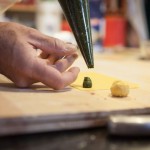
Each rectangular portion of rolled dough was dotted with mounds of filling a pinch width apart from the other, on the side closest to the edge of the counter, leaving enough room on the edge to fold the dough over onto itself.
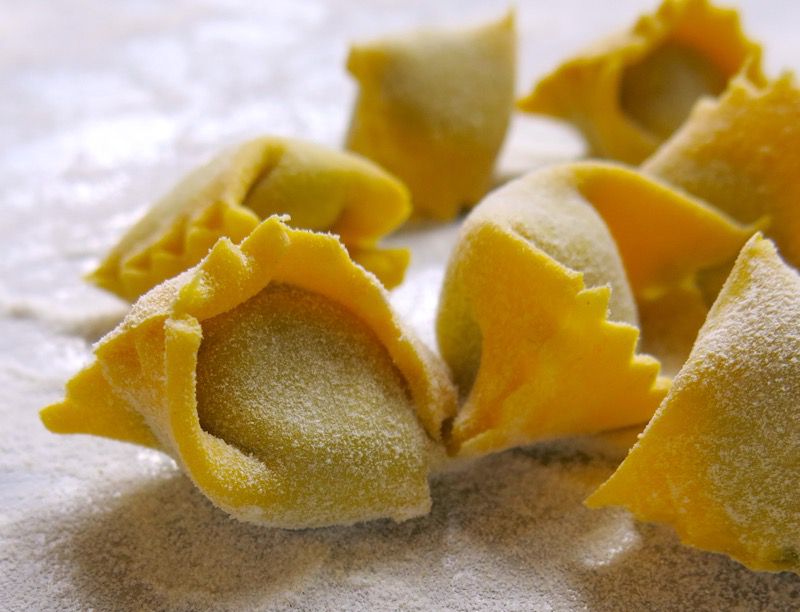
Agnolotti del Plin: Shaping and Cutting the Pasta in this Traditional Piemontese Shape
It looked difficult, and appeared that the mounds of filling may fall of the pasta when flipping the dough over with the filling onto itself, but that didn’t happen. Easy-peasy.
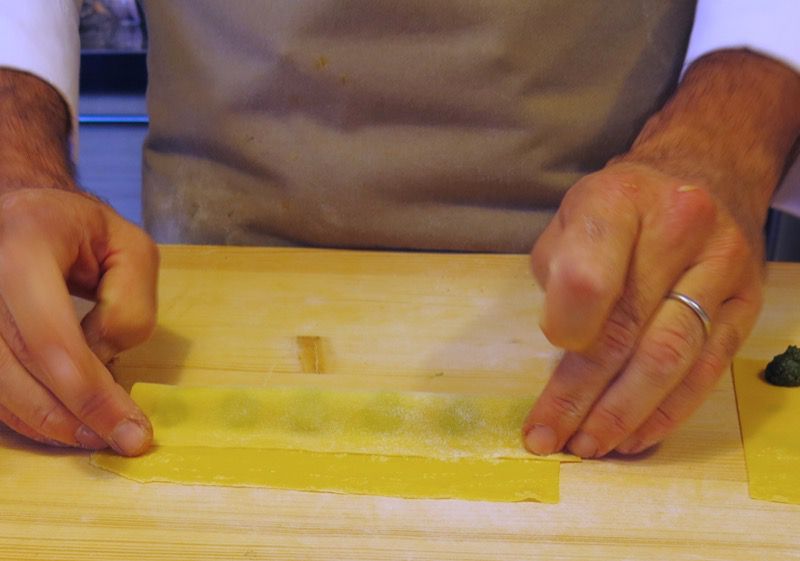
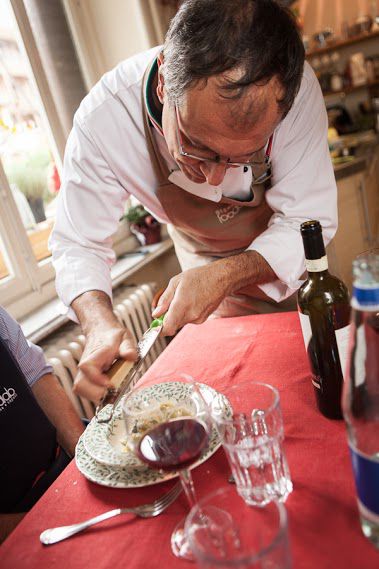
Above, Federico has pinched one end of the pasta dough closed around the mound and is pointing to the end not to pinch closes. Each mound of filling has been turned upside down onto the dough and the long horizontal edge has been pressed, to seal.
The pinching process begins. Using the forefinger and thumb, pinch the dough together around each mound of filling, in the upright position, until the row is done.
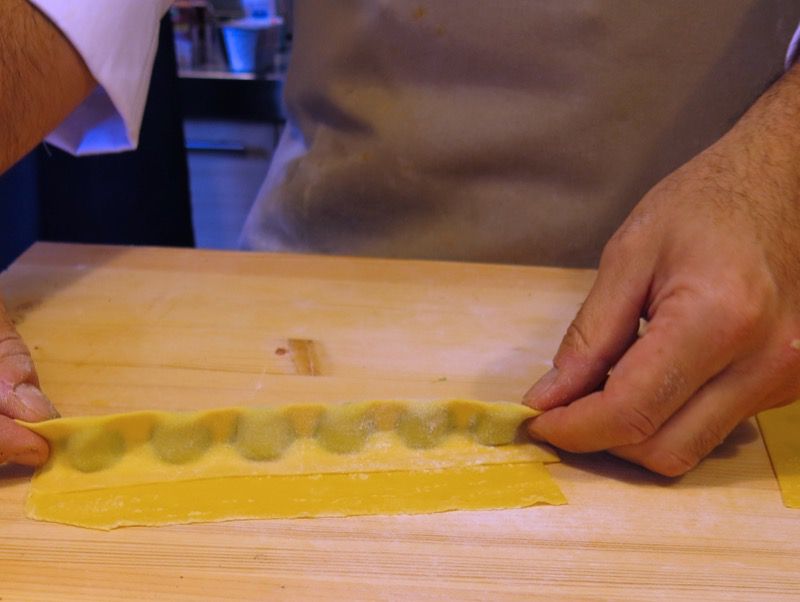
Now the other end is pinched closed.

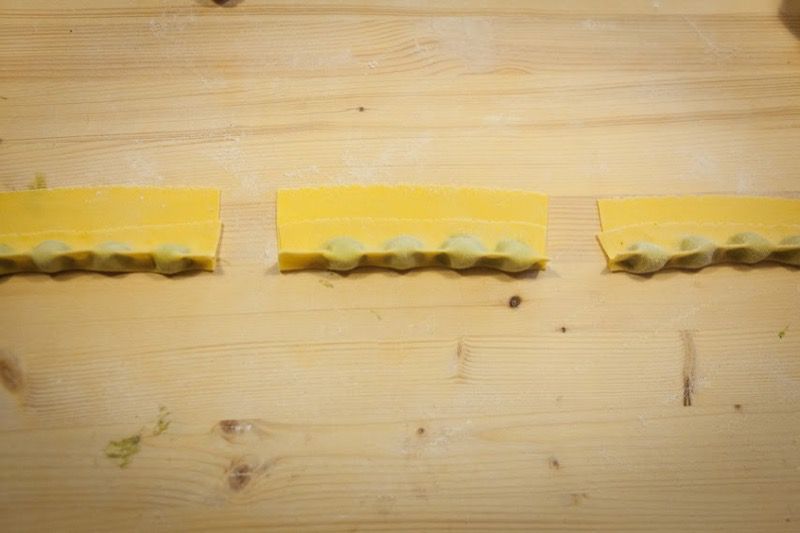
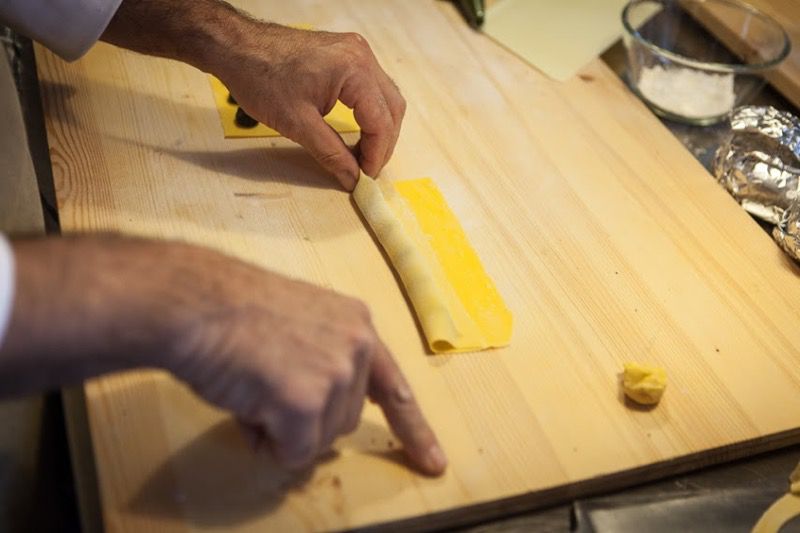
Above, you see how the rolled pasta was cut into three portions to be filled.

Each mound of filling is securely enrobed within the pasta.
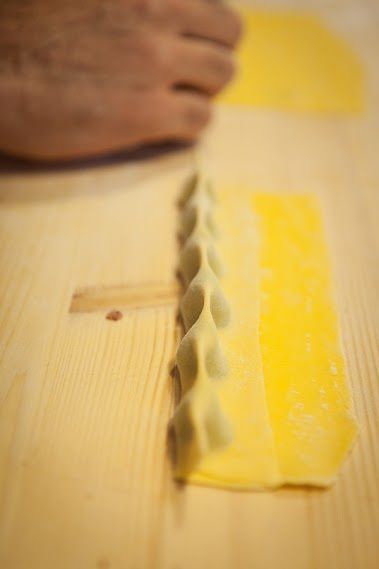
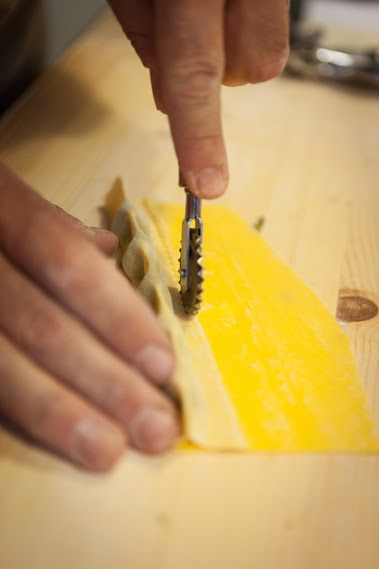
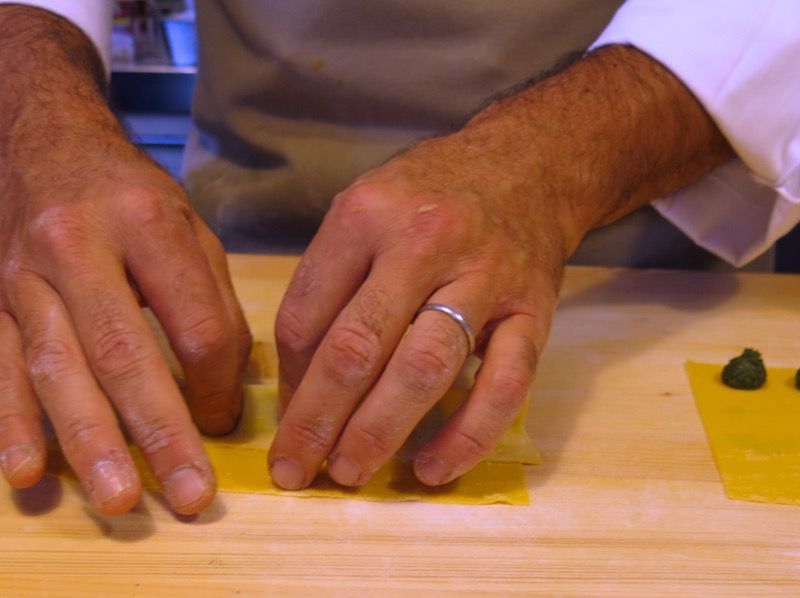
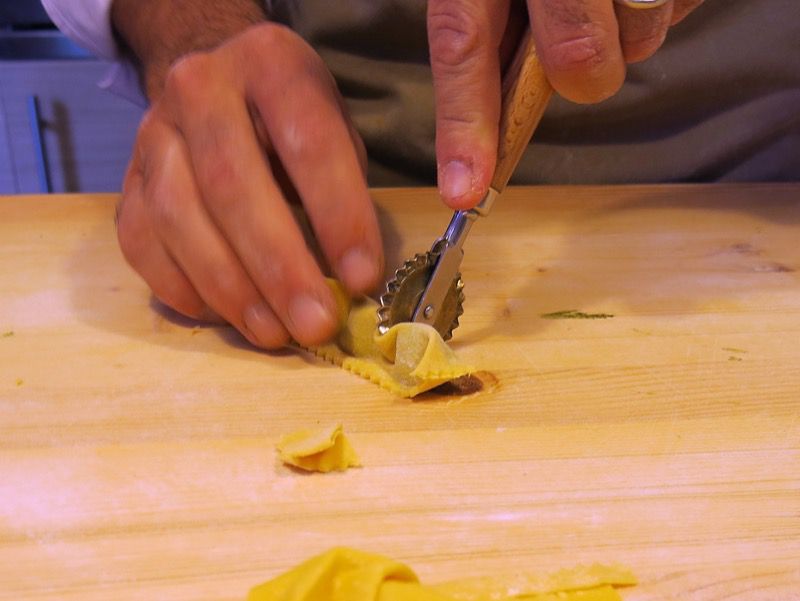
Slice the back of the filled portions horizontally along the folded and sealed edge with the pasta roller.
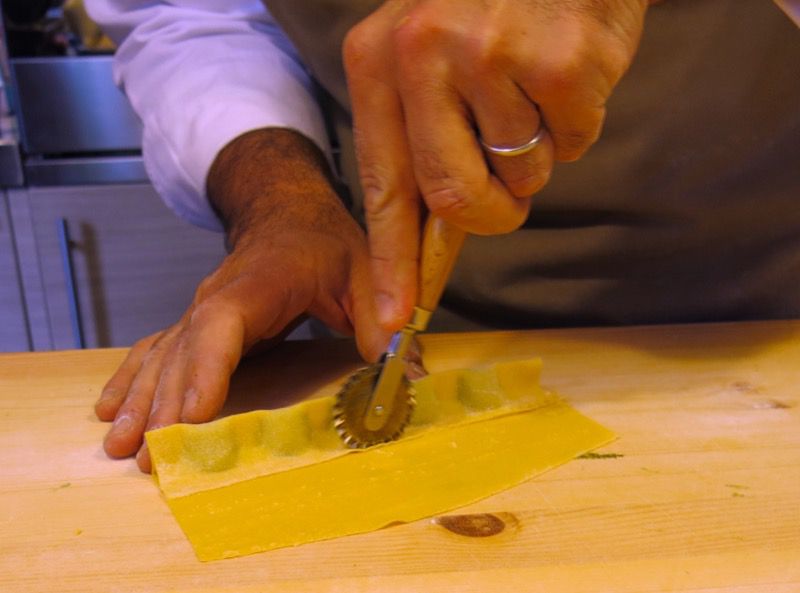
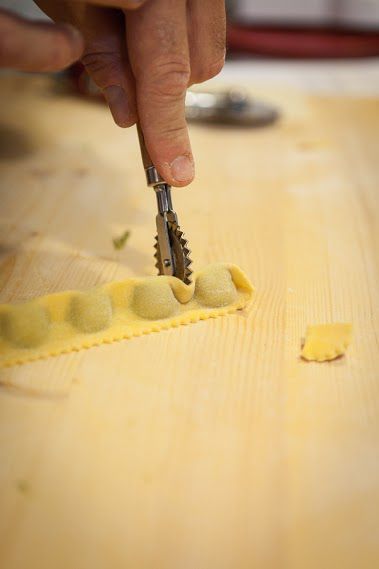
Position your pasta wheel very close to the edge of the pasta, between mounds, and then quickly and firmly, pressing down, roll it directly though the pinch.
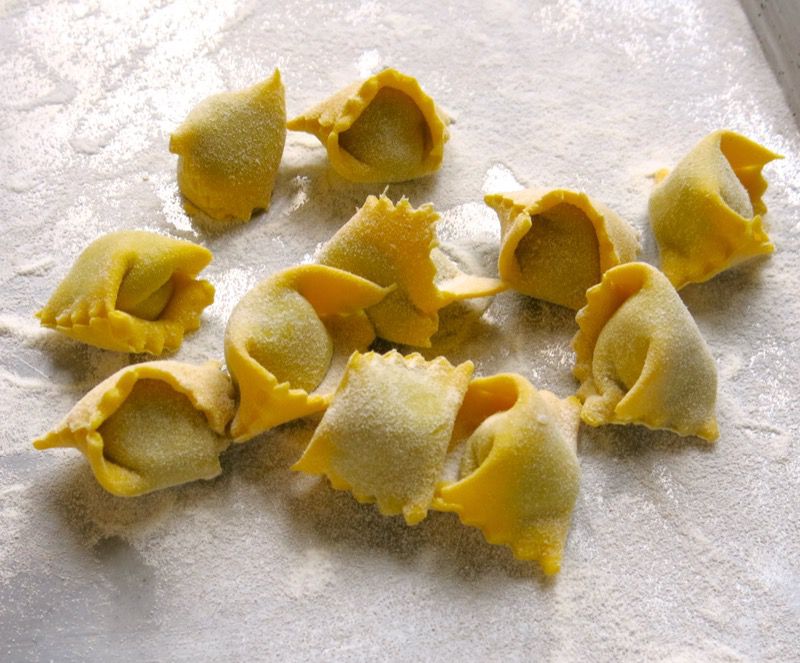
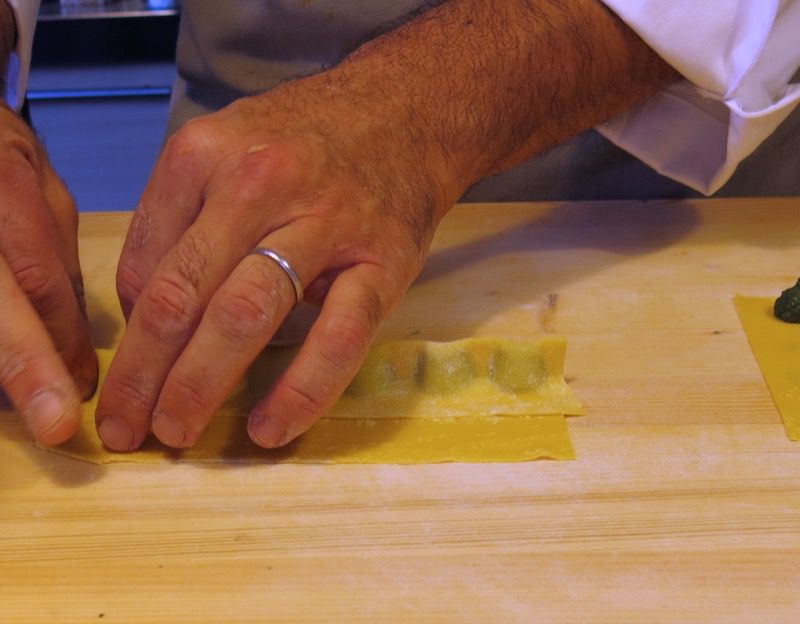
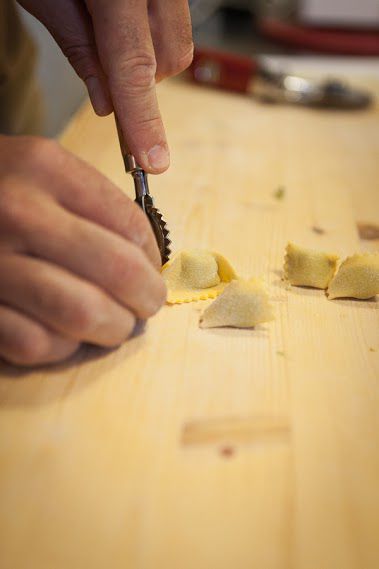
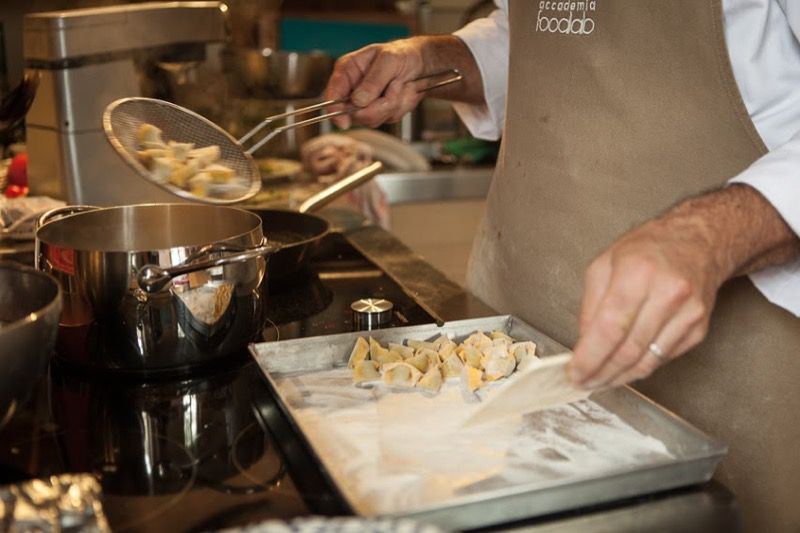
That is seriously exciting. I got giddy. Look at the lovely little pillows of filled pasta. It was so easy, I could not believe it – yet, completely know that without such a class, I could never have the confidence or know how to make this shape. I hope with these photos and instructions, should you be so motivated, that you now can. For me, this is an accounting of my learning that day so that I, too, may be able to make this pasta, often! You can see the rice flour, above, that is sprinkled on the Agnolotti del Plin to keep them from sticking to one another.
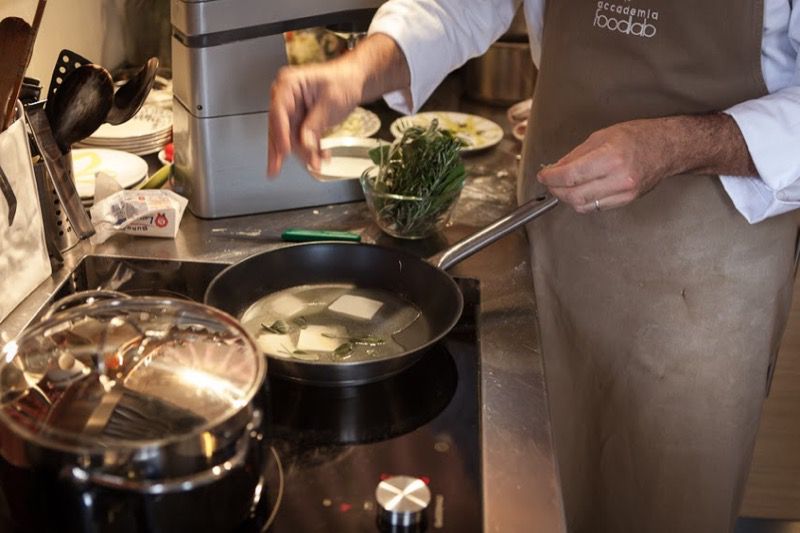
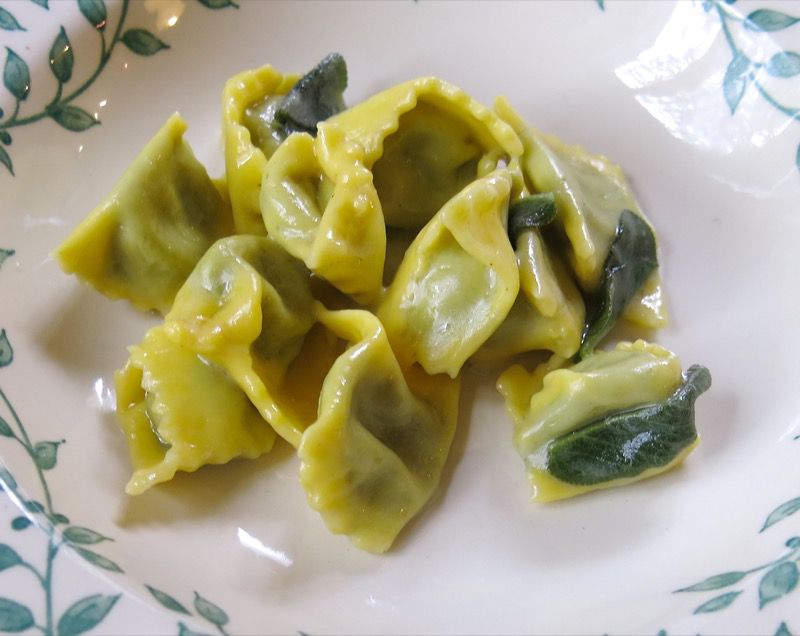
Keeping it simple, sage butter sauce is a must: butter is melting with the fresh whole sage leaves on medium low. Federico is not making a Sage and Brown Butter Sauce. This is different.
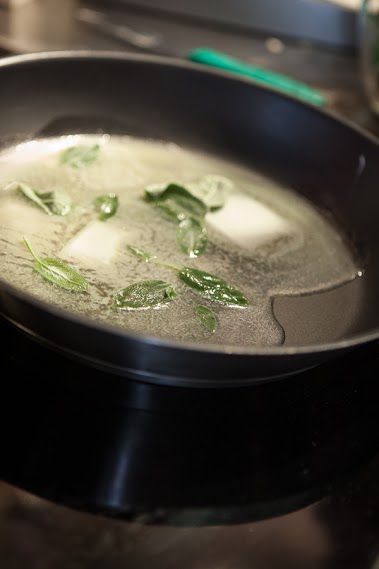
At the same time, he is cooking the Agnolotti del Plin in boiling salted water in batches, 4 minutes each.
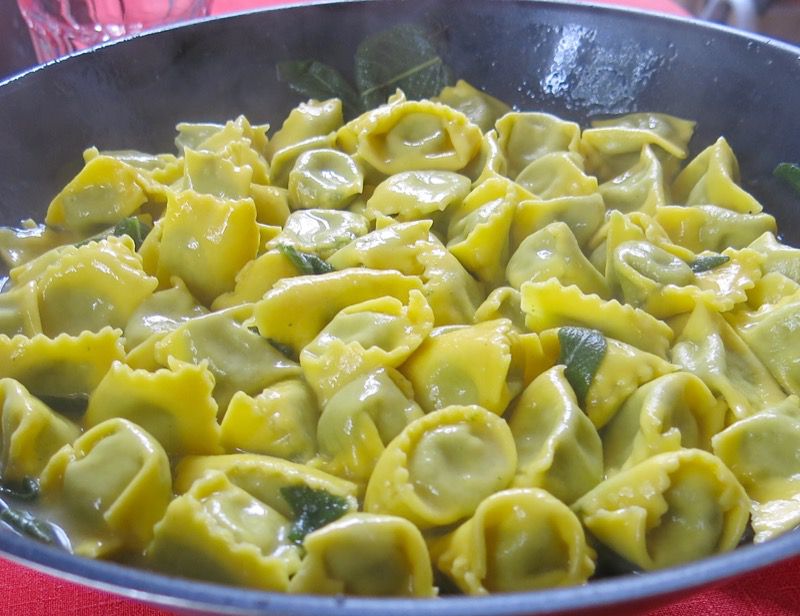
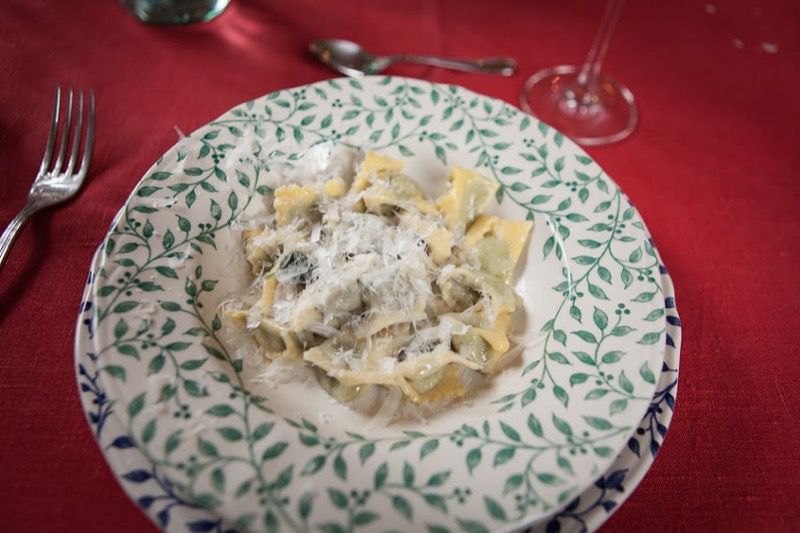
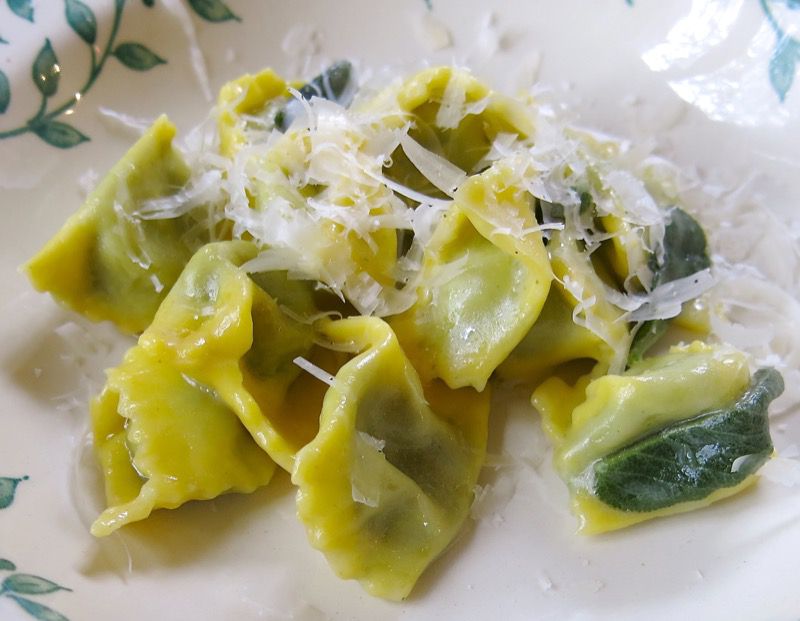
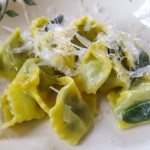
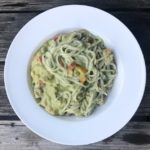
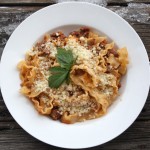
Agnolotti del Plin tossed into the creamy Sage and Butter Sauce was divine. Truly, there is nothing like fresh handmade pasta. The succulent mouth feel as the velvet pasta pillows explode with flavor, and the little chewy bits around the folded edge of each Agnolotti simply offers a truly Piemontese home food experience. And one I plan to repeat in my own home.
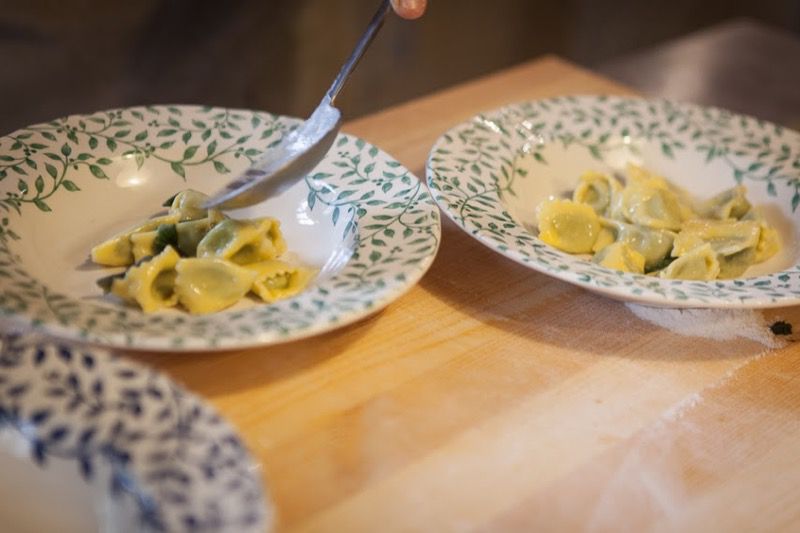
Federico said that 10-12 Agnolotti del Plin is considered an average portion.
I do believe I have an average portion above, but asked for a small one. We did make about 40 Agnolotti del Plin.
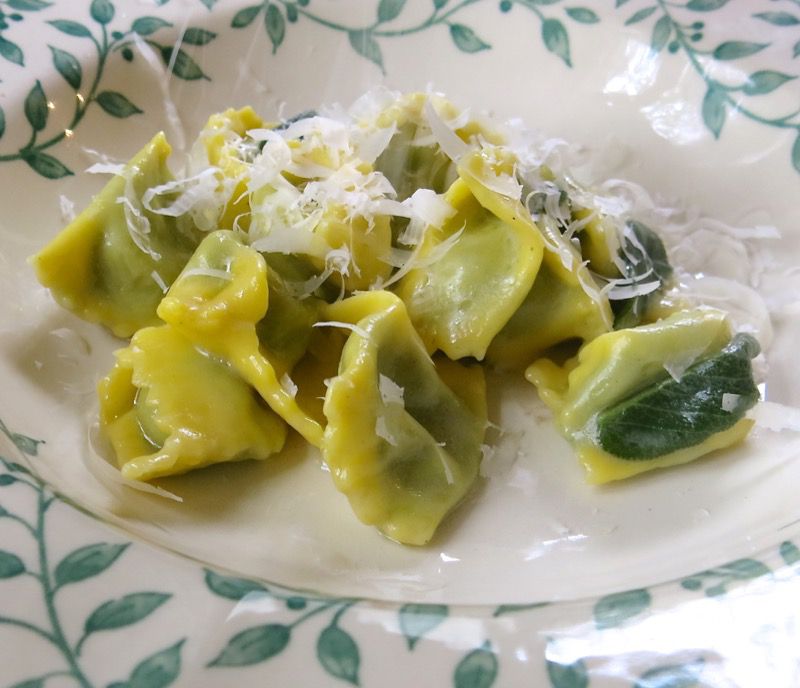
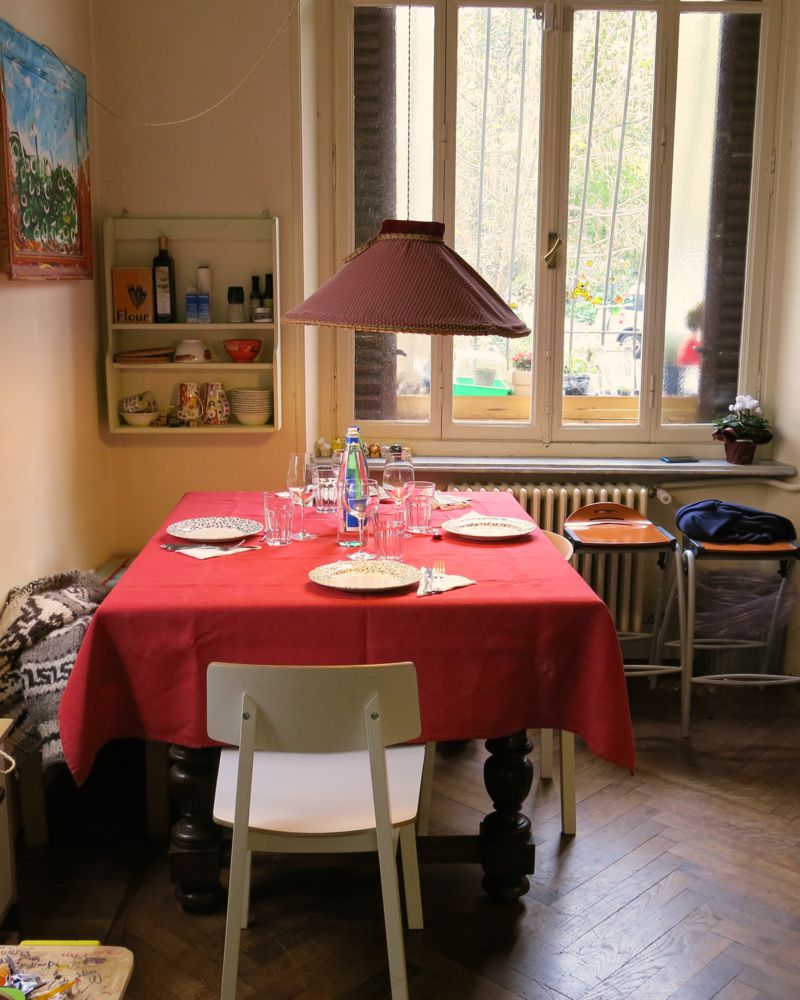
The table was set. We had reveled in the Caponet and were now served the pièce de résistance: Agnolotti di Magro al Burro e Salvia or Agnolotti with Ricotta Spinach Filling in Butter Sage Sauce. Sinking deeply into my chair, I was oh, so satisfied. What a wonderful day.
Pasta Fresca all'uovo for Agnolotti del Plin with Sage and Butter Sauce
1 egg to 100g of 00 flour is considered ingredients for pasta for one. This is a traditional pasta specialty of the Piemonte region in Italy.
Ingredients
Ingredients for Pasta Fresca all'uovo:
- 400 g 00 flour (available at Italian Grocery stores)
- 4 eggs (if possible, special eggs for pasta making: the more orange the yolk, the more authentic the result)
- One batch of Spinach Ricotta Filling (recipe below)
- Rice flour for dusting finished Agnolotti del Plin to avoid sticking
Ingredients for Sage and Butter Sauce for Agnolotti del Plin
- 100 g unsalted butter
- 8-12 fresh sage leaves
- salt and pepper to taste
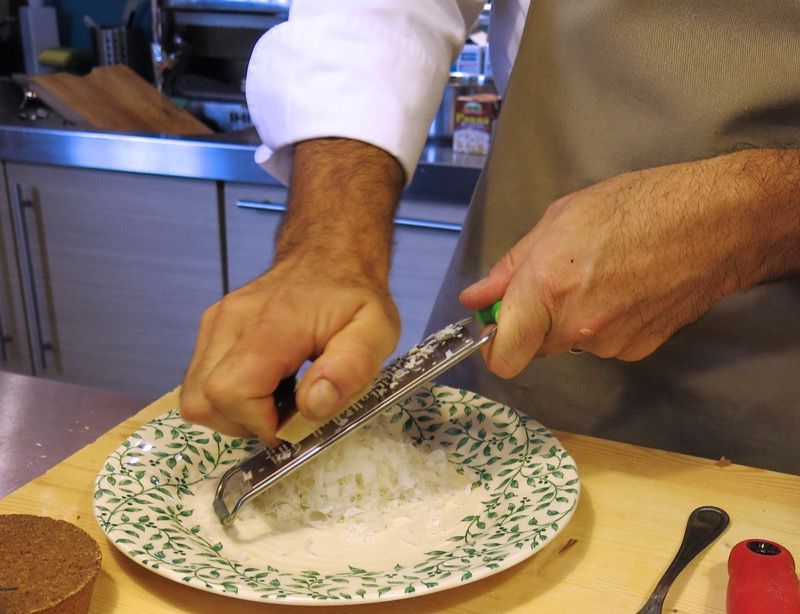
- Parmesan Cheese for grating on top of plated Agnolotti del Plin
Instructions
Making the Fresh Egg Pasta Dough:
- Scale the flour into a bowl, making a large hole in the center; crack the eggs into the centre of the bowl
- With a fork, whisk the centre of the eggs and continue whisking until all are incorporated; whisk in edges of flour
- Continue whisking: there is no rush
- Little by little, whisk in the edges of the flour, until a dough is formed (all flour will not yet be incorporated)
- Start folding the dough with the fingers of one hand, incorporating the remaining flour in the bowl until it is no longer sticky (all the flour may not yet be incorporated)
- Transfer the ingredients to the pasta board: continue to fold or knead the dough with one hand for about 15 minutes or longer, to incorporate all of the remaining dough (if there are little dry bits, move them to the side as they will not incorporate well)
- Once the dough is smooth, and elastic, and a little firm, it will be ready to rest (Best a bit firmer as this will be machine rolled; hand rolling can tolerate a softer dough)
- Wrap with plastic wrap or foil and rest in the fridge for 40 minutes
Rolling the Fresh Egg Pasta Dough:
- Take the packages of cold fresh pasta dough out of the fridge, unwrap and portion into three or four pieces; cover the pieces you are not working with to retain their moisture
- With a rolling pin, roll into a rectangle that will fit into the thickest opening of your pasta roller; sprinkle a skiff of 00 flour on it so it doesn't stick to the roller
- Turn on the pasta roller, and starting with level 0, feed the dough carefully through the roller; fold in half and feed it though 00 one more time
- Continue to feed it through your pasta maker (hopefully you will have 9 settings) until level 4; take it over to your board and sprinkle with another skiff of flour
- Continue to feed through the machine and at level 9, put the dough through twice
- Fill and portion this rolled dough, then continue to roll the remainder of your dough, filling it as it is rolled
Filling the Agnolotti del Plin:
- Prepare a cookie sheet by covering it with parchment paper; have rice flour out for sprinkling
- Take the rolled portion of pasta dough, and slice of the ends to make a rectangle; the slice in half or in thirds, depending upon the length of your dough
- Using one portion of the dough, place it horizontally in front of you and tilt the pastry bag vertically and disperse a small mound of filling on the long edge of the pasta sheet closest to you; continue along the edge of the pasta sheet, just far enough a part to pinch between each mound with fingers
- Once the pasta sheet is lined with mounds of filling, take a firm hold of each end of the sheet, and turn it over on top of itself, ensuring there is an edge formed one turned (see above photo)
- Gently press the edge to seal the sheet together, and close one end of the pasta filled with the mounds
- Using the pointer finger and thumb of both hands, pinch the dough around each mound of filling starting at the end that you have closed with a pinch
- Move down the row of mounds, repinching the one pinched side and closing the open side with a new pinch until the entire row is pinched, then pinch the other end
- Using a round pasta cutter (see photo) trim off the long sealed edge; turn the filled pasta sheet so that it is in front of you horizontally and the mounds are exactly upside down
- Line up the pasta roller (as in the photos above), very close to the dough and then just quickly push it through to cut each piece of Agnolotti del Plin free from the line- up; continue until each portion of filling has become an Agnolotti del Plin
- Dust with rice flour to avoid sticking and place on parchment covered pan until ready to cook, or freeze
- Continue until all Agnolotti del Plin have been formed
- At this point, you can cover with a towel until cooking time, or fast freeze over night and then portion into zip lock bags for serving another day
Sage and Butter Sauce for Agnolotti del Plin:
- Place 2 tablespoons or 30g of the butter into a frying pan while heating the water to cook the pasta; lightly fry the sage (you do not want brown butter or a high heat)
- when the pasta is at 2 minutes (and it will take 4 minutes to cook) add the remaining butter and swirl to combine
- Add a little of the pasta water to the sauce, keep on medium low heat, swirling to emulsify butter and water into a creamy sauce
- Add the Agnolotti del Plin, tossing to cover all, and serve with extra grated Parmesan cheese
Notes
Spinach Filling for Agnolotti del Plin or Agnolotti del Plin di Spinaci
Agnolotti del Plin is delicious with a variety of stuffings. Meat is traditional as is this spinach stuffing.
Ingredients
- 400 g fresh egg pasta dough (recipe above)
- 400 g fresh spinach
- 80 g freshly grated Parmesan cheese
- 120 g ricotta cheese
- nutmeg , salt and pepper to taste
Instructions
- Wash spinach, salt and cook in a ladle of water (very little water); squeeze out all liquid and roughly chop OR buy chopped frozen spinach and squeeze out all liquid (some brands are as good as fresh)
- Place all ingredients in food processor to combine into a paste; taste for seasoning and adjust as needed
- Place filling into a pastry bag for portioning purposes; rest until pastry is rolled
Notes
You can reach Federico at info@cookinitaly.org
About a third of the photos in this post were contributed by Jens Gerbitz, a much better photographer than I. I am ever so grateful for his lending them to me. You can browse his entire set here, but please note that he is the owner of these photos and they are not to be copied or used in any way without his express permission.


Che bella pasta!
As a self-proclaimed expert on al plin (the eating of it anyway after more nearly a dozen versions sampled now) I think this is incredible, Valerie. Great post! Really terrific.
Kari
Thank you so much for this post. Today we had ravioli filled with paste of capsicum and sausage meat, accompanied by a couple of cherry tomatoes cooked on the stem and sage butter. Your post has inspired me to make filled pasta once we return from our trip! Your description and photos make me think I should be able to manage! Can’t wait to try these little gems!
This is an incredible post. I felt like I was in the class with you. Can’t wait to try this recipe. I LOVE making fresh pasta! Thank you.
Wonderful to hear, Denise! Thank you!
And I love sharing recipes – so if you have any fresh pasta fillings or special sauce recipes – or tricks and tips, please do pass them along, too!
Live in Edmonton? We could do a pasta making day!
🙂
Valerie
Wonderful post Valerie!
I love the deep yellow of that pasta! We (used to) make mostly the Southern version, pici/filej without egg but I’m teaching myself to make various egg pastas as well. Dario loves spinach pasta for the traditional bologenese. I so wish I had a few extra days to have participated but the sweet local chestnuts of Aosta and my darling Zia (aunt) were calling me. If we don’t go to Expo, I’ll be signing up for the next one in 2016.
I can live vicariously through you because your post captures the feel so beautifully. We’ve only had handmade pasta once since I’ve been home but I’m thinking plin will be perfect for someone’s small and helpful hands. Got to break in that Slowfood pinocchio apron..
Thank you,
Mary
Ok Valerie, I’m spending this cold and dreary afternoon making this for the first time since that great class. Got Nat King Cole forming the needed calming sonic background for attempting this. With your fantastic directions and my memories of that wonderful day, I shouldn’t screw it up too badly. Wish me luck! Will report back with a full damage assessment.
Jens
We should have done this together! Would love to do it with you when you make it again!
Send me a photo!
Hugs
v
Dear Valerie,
I like pastas and my favorite is capelleti. Today we had nhoc. I will tray your paste.
Ruth
Dear Ruth – what is nhoc?
Happy 2016! Valerie
XOXO