In Italy’s Pasta Capital: Bologna, by Mirabel from Taste of Italy
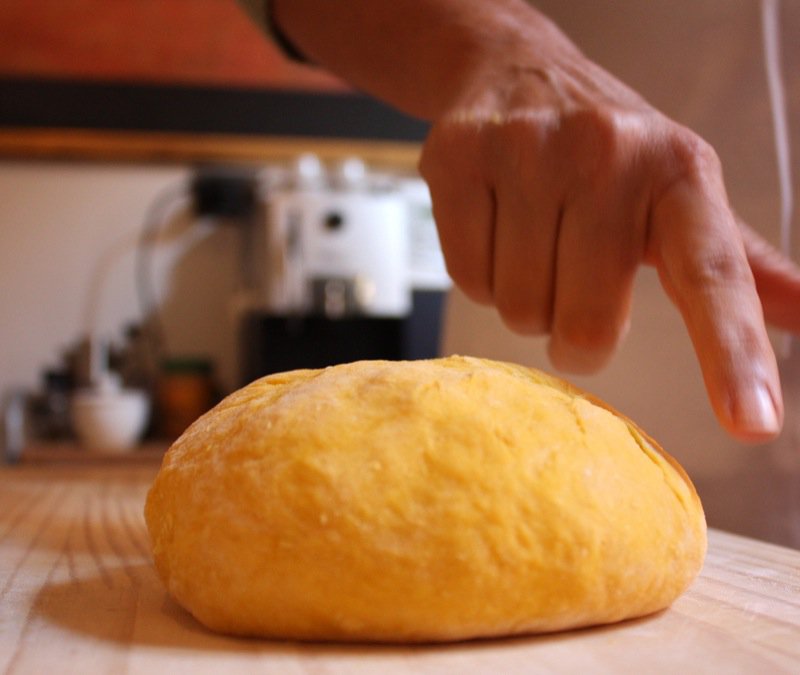
In Emilia Romagna there is an old saying, “Non si butta via mente!” which means nothing goes to waste! Mirabel integrates the philosophic culture of the Bolognese people as she shares their centuries old and world famous tradition of hand rolled pasta. This day and the lessons learned were an unexpected pleasure and a privilege. Martina had told me she would arrange a homemade pasta lesson for me in Bologna, and I left it in her hands, yet I had no frame of reference for the experience I was about to undertake. This was an authentic hand rolled pasta lesson. A sharing of the age old culinary art from generation through generation to me. This was a priceless opportunity. Grab a coffee and put your feet up for this technical epic.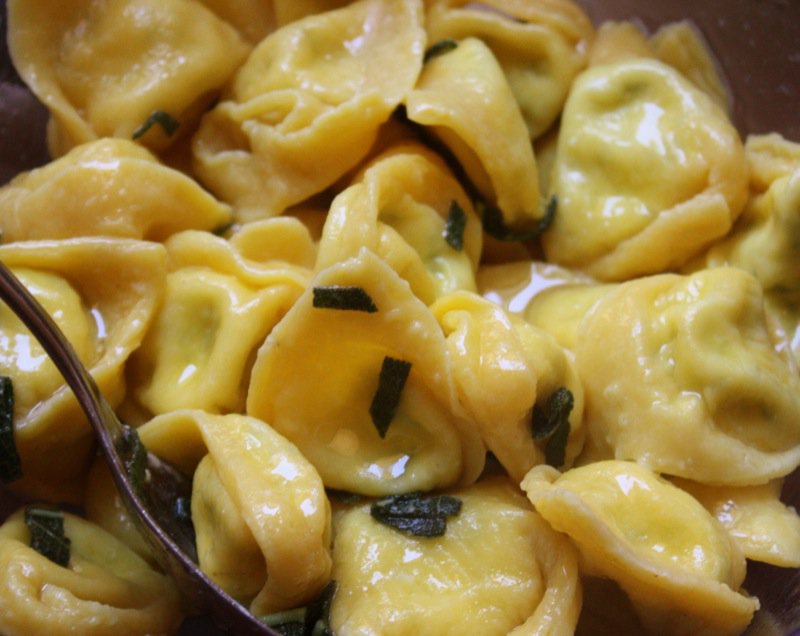
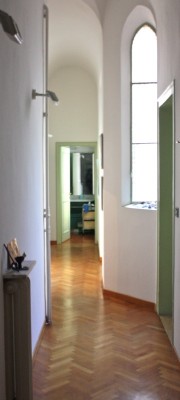
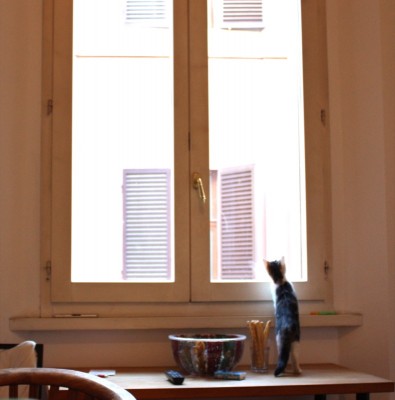
Let’s reset the stage: down the back hall of Martina’s magificent 2000 square foot palatial apartment steps away from the Piaza Maggiore in Bologna, and into the kitchen on the left, opposite the arched window. Kitty is propped on the counter tracking a black fly on outer glass pane.
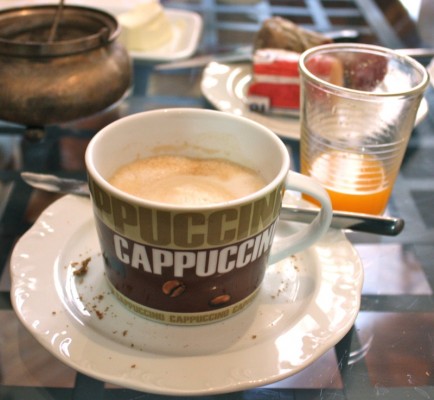
The mornings at Martina’s would start with cappuccino and freshly squeezed orange juice (there is no other kind, in Italy) brought up the two long flights of stairs from the cafê below by my beloved Vanja. Unforgettable. I didn’t eat the breads, salumeri and cheeses she offered, but enjoyed participating in the local life. We returned the tray on the way out for the day, but on this day, my teacher was coming to me!

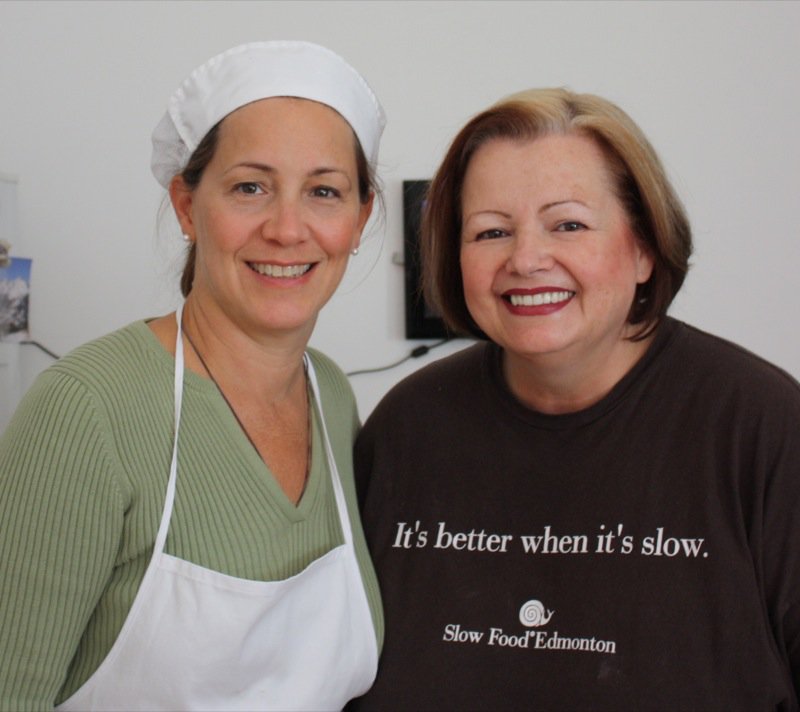
Everyone was scurrying about to leave for the day. Martina was taking Vanja out shopping and touring. After the pasta making morning, we were all heading to Modena to visit an authentic Balsamic making family. Mirable arrived and had the kitchen set up for our class in no time!
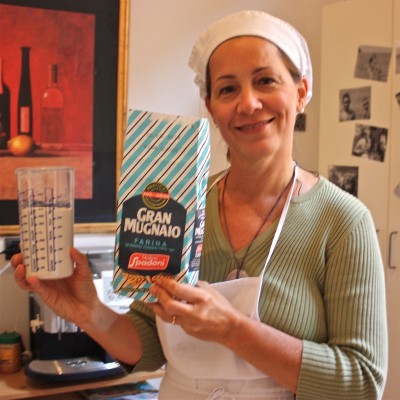

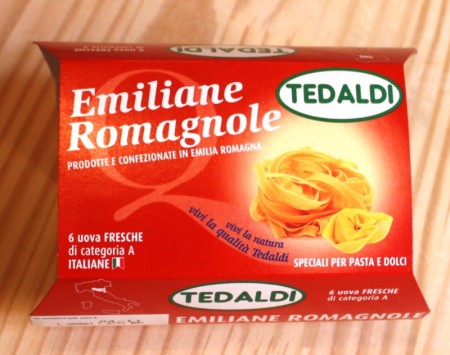
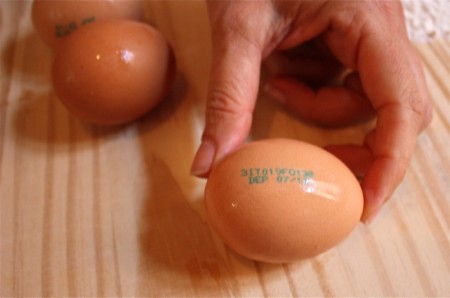
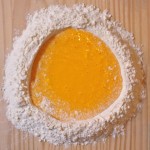
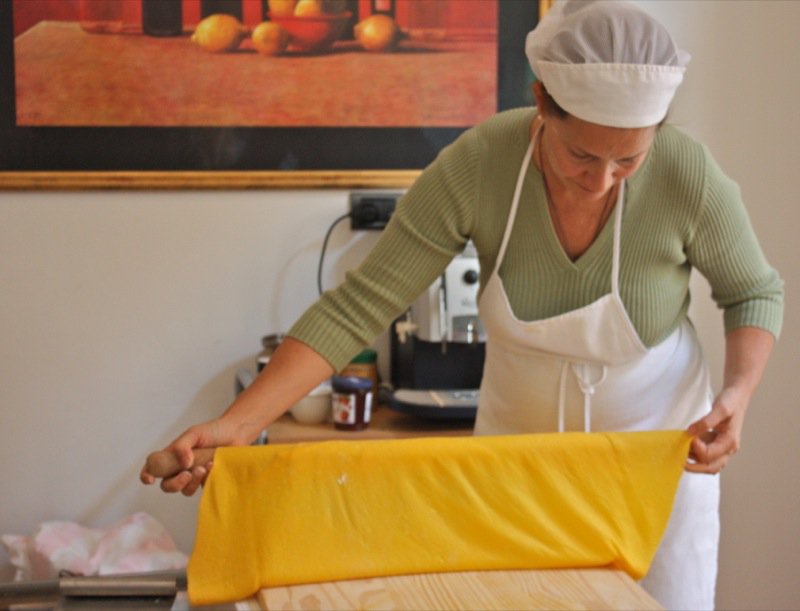
Marina introduced me to the simple, yet very special, local ingredients used to make this world famous pasta: 100g 00 flour to 1 egg is the correct portion per person when making hand rolled pasta for a meal. The eggs are specially raised in the region for pasta making as the yolk must be very high in beta carotene and a dark yellow, or orange colour, to create the characteristic golden pasta colour the region is famous for. Below, left, is the box for pasta making eggs. You will see that each egg has a stamp on it. That is because every egg from every farm in the country is stamped so that the farm the egg came from can be identified. Italian people care about where their food comes from and know which farm it comes from, even if they buy it from a supermarket. The information below, inside of the egg carton, identifies the exact region and farm the eggs have come from.
Making Hand-rolled Pasta Dough
There are two factors to consider when determining how much flour to incorporate into the eggs: the weather and the weight of the eggs. These will always vary, thus the exact amount of flour used each time will also vary. Pay close attention to the texture of the dough and leave out or add more flour as required.
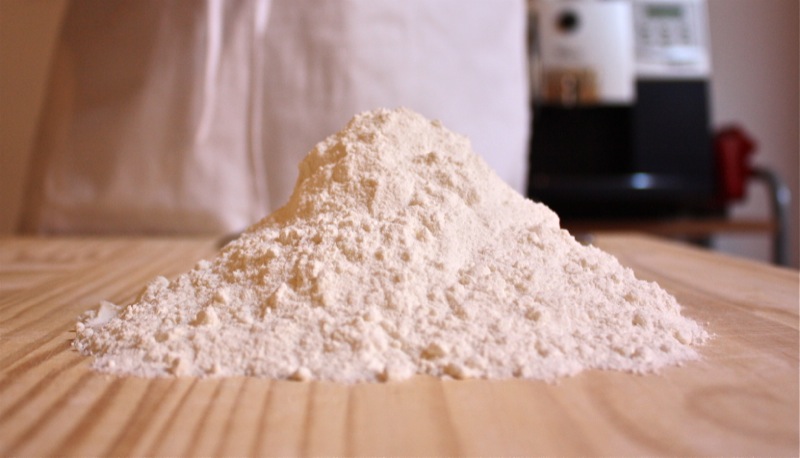
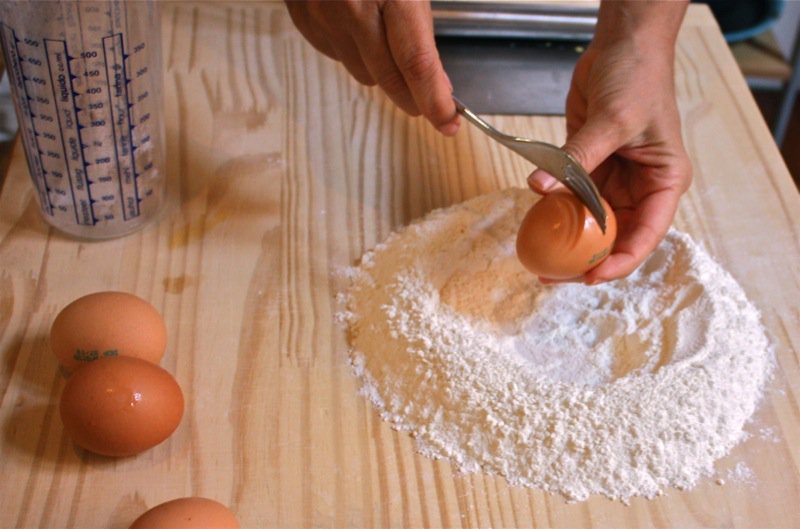
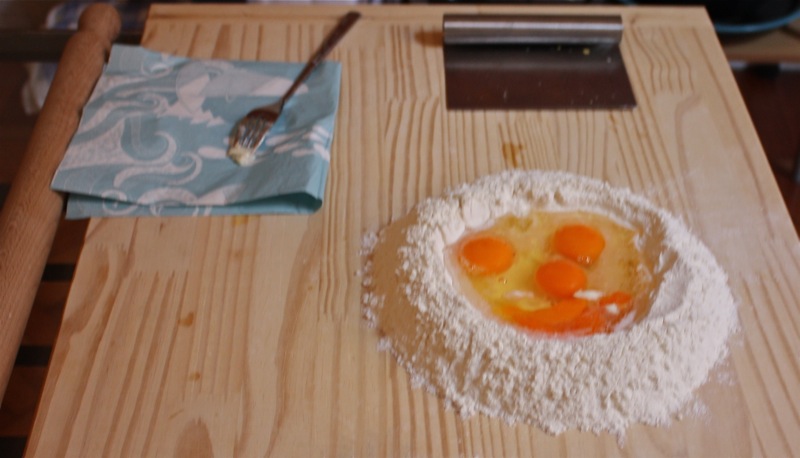
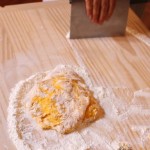
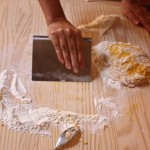
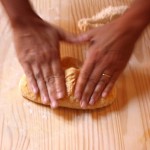
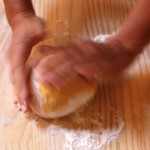
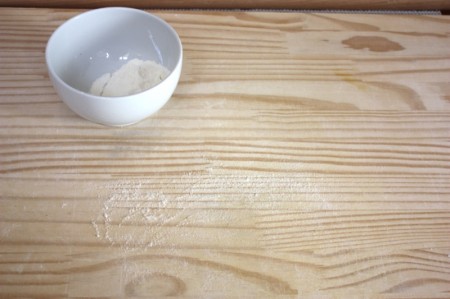
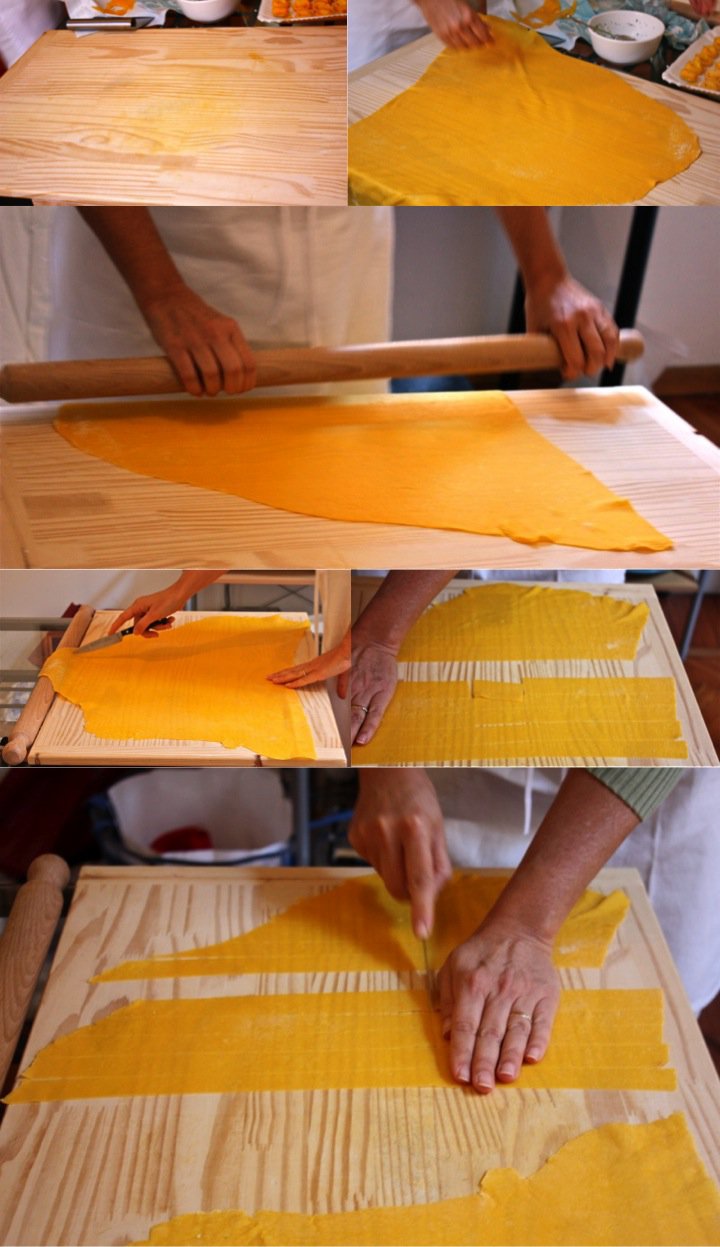
Sift the flour onto the pastry board into a mound.
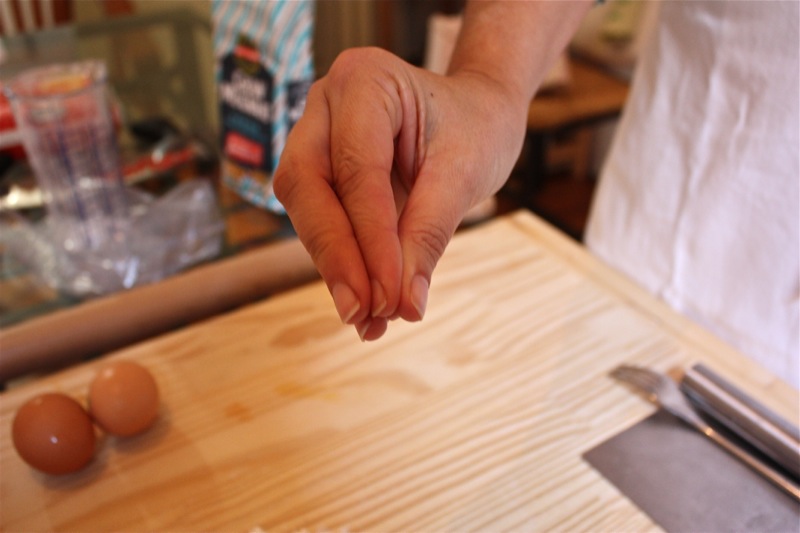
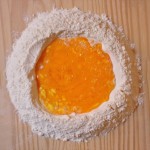
Place the tips of your fingers with your thumb to make a volcano opening, or a well, in the flour; push it back carefully and slowly to ensure enough space for the amount of eggs you are using. Wash and dry the eggs in their shells. Break the clean eggs into the well.
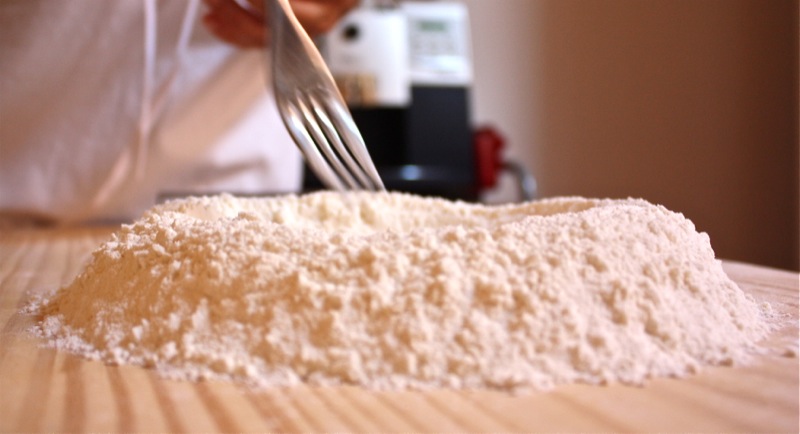

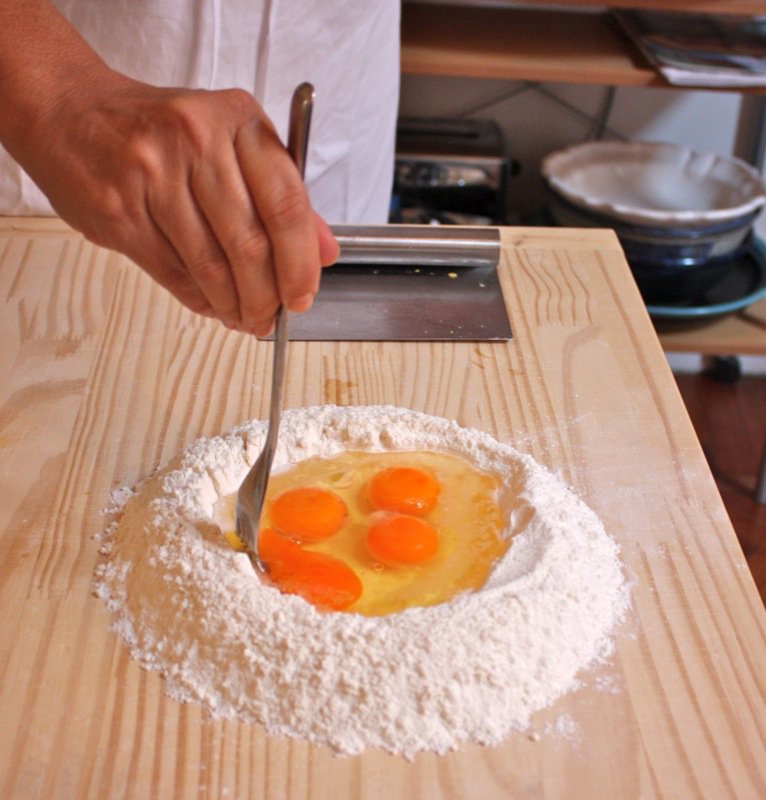
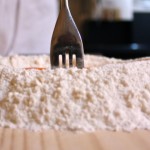
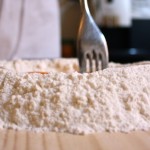
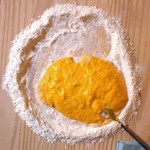
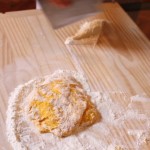
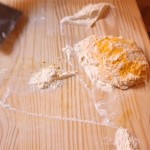
Above, see how the fork was used to widen the flour well and heighten the walls to enable the eggs and flour to be carefully incorporated without breaking through the flour wall. (Compare the photo directly above to the one above it.) Using a fork, slowly mix the eggs together. There is no rush. Mix, or whip, the eggs until completely combined and then slowly, slowly, slowly incorporate a little flour as you stir. Fully incorporate each new addition of flour before you introduce more into the mix.
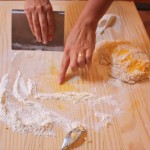
Do this until all of the flour is incorporated into the eggs. Have you noticed there isn’t any salt or any other ingredient? Only flour and eggs.
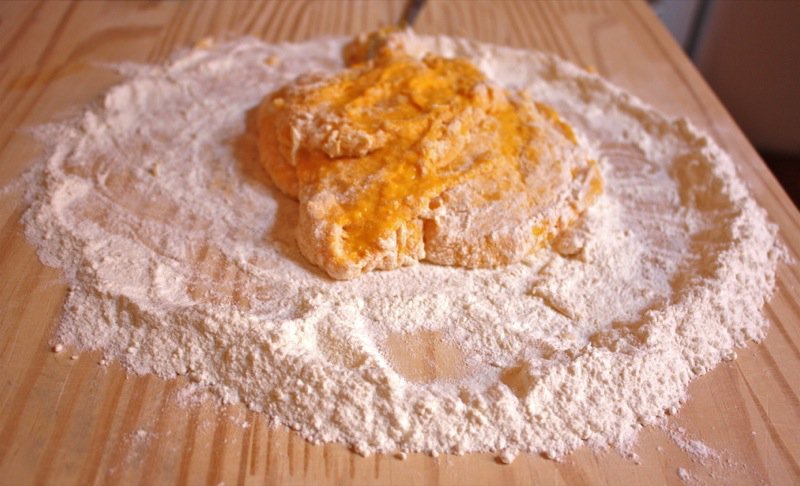
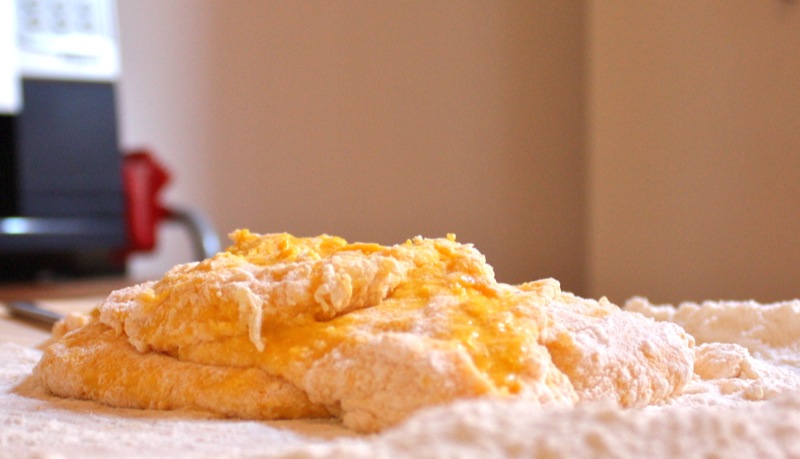
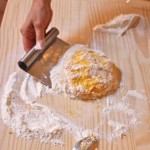
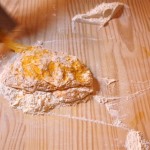
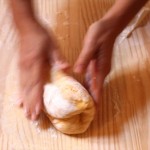
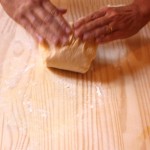
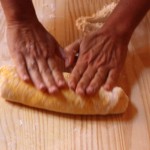
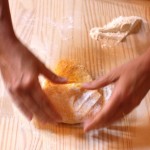
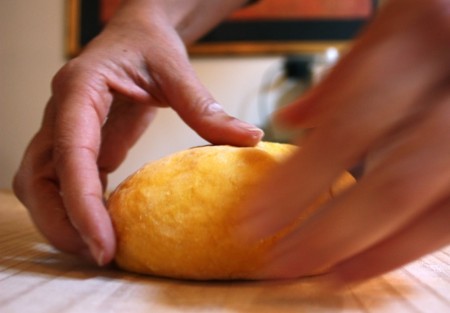
When almost all of the flour is incorporated, you need to start using the spatula. Move the “good” flour to the side; scoop up the pasta and set it aside, then clean the sticky “gunk” from the pasta board and place it to the side. You do not want these dry or hard bits worked into the beautiful tender dough. Then, start incorporating the good flour, using the spatula, as you see below, through a folding knead, just until the pasta is dough is no longer sticky. There may be some “good” flour left over. Remember that the only variable in the measurement of these two ingredients is the size of the eggs. This is the time you compensate for that through this process. Remember, there is no rush. Maribel was clear about that: slowly, slowly…. slowly.
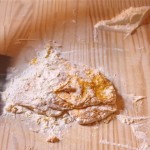
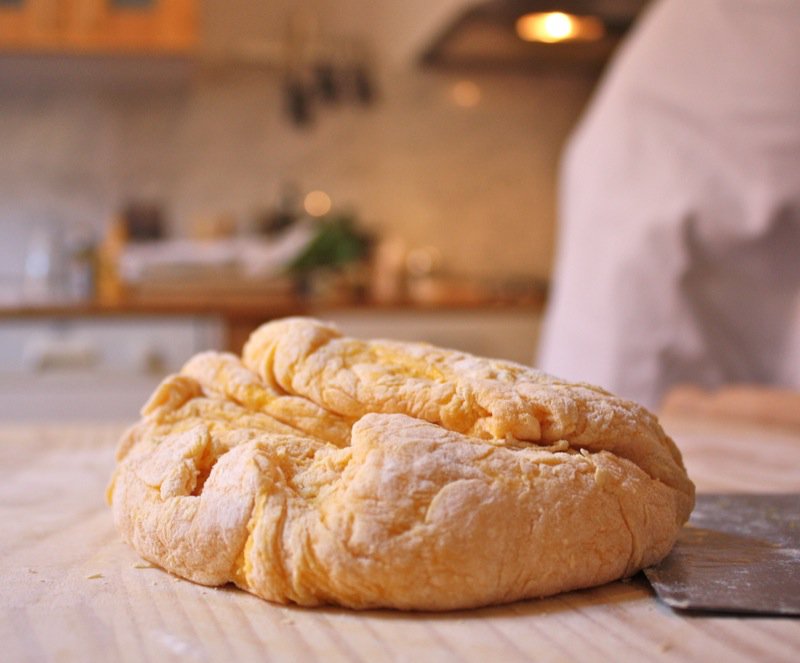
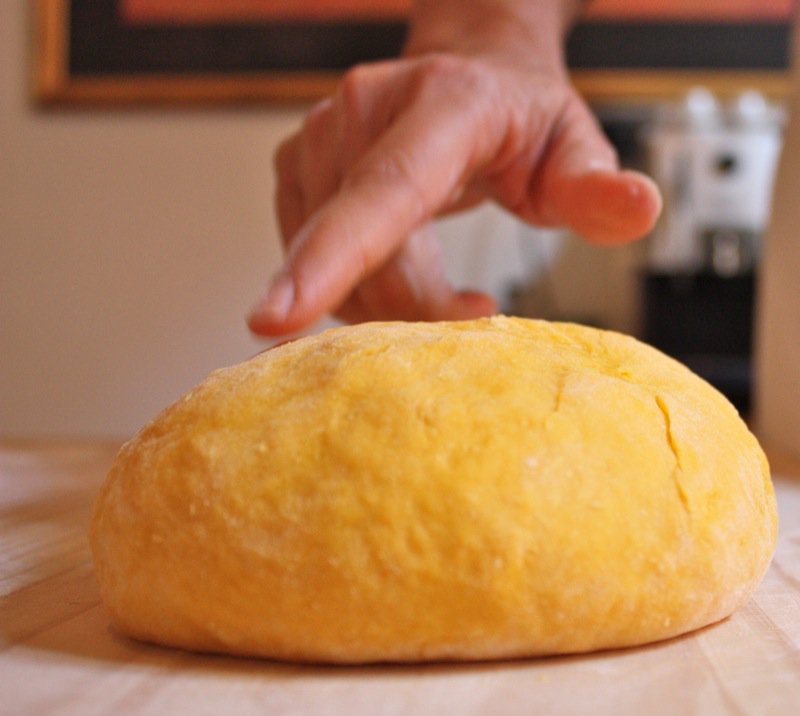
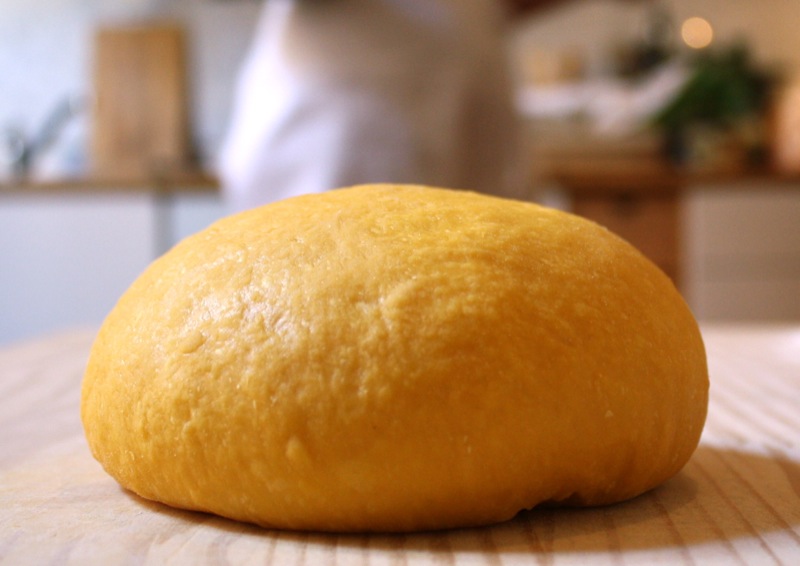
And, voilà! What tender soft lush dough! I was elated! Little did I know. This was just the beginning!
Kneading Hand-rolled Pasta Dough
Add only enough flour to have the mixture feel like a soft play dough. Dust with a wisp of flour under the board and on the ball: flatten and fold gently to the middle. Do not press hard or you may tear the gluten threads; fold, push gently, ¼ turn, fold, push gently, ¼ turn etc…

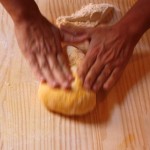
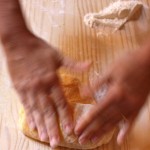
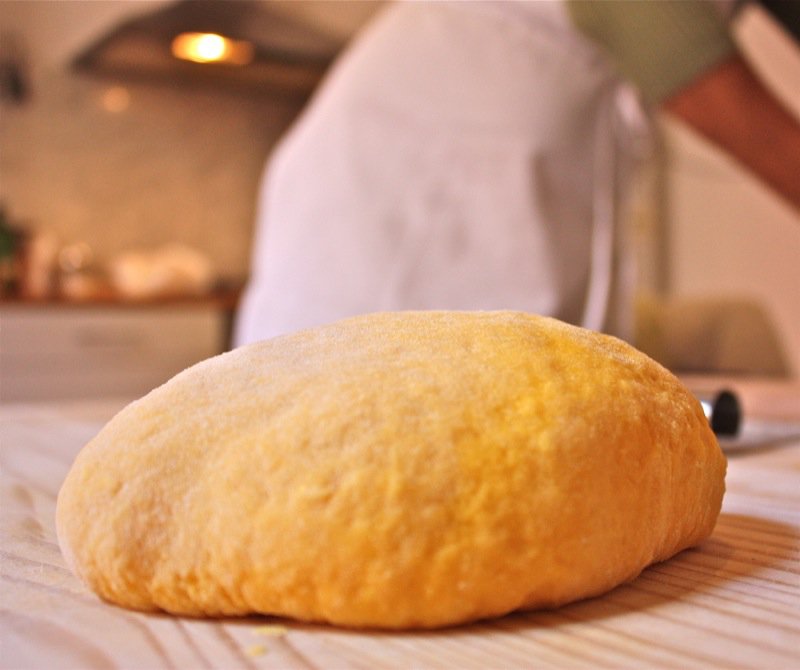
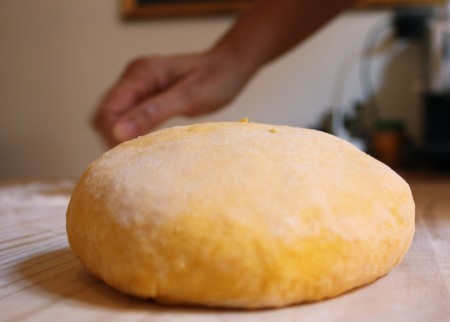
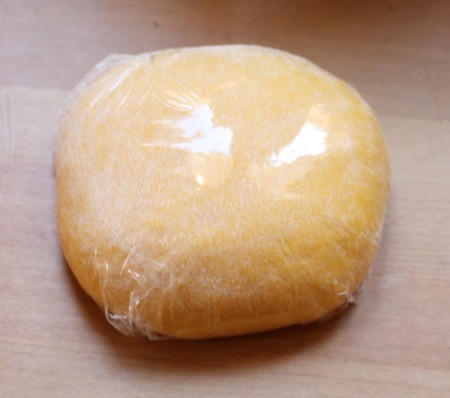
Dust with a wisp of flour as needed and fold dough to fold in the flour; you do not want any surface folds or cracks as you see in the dough, above. Knead the almost finished dough gently until glossy, smooth as a baby’s bottom, and not at all sticky on the surface, as below. Wrap in plastic wrap, and rest dough for thirty minutes: tick-tock-tick-tock…
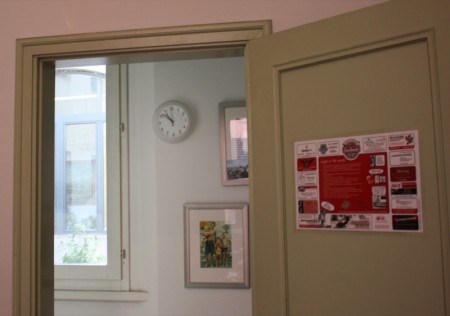
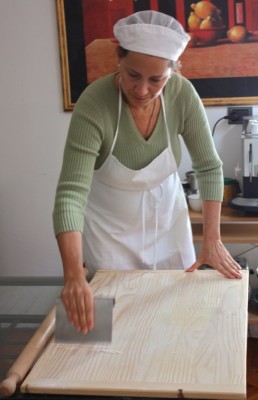
The clock was just outside the kitchen door, on the wall of the long winding back hall that leads to the kitchen, laundry room and back bathroom. When making homemade kora or phyllo (burek or strudel) pastry or dough, only practice will ensure a good result. It is similar with pasta, but Maribel has developed a brilliant process that ensures a really good hand-rolled pasta every time after taking one of her lessons. Taking her class is the first part of this process to be personally coached by her; one does need to be coached and get the right feeling of how to make this hand rolled dough.
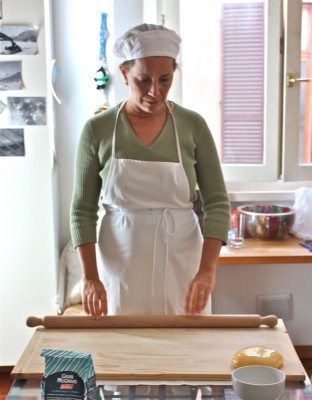
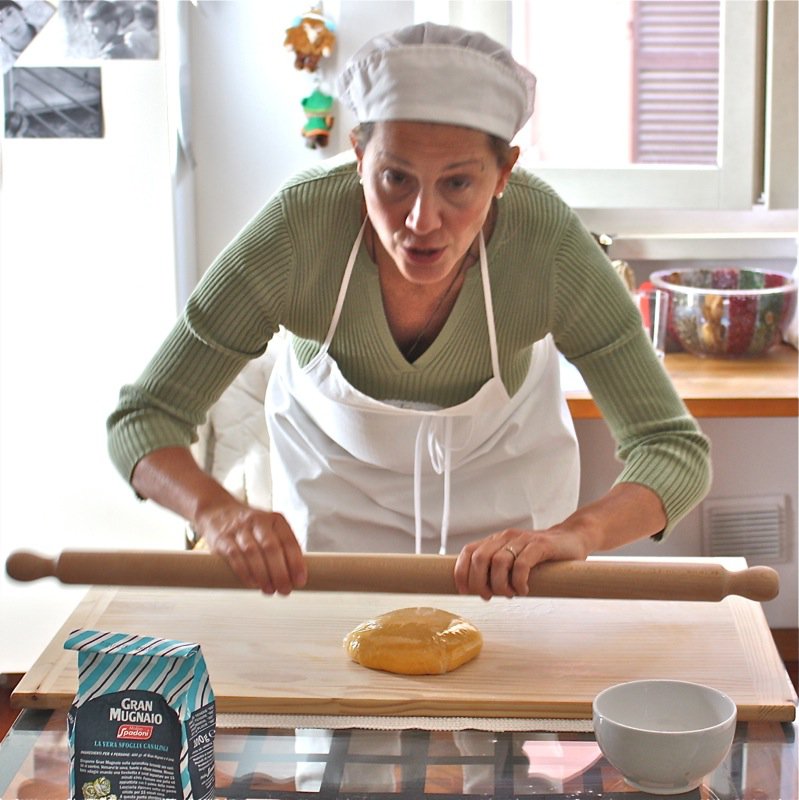
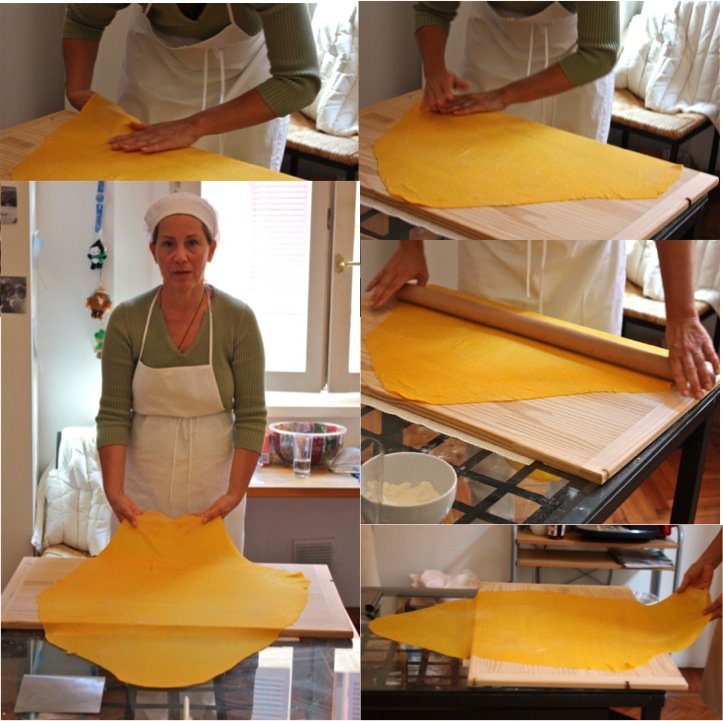
Rolling Hand-rolled Pasta Dough
Maribel has developed three parts to the hand-rolling process:
- Up and down
- Window Washer
- Edges
These techniques are her own, and personally, I find them brilliant! She carefully went over each one before actually demonstrating it on the dough. The thirty minutes were up just as she finished scraping the board to clean it of any dry bits. Consistently, dust with only a whisper of flour as needed before laying the dough on the surface after each ¼ turn.

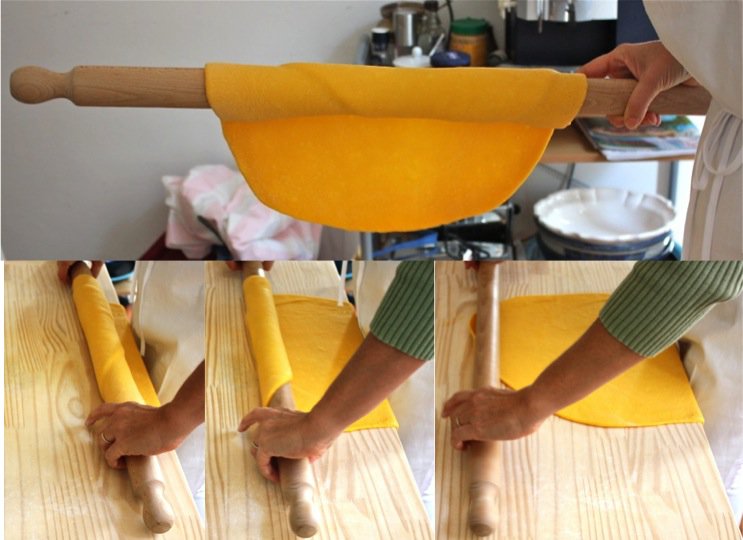
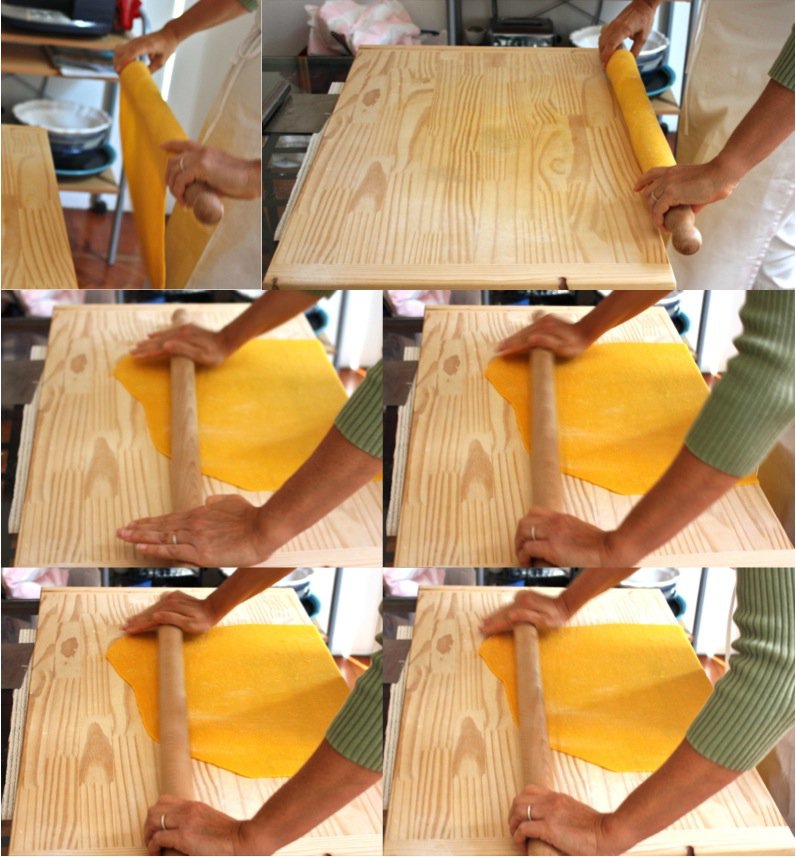
1. Up and Down Technique
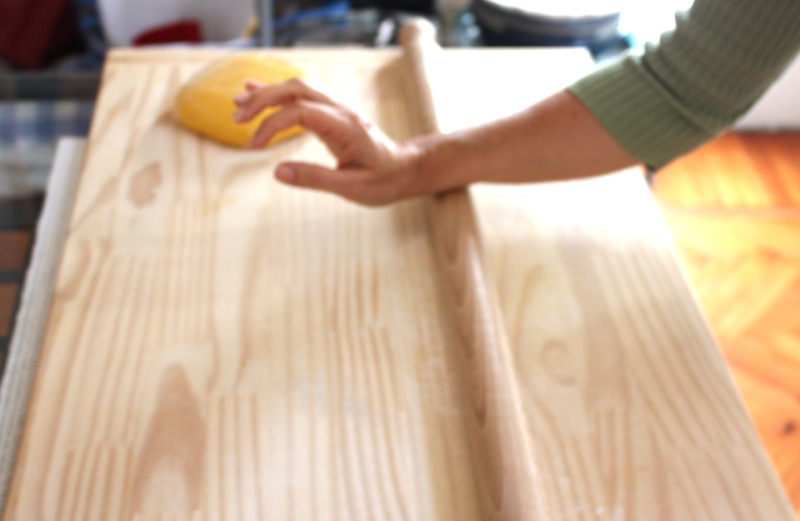
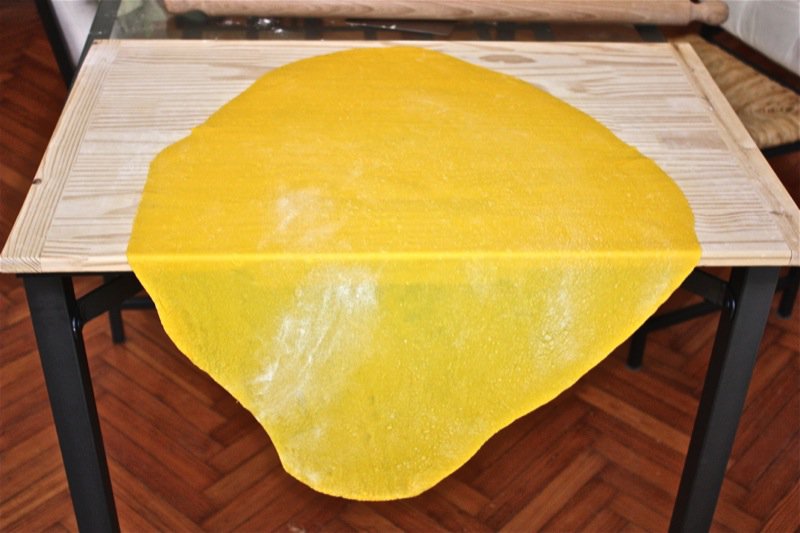
- This motion is used to flatten the dough. Use your hands on the rolling pin from tips of fingers (up) to heel (down) and roll three times, then turn the dough ¼ turn and continue three more times up and down. Turn dough ¼ turn and so on, until the dough is the size of a large round dinner plate.
- This process ensures a nice round shape.
You can see the cupped hands Mirabel models for me, and if you read the instructions, you can do this!
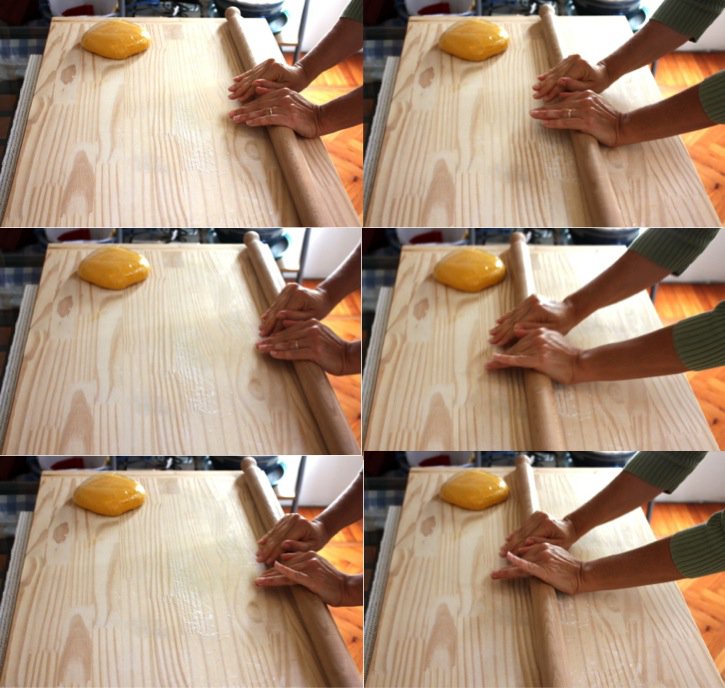
Mirabel was very specific about staying focused and in control. No slipping up and rolling onto your wrist! It took a great deal of concentration once I got started. Hope you can make sense of the photos below coupled with the instructions. I had Mirabel demonstrate for me so I could have this photo essay as reference. I needed a video camera! And I really did do 80% of the rolling! I should have taken a photo of the sweat on my brow and my back to prove it!
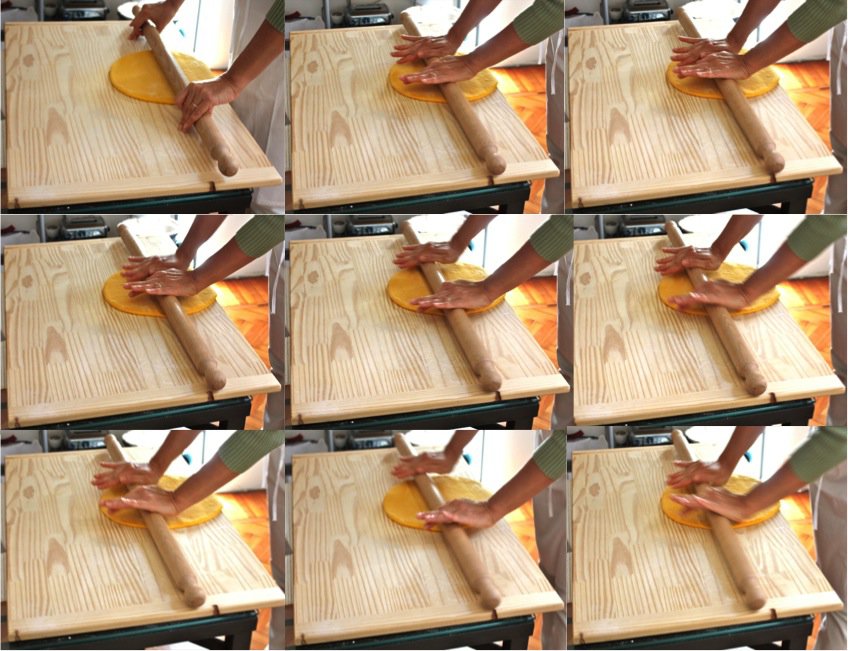

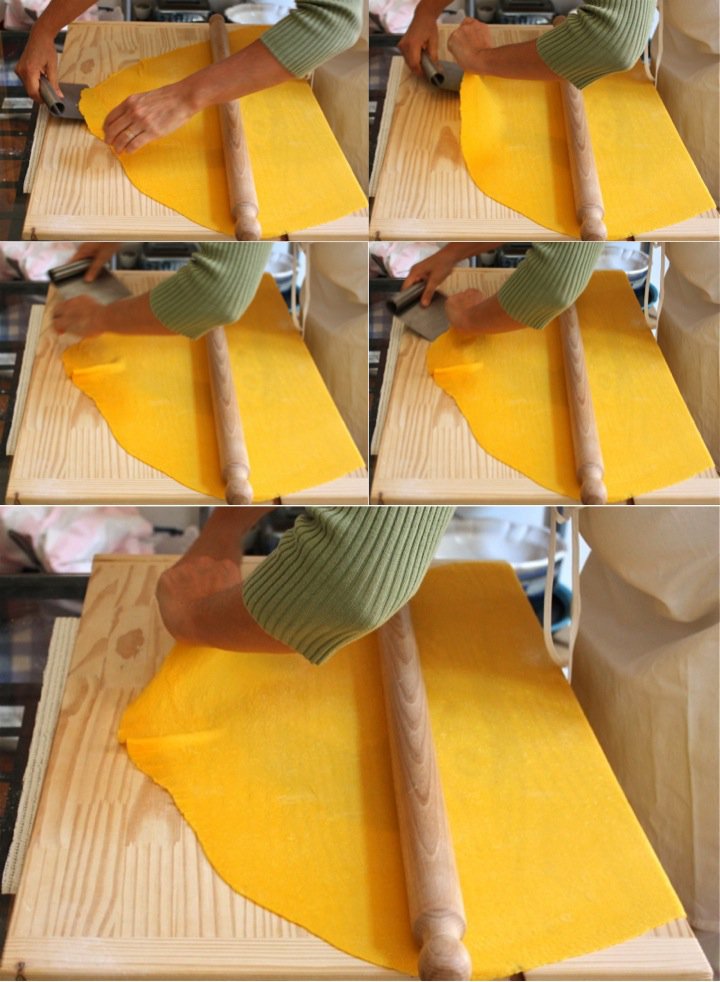
2. Window Washer Technique: there are two parts to this technique
a. In and Out Washer
- When the dough is the size of a large round dinner plate, place your rolling pin in the middle of the dough and work up only.
- Cup your hands over the rolling pin and keep them in a cupped position; place them in the middle of the rolling pin and roll up moving your hands from in (the middle of the pin) to out (the ends of the pin to where the dough is) in small “window washing” circles. As you roll your pin up over the dough, your hands need to be moving from the centre of the pin across it and back to the centre and across as it rolls up over the top half of the dough: in and out, in and out, in and out.
- Stop short of the edges: do not roll over the edge!
- Do this three times, then turn the dough ¼ turn and continue three more times: in and out.
- This process ensures an even distribution of weight over the dough.
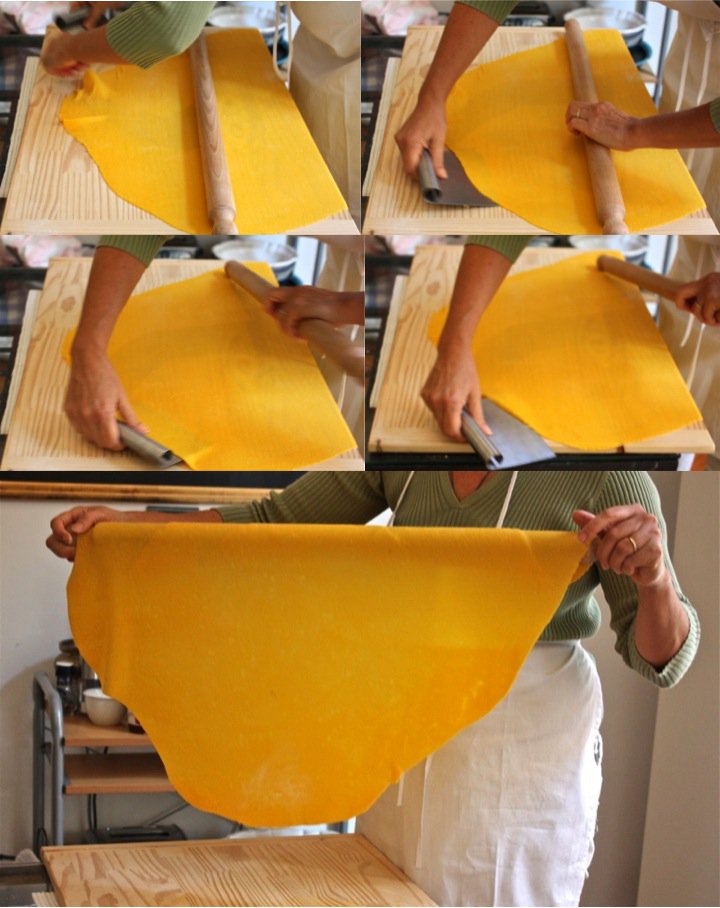
b. The Breaststroke Washer: demonstrated above
- Still working from the middle of the dough and up not touching the edges, uncup your hands slightly. As the dough is getting very big, even weight distribution is very important. Use your hands from the middle of the rolling pin to the outside, still “window washing”, but in larger, more sweeping strokes with a more open hand.
- Do this three times, then turn the dough ¼ turn and continue three more times.
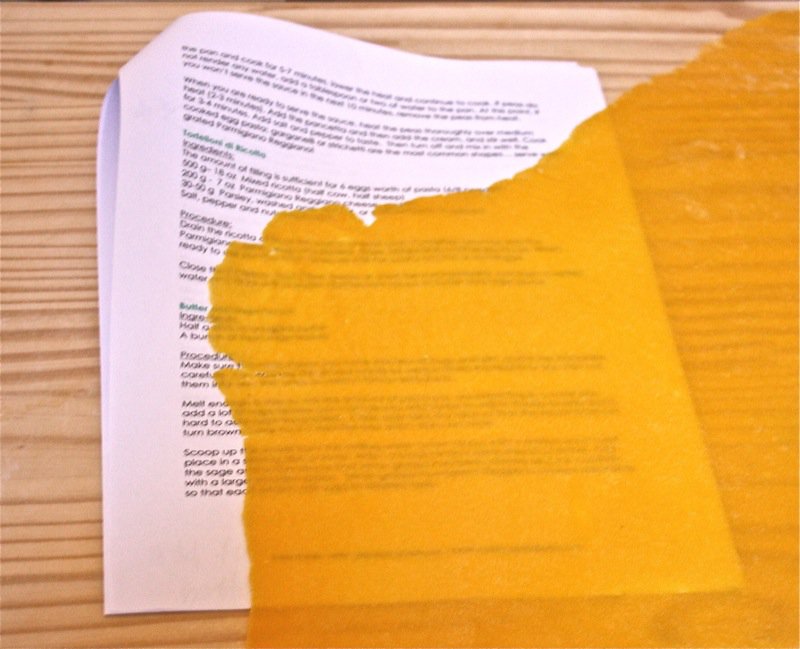
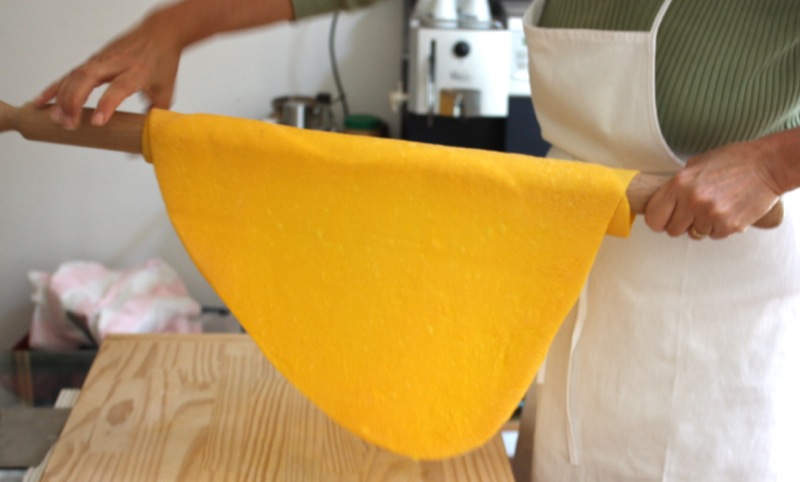
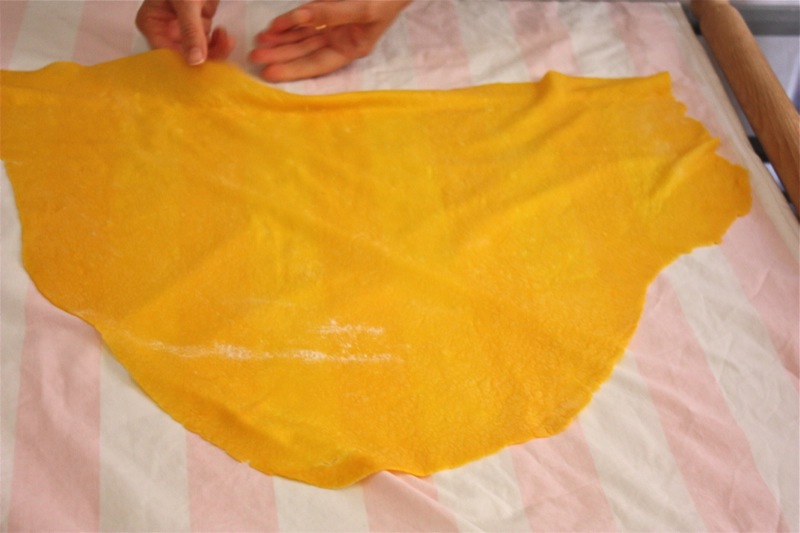
When the dough is thin enough to read through, or as the Bolognese say, “The pasta is thin enough when it is held in the window and one can see San Luca Basilica through it.”, it is time to work on the edges.
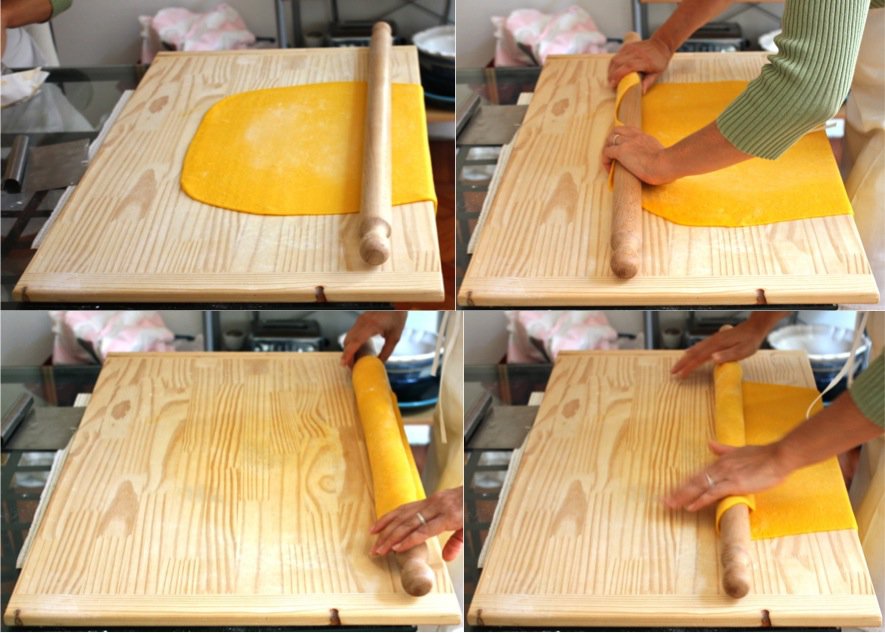
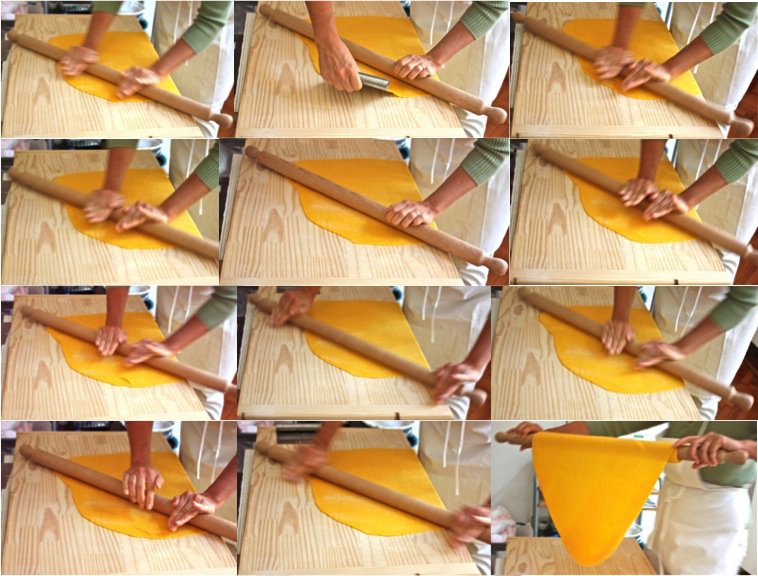
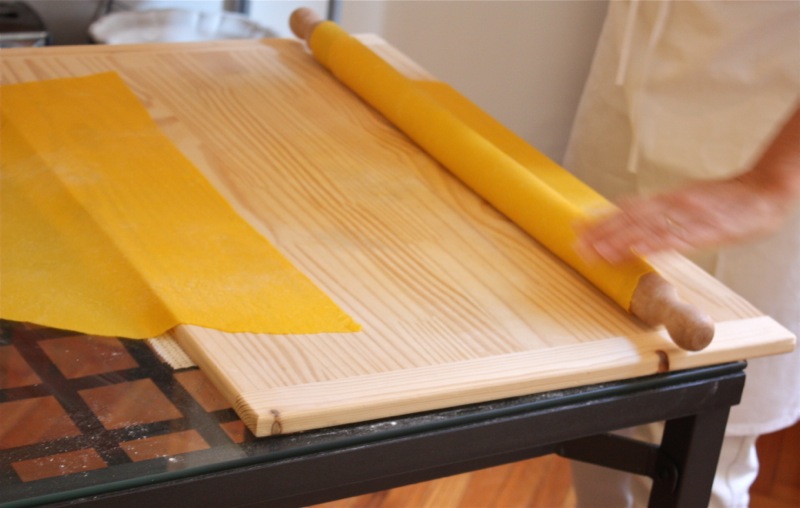
Turning the Dough
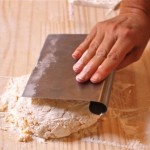
- When the dough becomes too large to pick up and turn on your own, first check to ensure that it is not sticking to the pasta board. If it is, use your metal spatula to loosen the dough.
- Once the dough is loosened, place the rolling pin at the top of the dough. Pick up the dough with the pin and swiftly give it a little tug to ensure that the dough is tight around the top of the rolling pin.
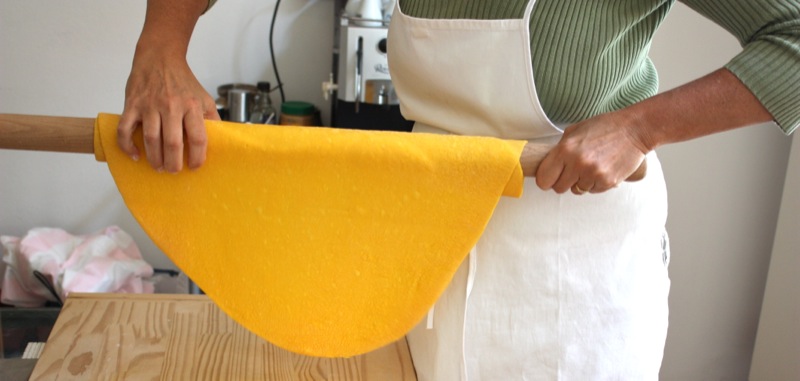
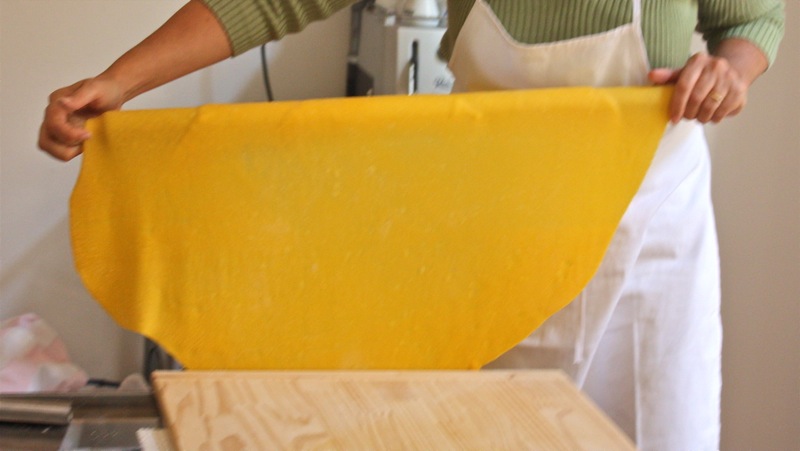
- Never touch the dough. No fingerprints allowed! (see last photo where Mirabel demonstrates how to NOT touch the pasta when turning the dough)
- Tuck your fingers around each end of the rolling pin so the dough doesn’t slip off of the pin, and roll the dough up onto the pin. Turn the dough ¼ turn and unroll.
- Place your rolling pin in the middle of the dough, and now switch from in and out to the breaststroke.
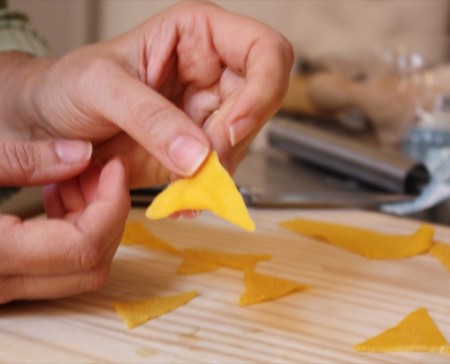
3, Edges: rolling the edges
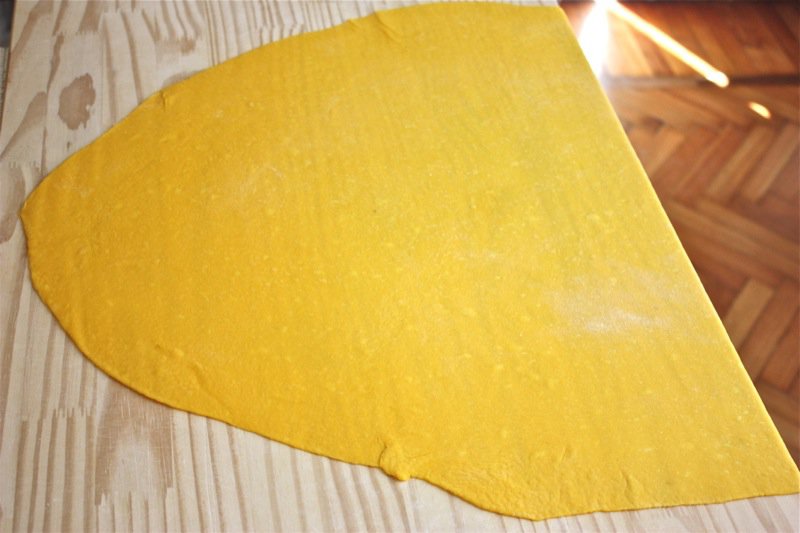
- Depending upon the amount of pasta you are making, the sheet could be enormous by now, and difficult to work with, as mine was for four people. Work on each edge only once, if possible.
- Place the pin near the edge and use one hand only, if necessary, or two, but distribute the pressure on each hand according to the need of the pasta. Work through ensuring your edges are as flat and thin as the body of the sheet. If the piece is too big, cut it and move ½ and work with only ½.
Turning the Dough when rolling the edges: as it gets really thin
Use the spatula to release the dough from the board; it has a tendency to stick, and is very delicate at this point. Be gentle. Slowly, slowly: there is no rush.
- Tortelloni is made with pasta that is a bit thicker, but not much. You should still be able to see San Lucca through it, for sure! But, save your thicker portion for the Tortelloni if you are making it. Below, the pasta was thicker in the section being rolled again using the “window wiper strokes” to thin out the thicker section. There was one end of our pasta we had purposely left a wee bit thicker than the rest for our Tortelloni.
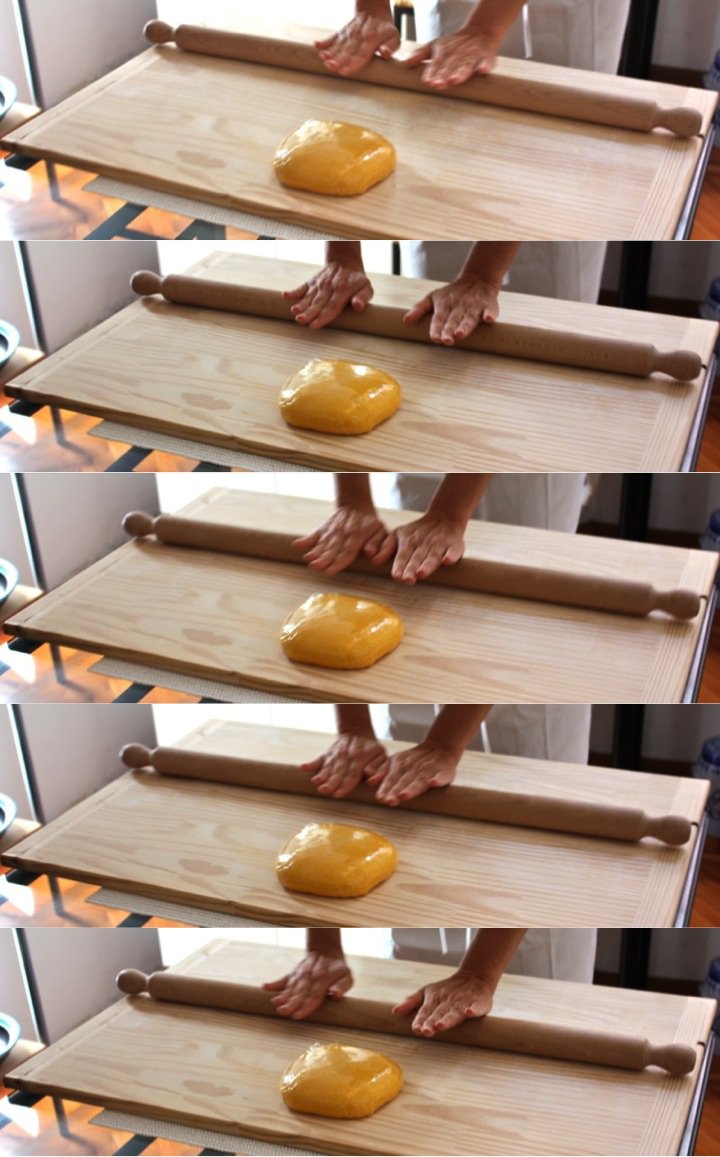
Usually Mirabelle makes a three egg pasta. This one is huge as we are having 4 people for lunch.The dough is soft and lovely. I did have to roll the edges with it hanging like this. She points out the little air bubbles within the dough that are evident if you look closely in the second photo below, as exactly what one wants to see!
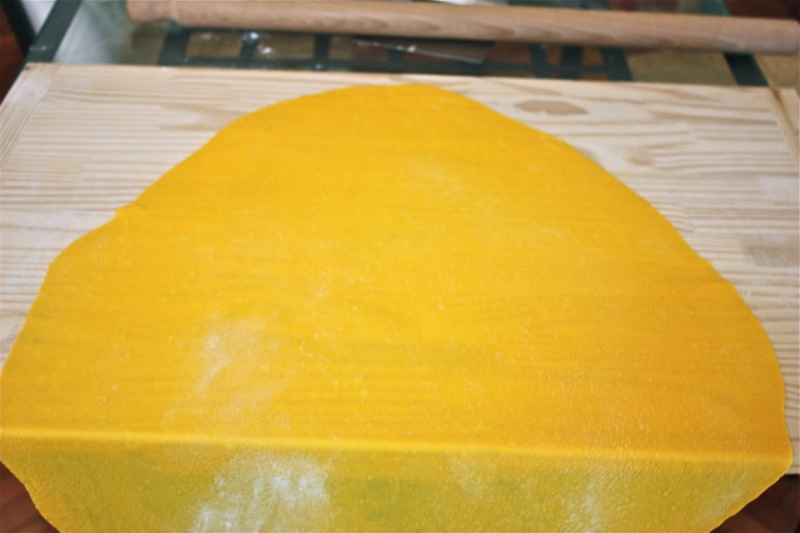
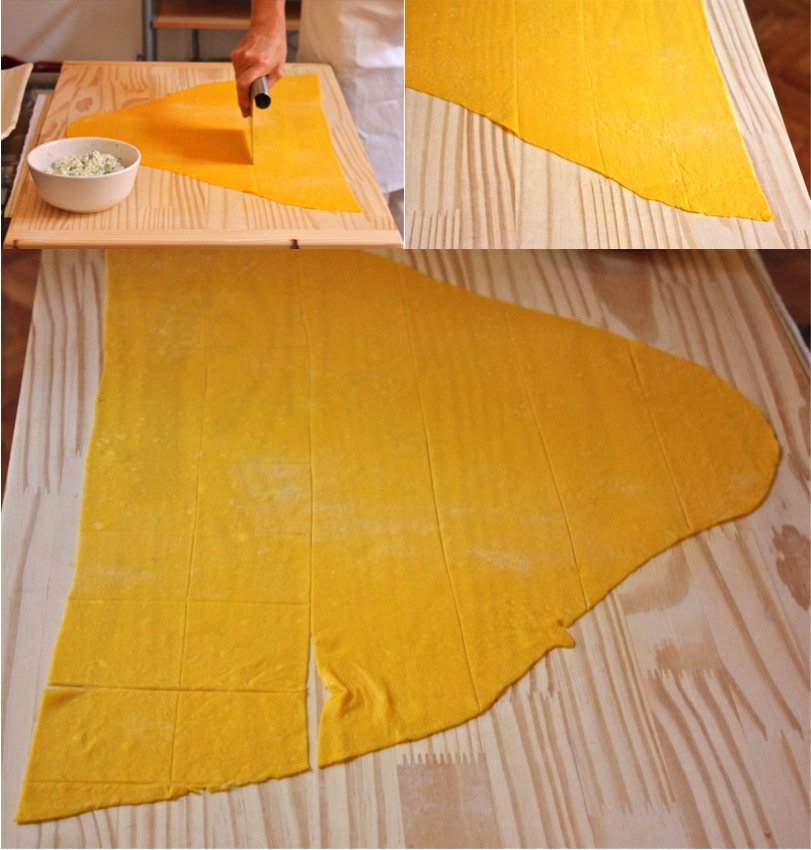
It is time to ready the dough for cutting and to do that, it all has to be on the table. This is not easy to do with such a large piece of very thin and very tender dough.
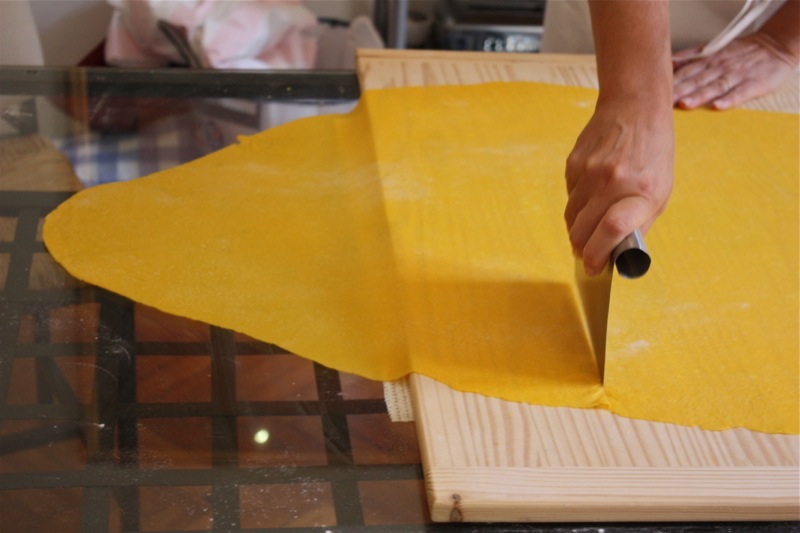
The thinner portion of the dough was laid on a linen to dry as it would be cut into wider strips and for that cut, needs to be drier; the thicker portion was for the tortelloni and placed on the cutting board and because Mirabel’s spatula was so sharp, she continued to portion the tortelloni squares with it.
Cutting Hand-rolled Pasta Dough for Handmade Tortelloni

Tortelloni vs Tortellini
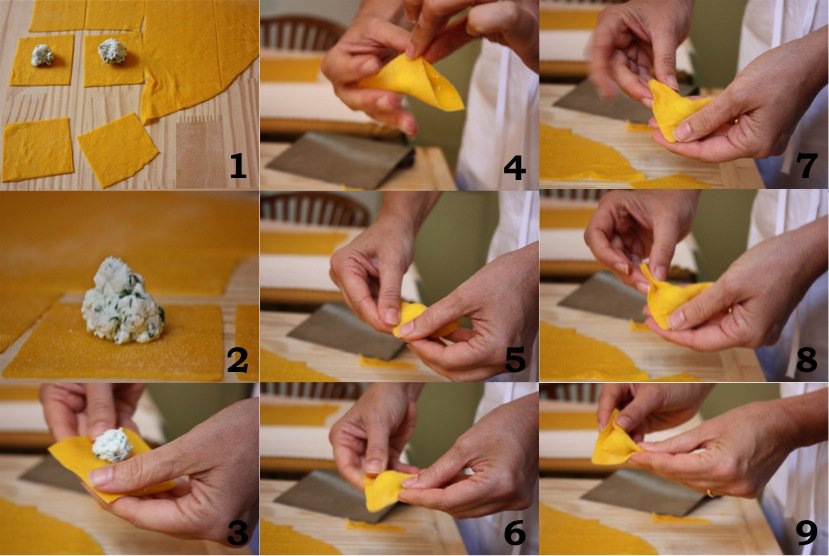
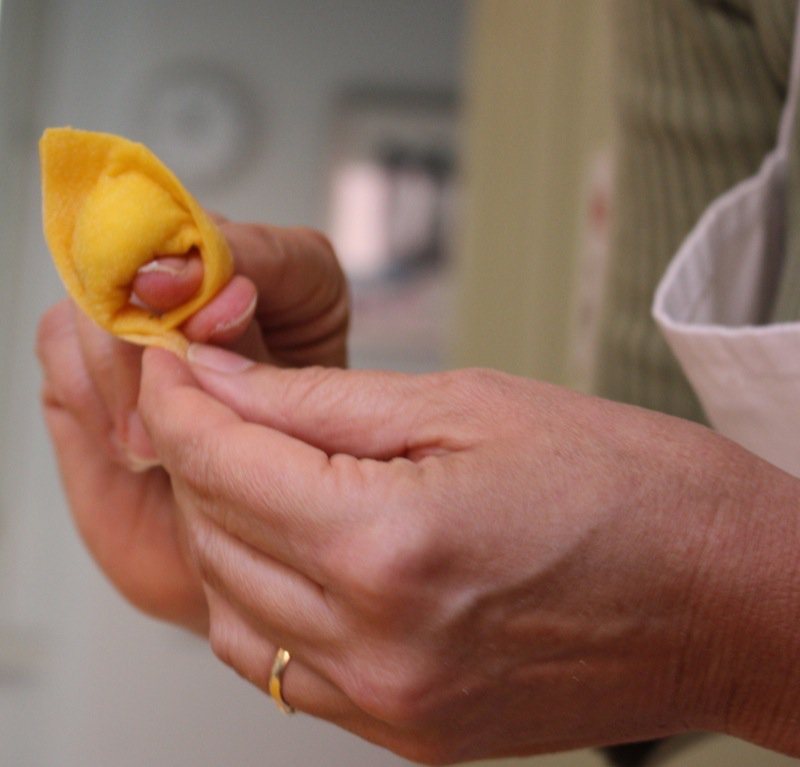
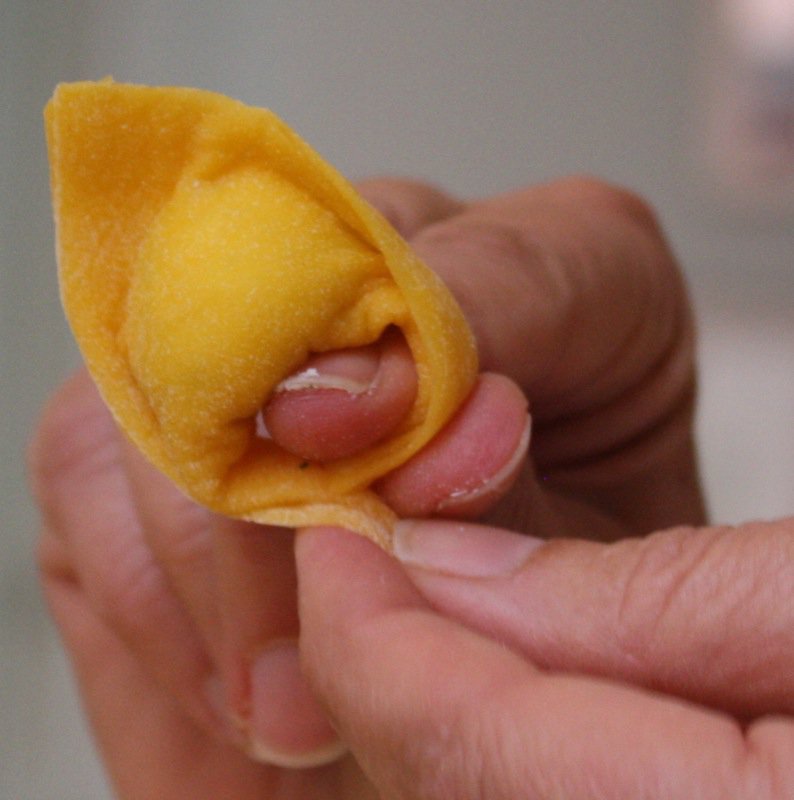
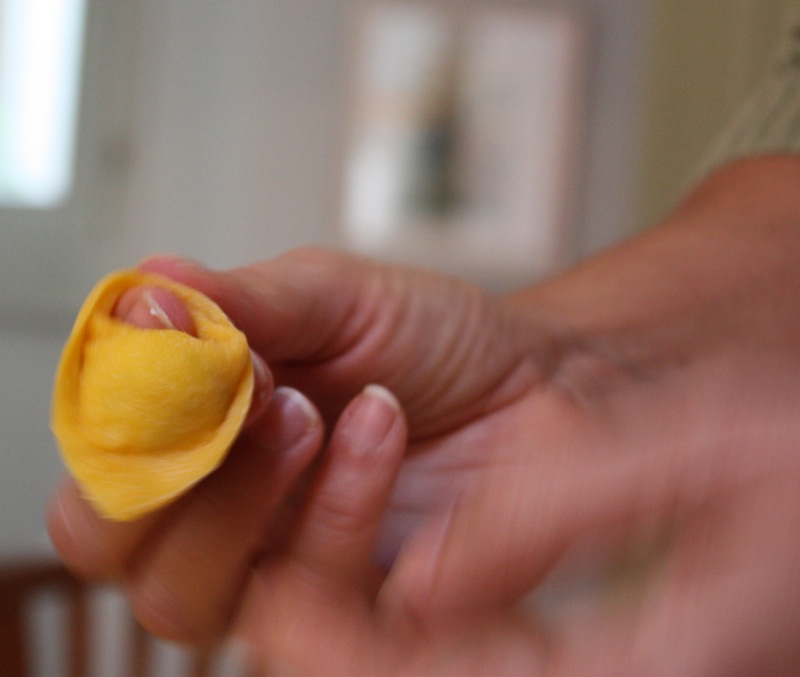
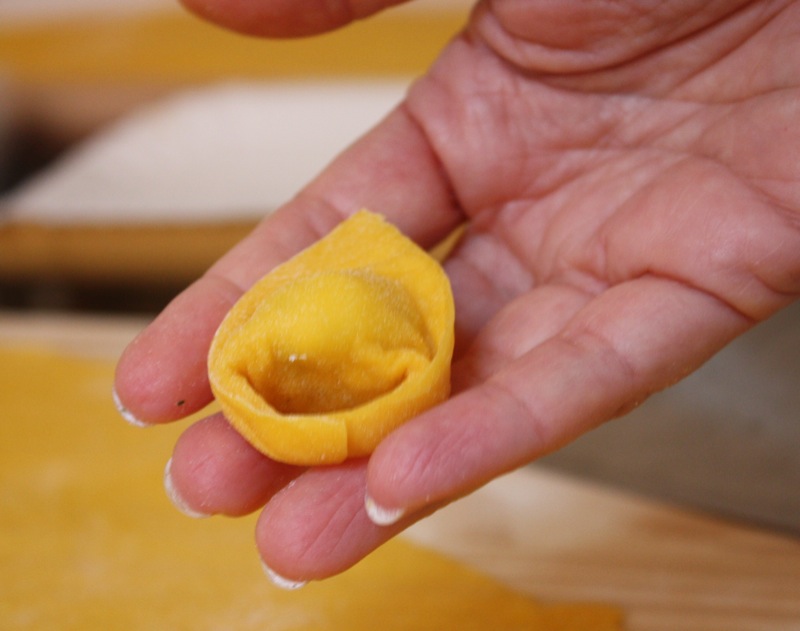
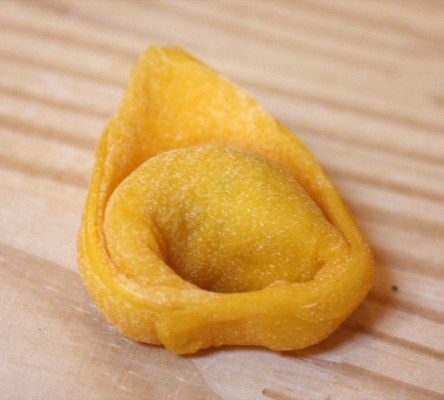
Interestingly, what we call Tortellini in North America is actually tortelloni. Tortellini is a true specialty as it is so very tiny and incredibly labour intensive to make. Below, Mirabel demonstrates the difference between tortellini and torelloni using a little ball of pasta dough as the filling for the tortellini. You can see the difference in the size of the square and understand why these are such a labour of love!
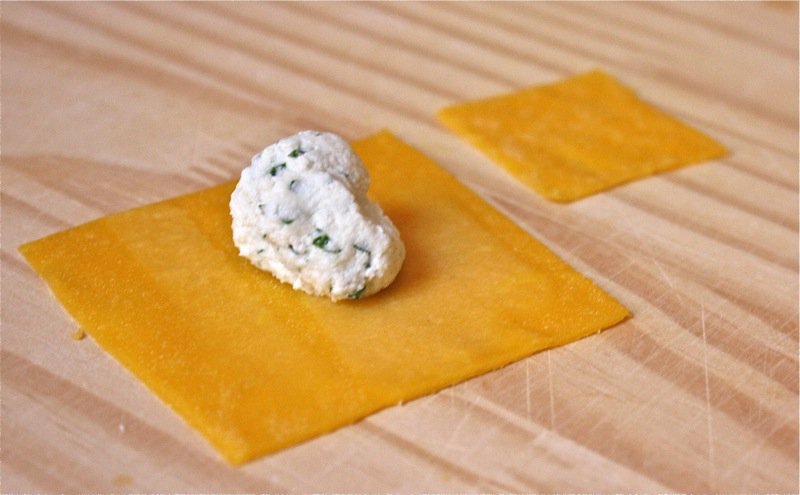
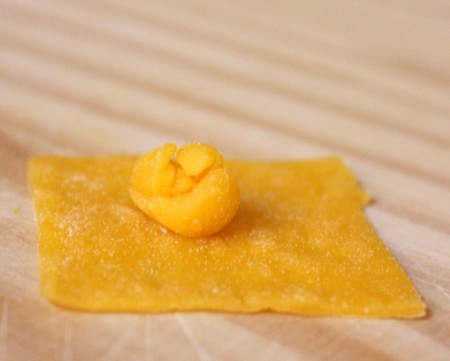
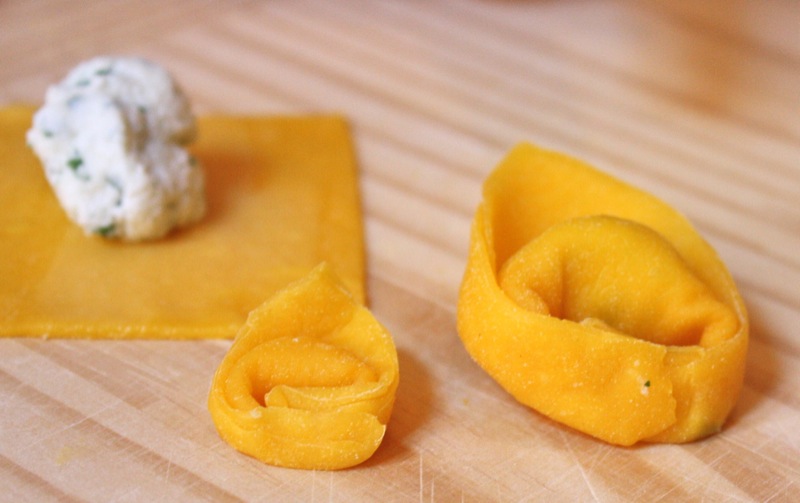
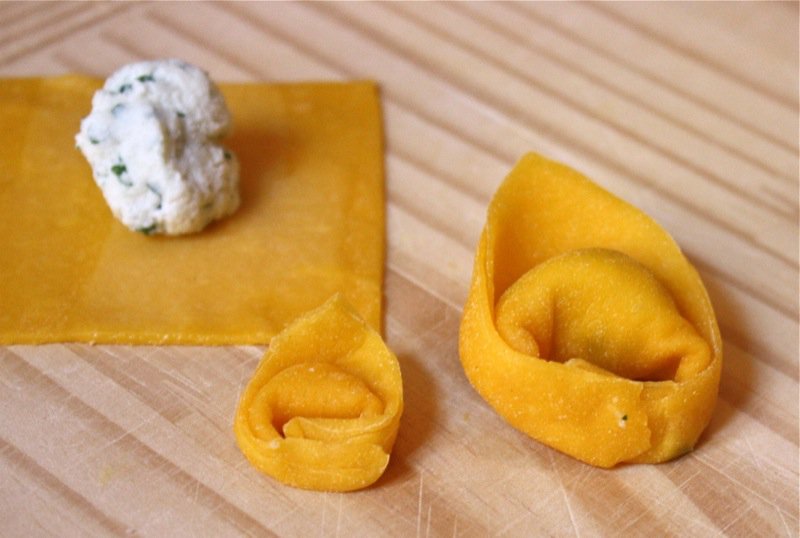
I should have had her hold them both in her hand so you could really see how tiny the tortellini is. You can buy it handmade many places in the Emelia-Romagna region but everywhere in Bologna. I could not understand how anyone would pay 24 Euros for 500 grams until I understood that it is truly hand made, and what it takes to make handmade tortellini. Martina was even kind enough to bring a package of manufactured tortellini home with her which we also had for lunch so we could compare the difference in the taste. In Western Canada, such a product doesn’t exist, even in manufactured form. We only have access to frozen tortellini which is actually tortelloni, due to its larger size. Even the processed tortellini in Italy was tasty, I confess!
Cutting Hand-rolled Pasta Dough for Handmade Piselli
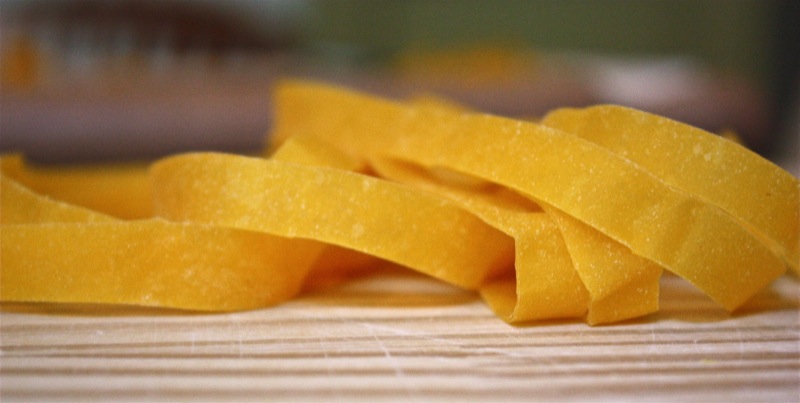
Cutting Hand-rolled Pasta Dough for Handmade Taglietelle
Cut straight down through folded pasta with a sharp knife; do not use a seesaw motion!
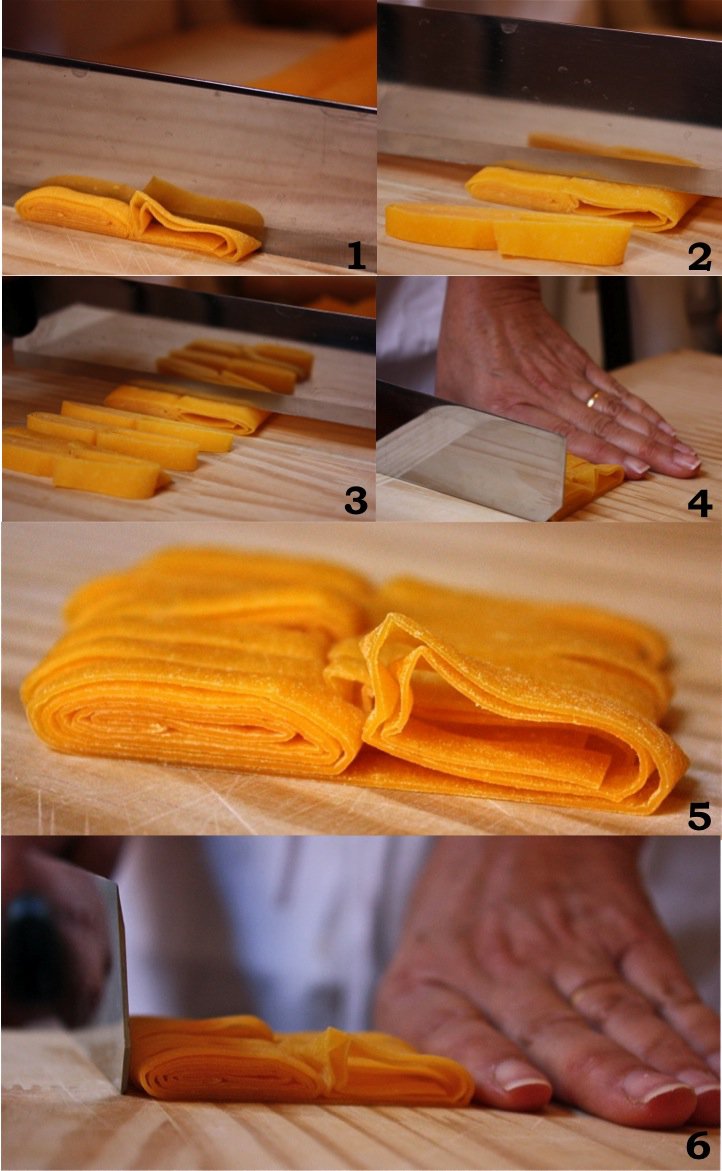
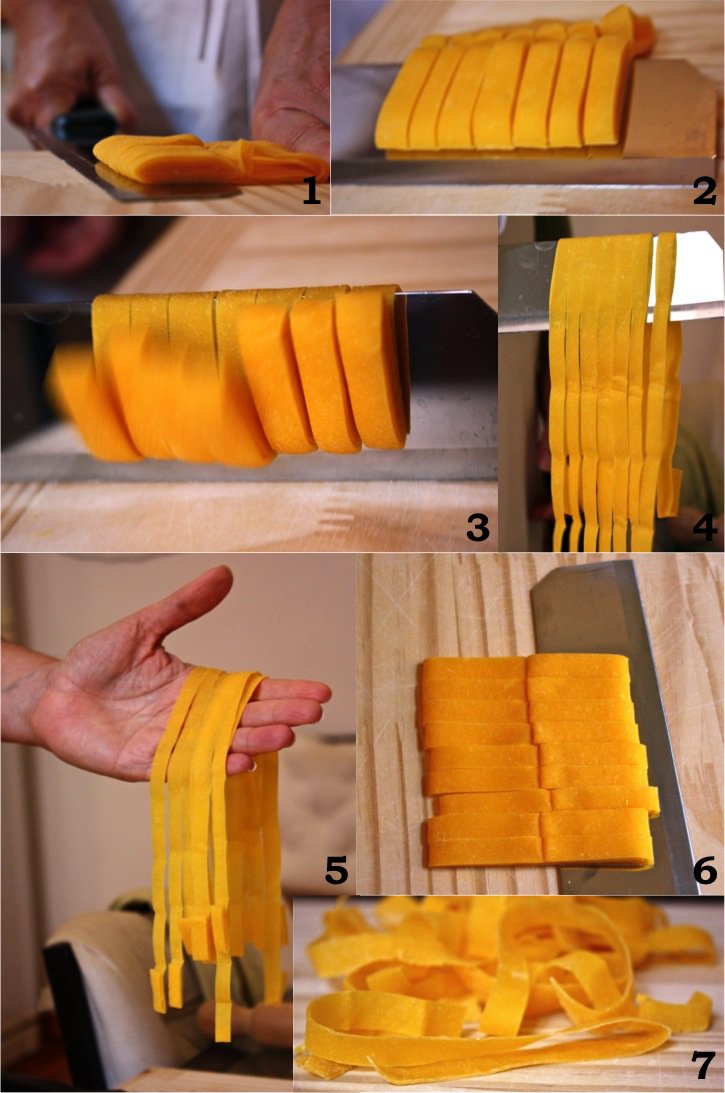
And remember, “Non si butta via mente!” which means nothing goes to waste!
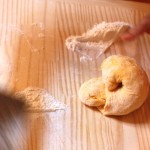
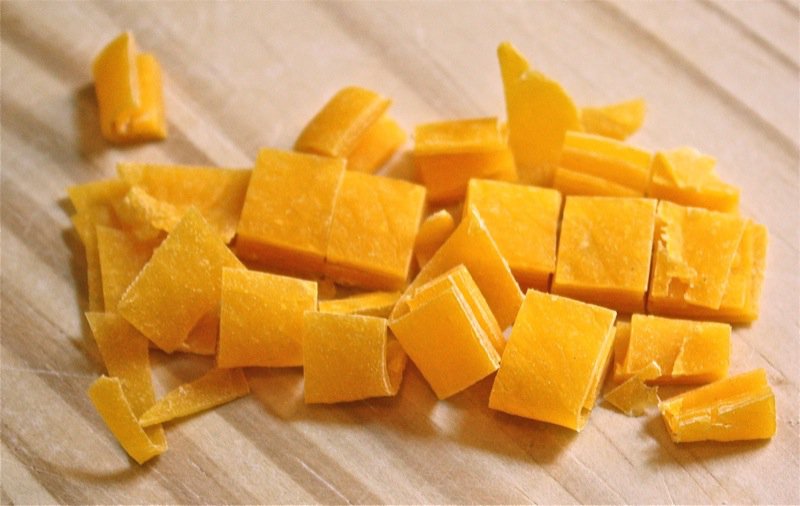
Maltagliati (meaning “poorly cut”) pasta are tiny cut squares made from the left over bits of pasta saved for soups.
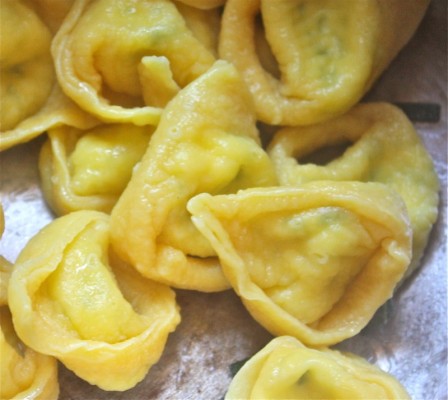
Test for Doneness of Hand-rolled Bologna Tortelloni
Cut at top point and look to see if still hard inside of the tip, and if so, cook longer.
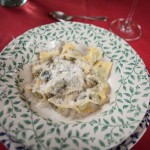
Traditional Tortelloni di Ricotta with Butter and Sage Sauce Recipe
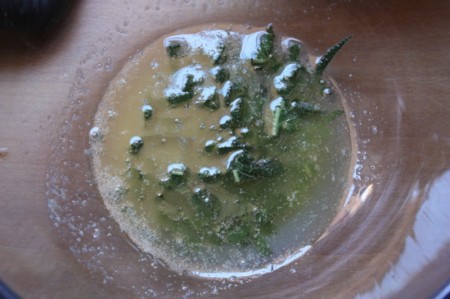
Ingredients filling for 6 people:
- 500g mixed ricotta (½ sheep, ½ cow)
- 200g Parmigiano Reggiano
- 30-50g flat leafed parsley (or spinach), minced
- salt, pepper and freshly ground nutmeg to taste
Instructions:
- Hang ricotta in cheese cloth to drain a few hours or overnight, if necessary (if it is already nice and thick, there will be no need)
- Mix all ingredients together and use to fill pasta
Note: If making a big batch, it is faster to place in a pastry bag, but I find it just as easy to use my hands to form the small balls. Some people add egg to this mixture which does change the texture of the filling and isn’t really necessary; garlic, to taste, is another common addition to this filling
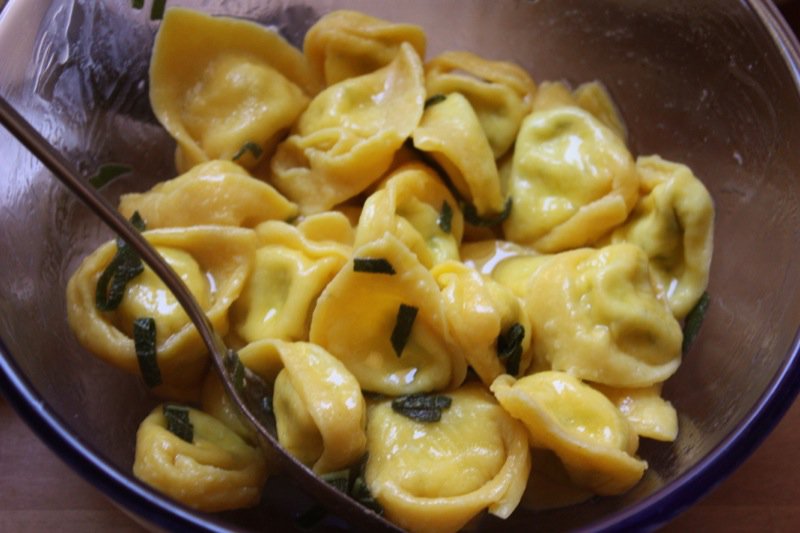
Butter and Sage Sauce
Ingredients for 4 people:
- ¼ cup of unsalted butter
- fresh sage leaves, whole or slivered
Instructions:
- Make sure your sage leaves are free of bugs and dirt if just from the garden (check the back sides carefully); leaving the leaves whole is the Emelia Romagnia tradition, but “fancy” restaurants tend to julienne them
- Use enough butter to veil the pasta you are serving; melt in a small pan
- Add a lot of sage leaves; you can always add extra butter to adjust the sage flavour later, but you cannot add extra sage later as it needs to cook
- Cook on a very low heat so it does not brown for 5-7 minutes; set aside
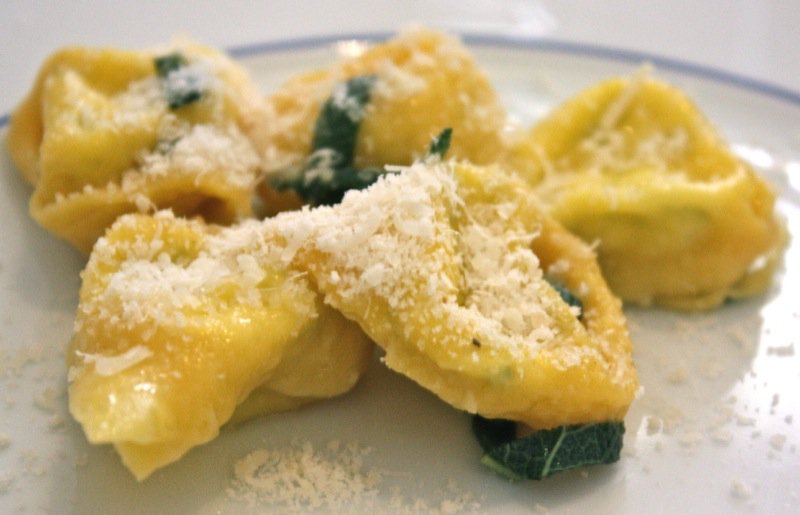
- Place pasta in a serving bowl when done; add 1-2 walnut sized dobs of butter and pour in the sauce, grate Parmigiana Reggiano over the dish and carefully toss all together with a large wooden spoon.
- Serve immediately with extra Parmigiana Reggiano on the side
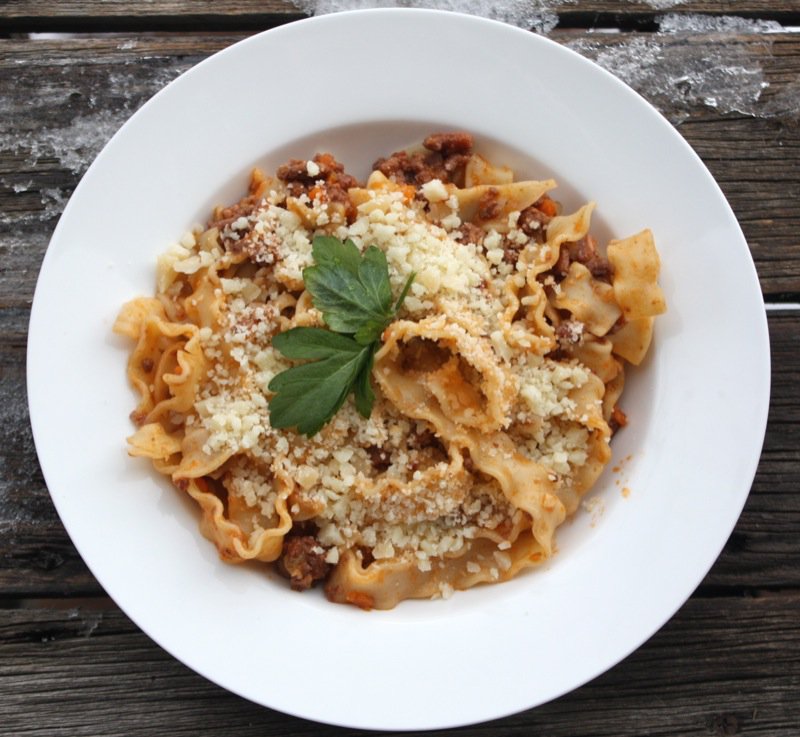
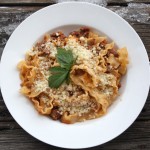
I did make the Official Bolognese Sauce (or Ragu, as the Italians call it) after my lesson with Mirabel! Check out the recipe and more lessons from Mirabel in that article. Is is scrump-dilly-ishious!
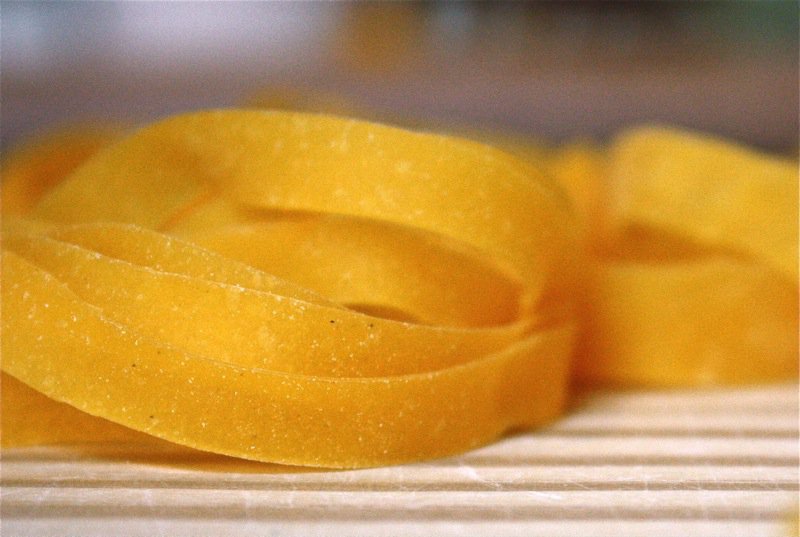
Traditional Homemade Hand-rolled Taglietelle Pasta
Ingredients:
- 100g 00 flour
- 1 egg
Instructions:
- This is the correct portion per person when making hand rolled pasta for a meal; there are two factors to consider when determining how much flour to incorporate into the eggs: the weather and the weight of the eggs. These will always vary, thus the exact amount of flour used each time will also vary. (Pay close attention to the texture of the dough and leave out or add more flour as required.)
- Follow the pictorial and written instructions from the top of the post to just above: final step is cutting the pasta
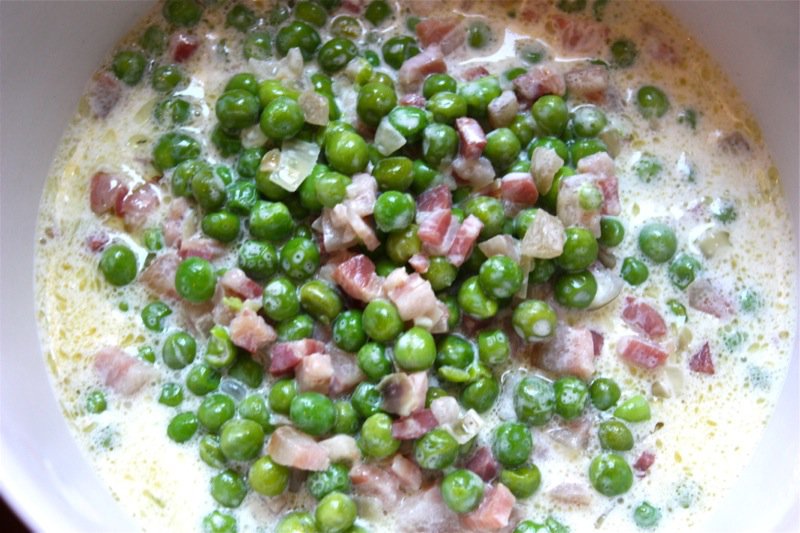
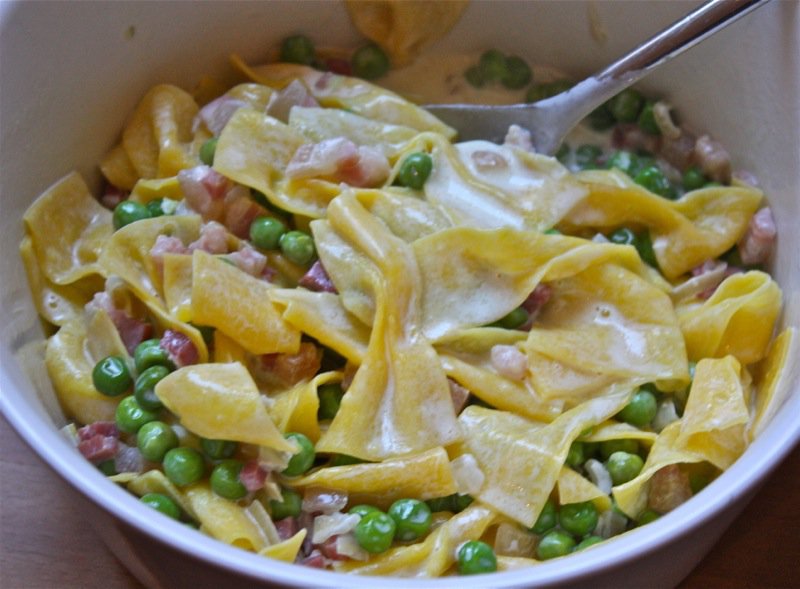
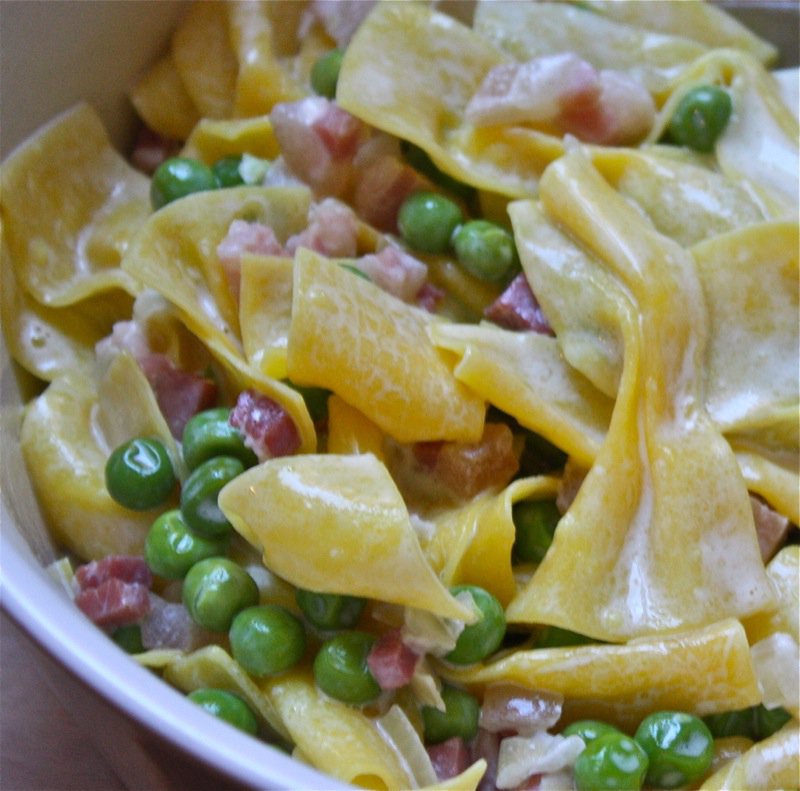
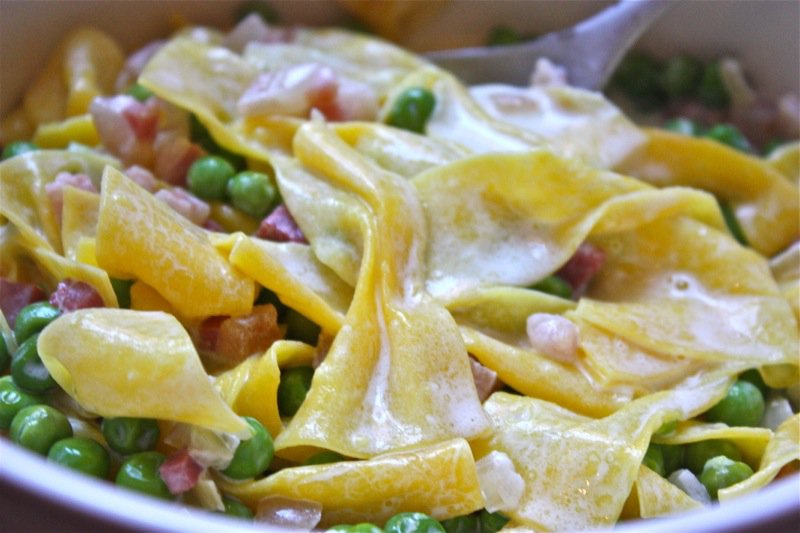
Piselli, Pancetta e Panna (Three P Pasta) Recipe
Ingredients for 4:
- 200g pancetta, chopped into small cubes
- 2 shallots, diced
- olive oil
- 150 – 200g small frozen peas
- salt and pepper
- 100g cream, or more, to taste
- Parmigiano Reggiano
Instructions:
- Cook pancetta over high heat until crisp
- Add shallots and sauté until translucent; add olive oil if needed
- When pasta is ready to be added to the sauce, add cream and peas and season to taste with salt and pepper
- Add pasta (garganelli and strichetti are the most common shapes used in this recipe) and toss; serve immediately with freshly grated Parmigiano Reggiano
It is evident, when looking at the photos, how tender, and ethereal hand-rolled Bolognese pasta is. This was on my bucket list, and I am so thankful for Martina who introduced me to Mirabel, and for Mirabel for being such an extraordinary teacher!


OH wow what a detailed pasta making tutorial! I really really enjoyed the step by step pictures, they are going to come handy. Many people dont realize how important it is to work very detailed when making pasta. That’s how different qualities are distinguished. Love the yellow of the pasta, so rich and perfect! i remember my teacher saying too, that one should be able to read the newspaper underneath the rolled out pasta dough, she used to say the same for the strudel dough. ^.^
I realized that the egg yolks in central Europe are much more intensive in taste and colore compared to what I had seen here in India for example. Now it can be too because of the brown egg types. Anyway, the importance is to use organic farming eggs! Even my husband has realized the huge taste difference of organic produce. =)
Oh by the way, thanks for passing by my blog. Its nice to meet you and know that u have seen my country.
Valerie, that looks absolutely amazing! Can’t wait to try it! N
Making pasta is such a labor of love! What gorgeous, golden yolks her eggs have and the pasta is such a beautiful color from them. The pasta dishes made from them look mouth watering!
There is nothing like hand made food in Italy, Susan… unless it is handmade food from the Alberta Prairies… 🙂 V
You really had fun at your pasta class. Can you find a large kneading board and a long rolling pin in your area?
Simona!
I know it was an epic post, but so personal to me! I bought the rolling pin and have it – but need the board. Suggestions? My husband said he may be able to make me one, but I would need a plan. Do you know where I could find one?
🙂
V
oh my goodness – gorgeous!
Valerie,
No one else is as thorough as you are when it comes to teaching important basics like making pasta; you are truly the ultimate teacher! I just found here yet another reason to let my father (who is half Italian/Croatian and grew up on fresh pasta made at home) allow me to start a chicken coop. We need fresh eggs for the best pasta!!!!
Joumana
You are also Croation and Italian? Wonders never cease! You must, then – well, maybe then, if you knew his mother – have some experience with Balkan food culture, too? Though, it is exceedingly simple in comparison to the Lebonese cuisine which I know know must be your mother’s – or is it just your husband’s? Such a snoop, aren’t I? I have a lot of knowledge about my husband’s cuisine and we have only been together 15 years, but nothing like the knowledge you have of Lebonese cuisine. I learn so much with each of your posts I read.
(I know. This post was a TOME!)
🙂
V
Hello!
Great to see a fellow Canadian.
I found your site via Foodalogue and so glad that I did!
This is the best course in Pasta making that I have ever seen, it is awesome.
I am subscribing to your blog.
Have a Joyful Day :~D
Charlie
Charlie
What a lovely complement! I was ducking after writing this post as it is such an epic – but for true learners and lovers of food, it is a very informative post! Thank you for subscribing! You have just made my day!
🙂
V
Wow, Valerie! Looking at these photographs reminds me of the strudel dough my mother used to make! Thank you for sharing.
Valerie: This looks mouth watering and the directions are awesome. It has been awhile since I visited and I love the new look of your blog, the pictures and the added features. WOW!
Love your new site SO much, dear Valerie!!! You’ve done a fantastic job updating it and I love the new big pictures. 🙂
Krista!
Thinking of you – of course!!!!=)
I have been searching for detailed instructions in English, for a couple of years. This is the very best I have seen. Where did you buy your rolling pin, and how long is it?
I was attending a class in Italy, Rob. This was the instructors rolling pin. However, I have found them in almost every good Italian store in my travels. I am sure you can find one in your city in your “Little Italy”. Just ask anyone around the area.
🙂
Let me know how it goes. SUCH a gratifying day and now I love making my own pasta!
🙂
Valerie