Nadja Kerstane from New Way of Cooking introduces Russian Dumplings
![]()
![]()
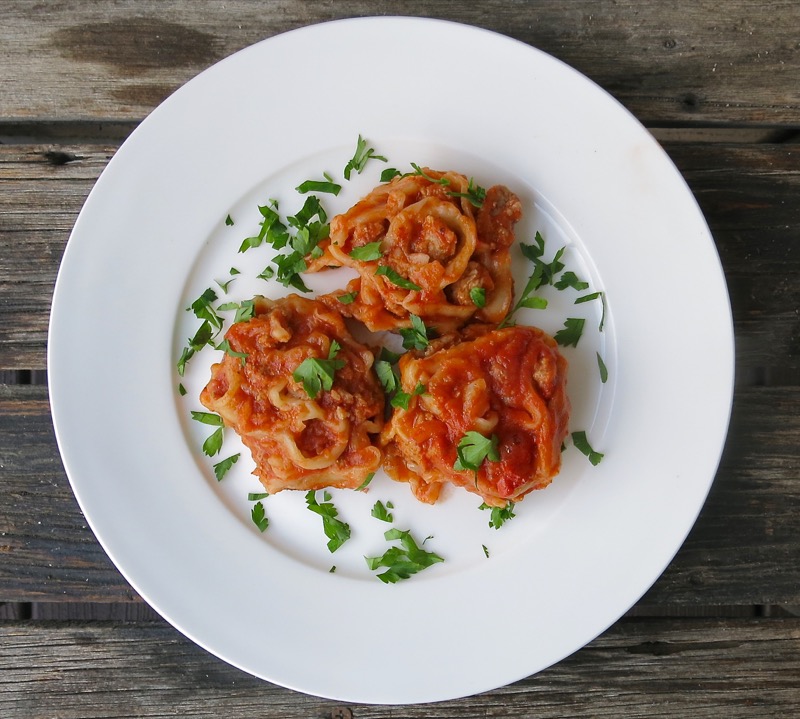
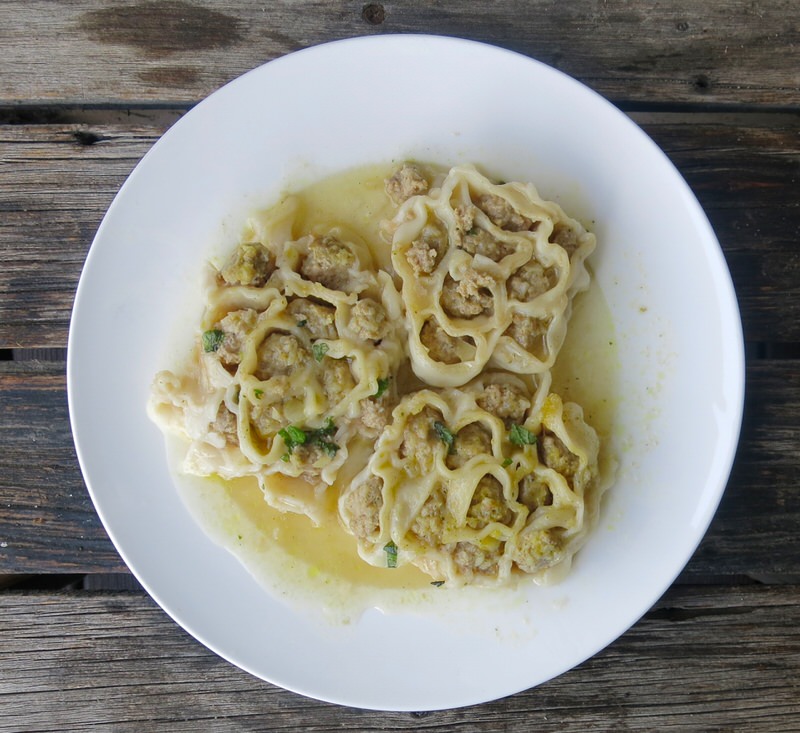
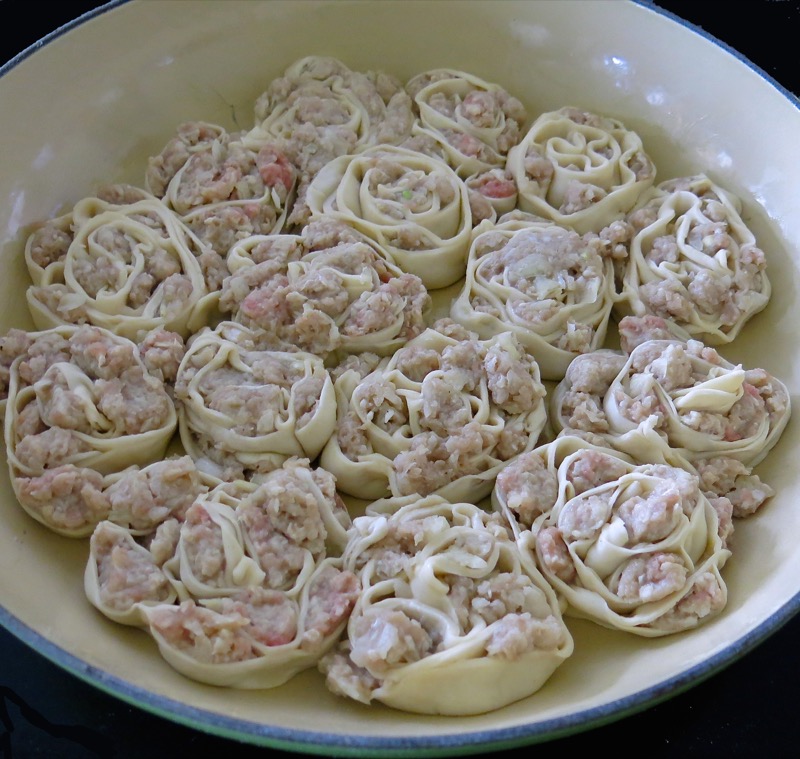
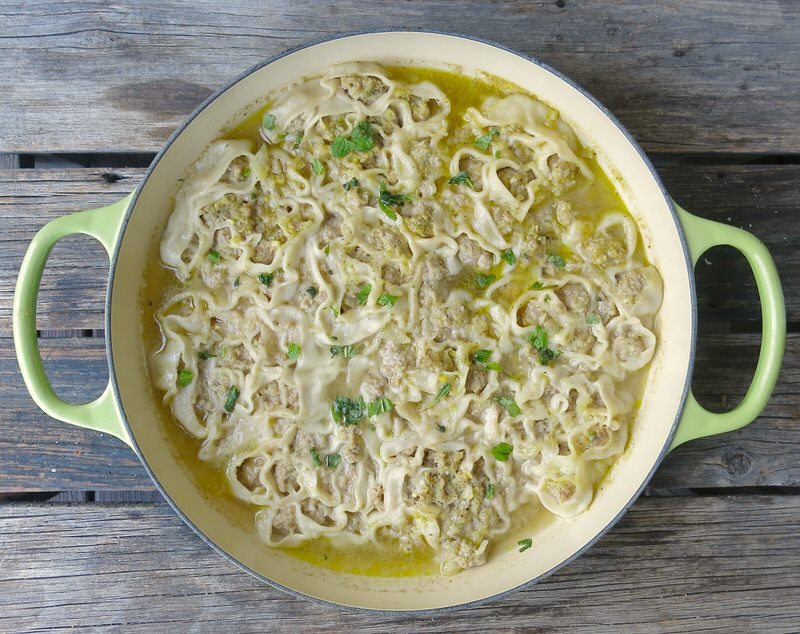
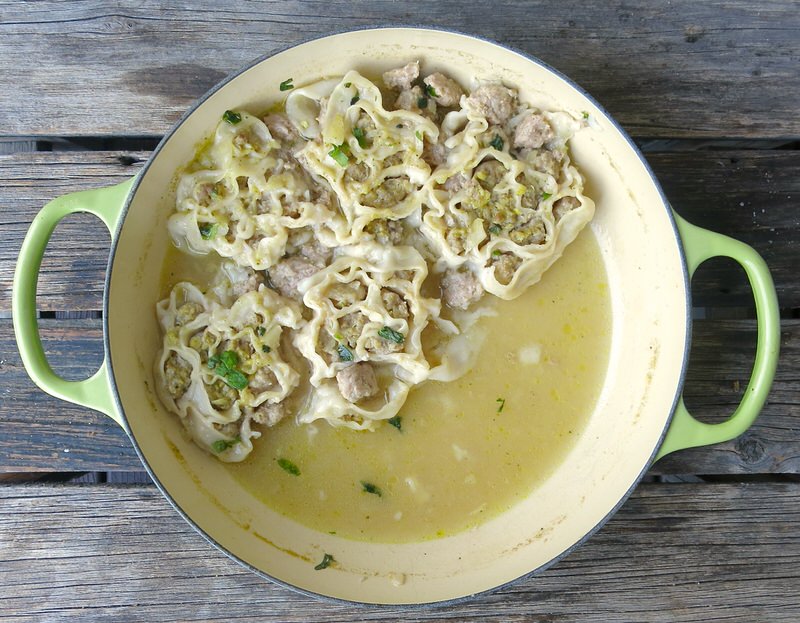
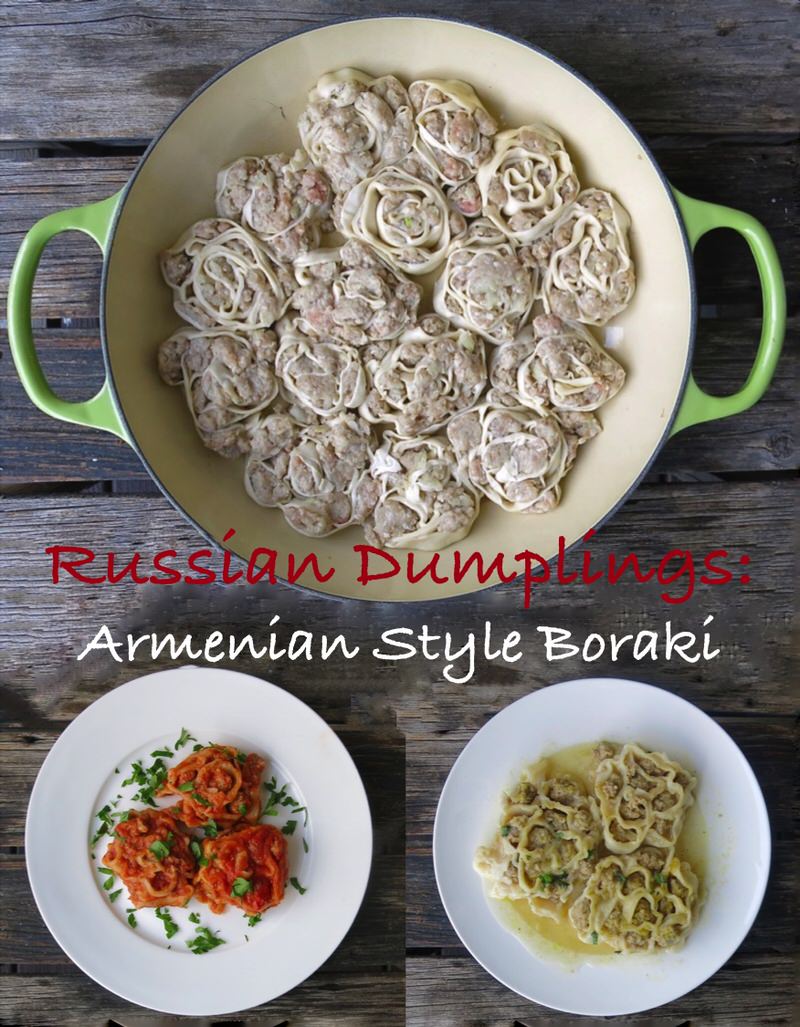
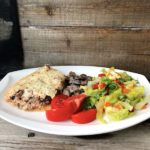
Teigtaschen, Boraki (Armenian style) and Mantji style Russian Dumplings are all made from this same recipe with only 5 simple ingredients: flour, water, salt, ground beef and onion. It is an incredibly tasty dumpling that can be presented in a soup, steamed, simmered in broth or in a substantial sauce. Versatility is the gift that this recipe offers. From these 5 simple ingredients and the techniques Nadja taught me, the variety of shapes, sauces, presentations and cooking processes for these simple Russian Dumplings is vast. Above, simmered in a Simple Tomato Sauce and below in beef broth.
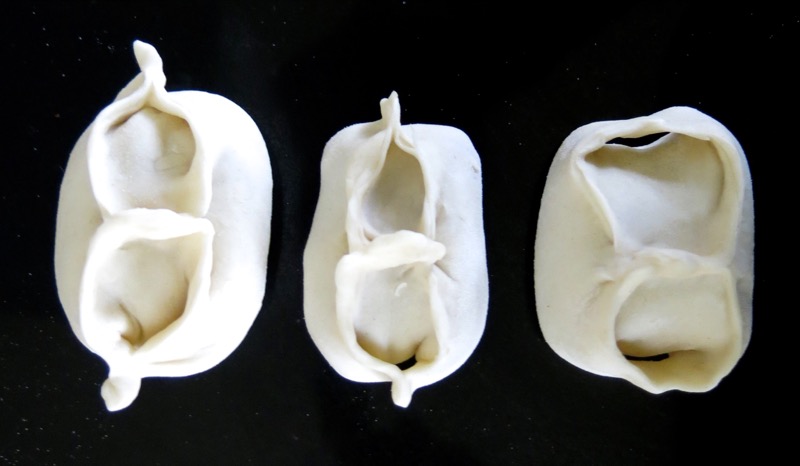
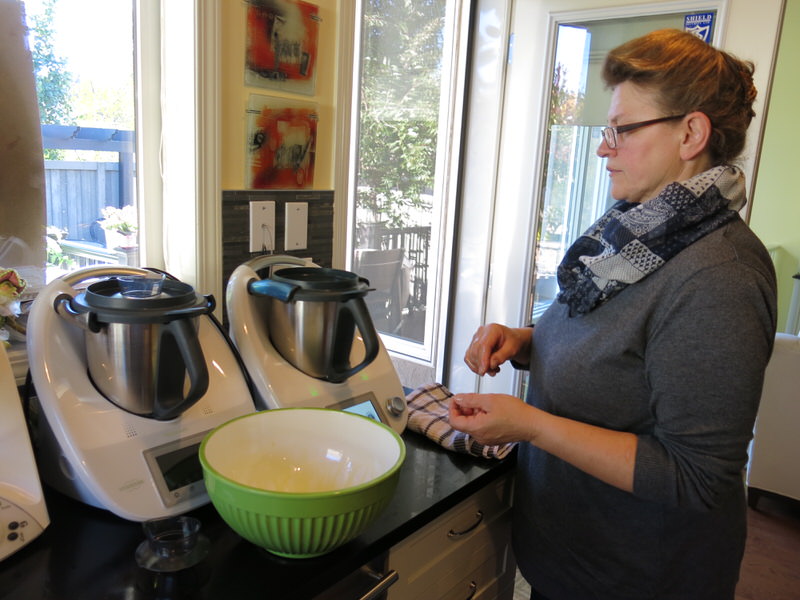
Nadja posted a photo on her Facebook Page of a pan filled with circle shaped pasta-like concoctions completely foreign to me, similar to the Russian Dumplings we made together, below. I texted her immediately asking if she would teach me how to make the dish after reading the ingredient list. Nadja and I met in June of 2014 when we started having local Thermomix Consultant Team meetings in my home. I have grown to love and admire her through our work together, and our shared love of cooking healthy nutritious, delicious food for our families in our home kitchens. She lives and works on her family farm near Barrhead Alberta, works another full-time job, sells Thermomix machines, still has 2 children at home of her 4 children and is a Grandmother of 6! This is a woman who owns her kitchen and has clearly been skilled since she was knee-high to a grasshopper.
Her website and Thermomix Food Blog, New Way of Cooking, is down right now, but I add a link to it when it gets back up. For now, you can find Nadja on Facebook, here.
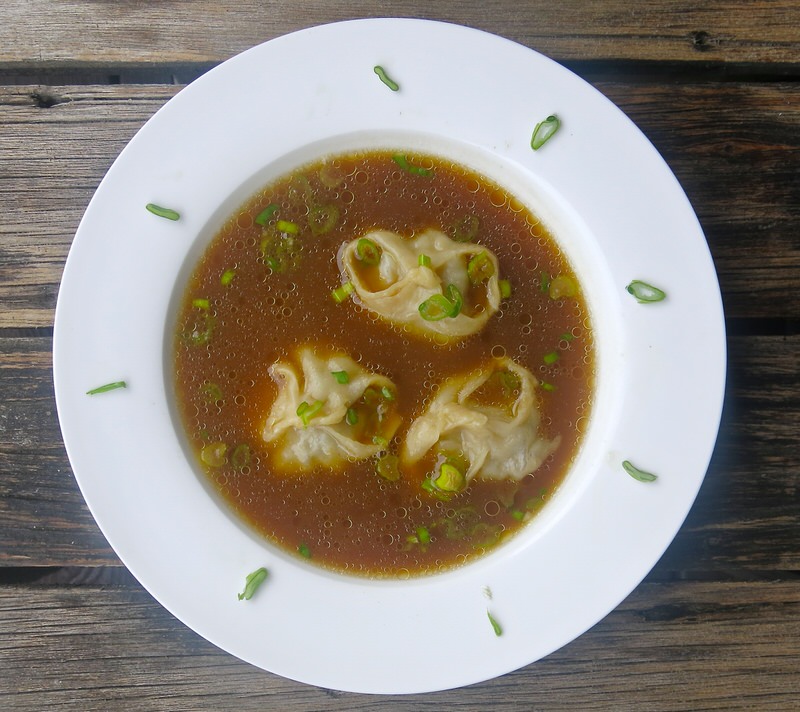
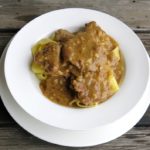
Even though the Russian Dumplings are made exactly the same way, simply simmered in a different sauce, the mouthfeel and taste experience is considerably different between these two dishes. That’s part of the charm of the dumpling. I haven’t tried them steamed, yet, which is Nadja’s favourite, but in a completely different shape. She didn’t mention adding them to a brothy soup, similar to a Wonton idea, and so far the soup version is my favourite for this dish. Of course, the broth must be a richly flavoured homemade beef broth, one round of the Boraki in each bowl with a smattering of green onions or chives as garnish for colour, texture and flavour contrast.
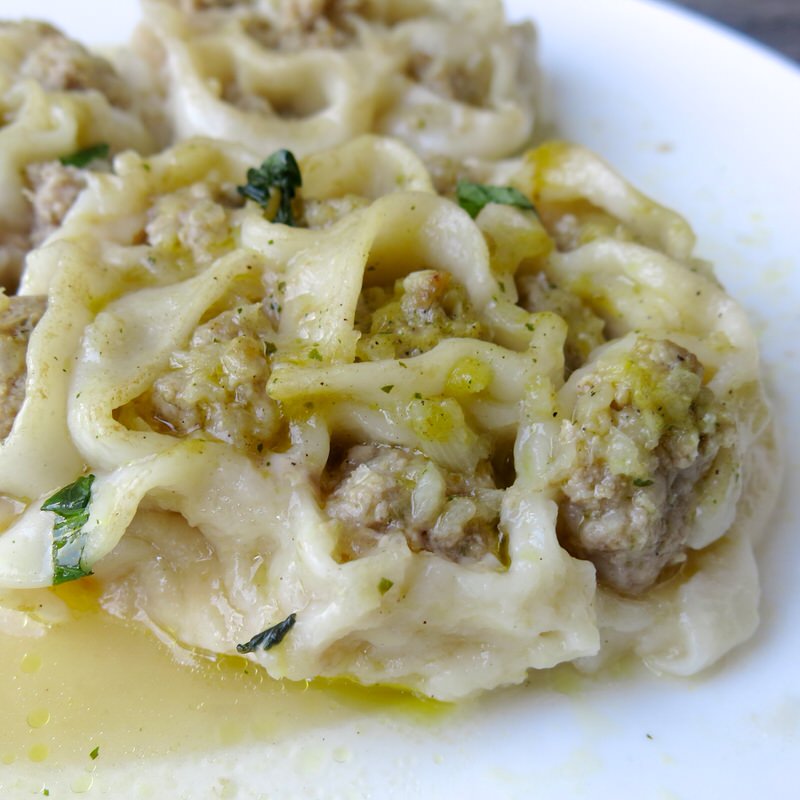
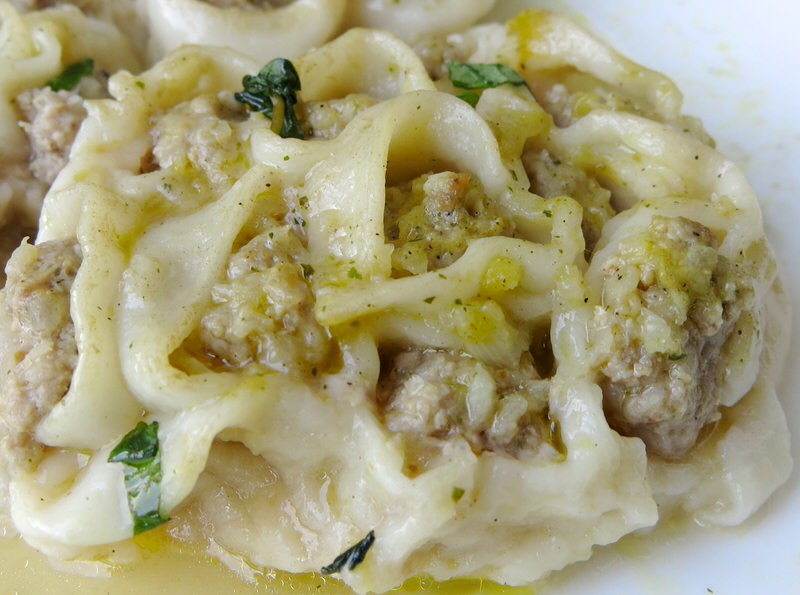
Supple, sumptuous pillowy dumplings give way to juicy, flavourful meaty mounds: simmered, sultry, simple home food that spells ‘comfort’ no matter where you are from.
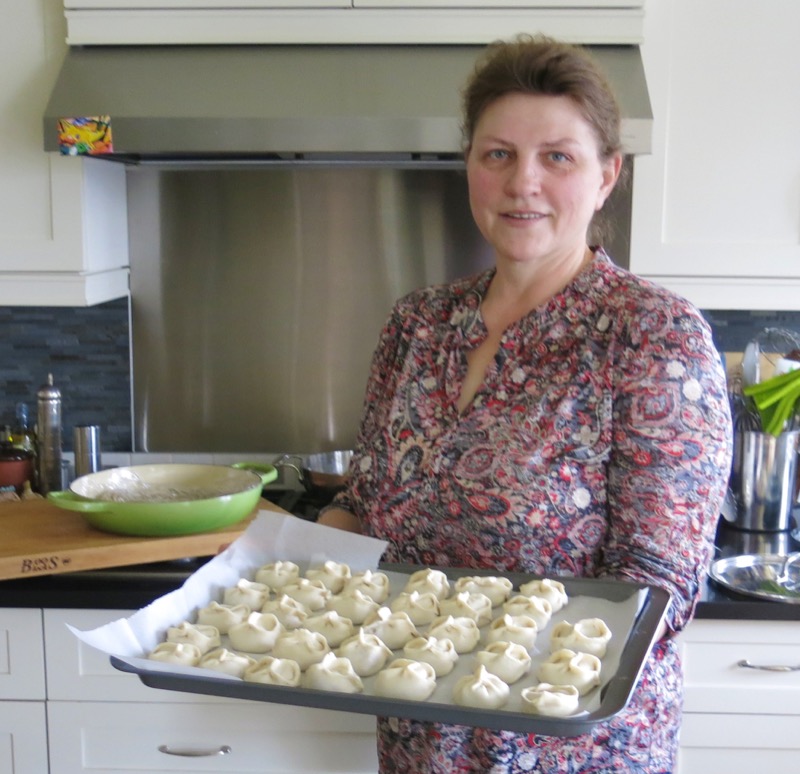
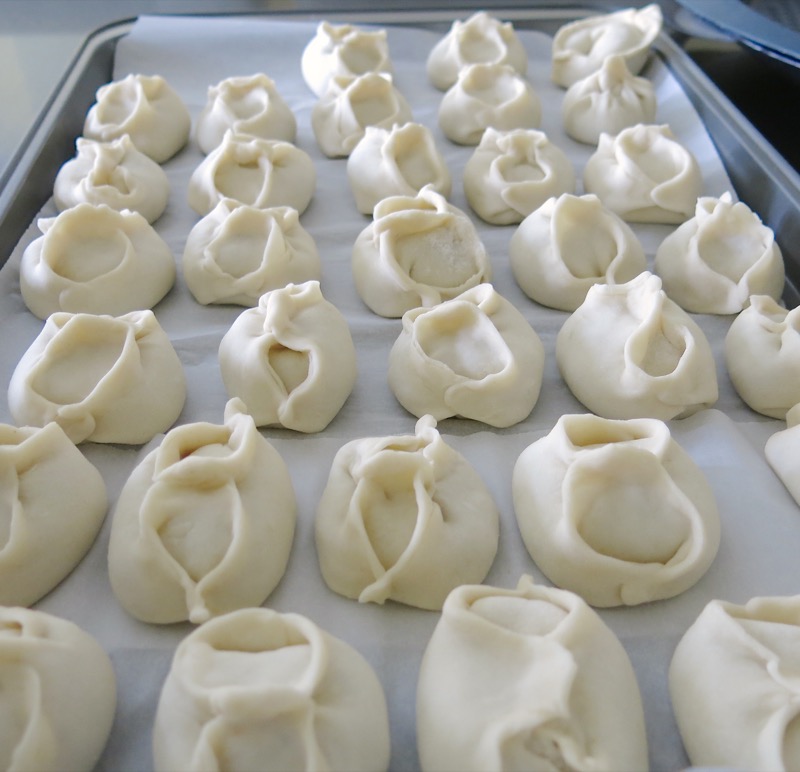
Nadja presenting the Mantji style Russian Dumplings just before they go into the freezer. These are the ones best steamed that are Nadja’s favourite.
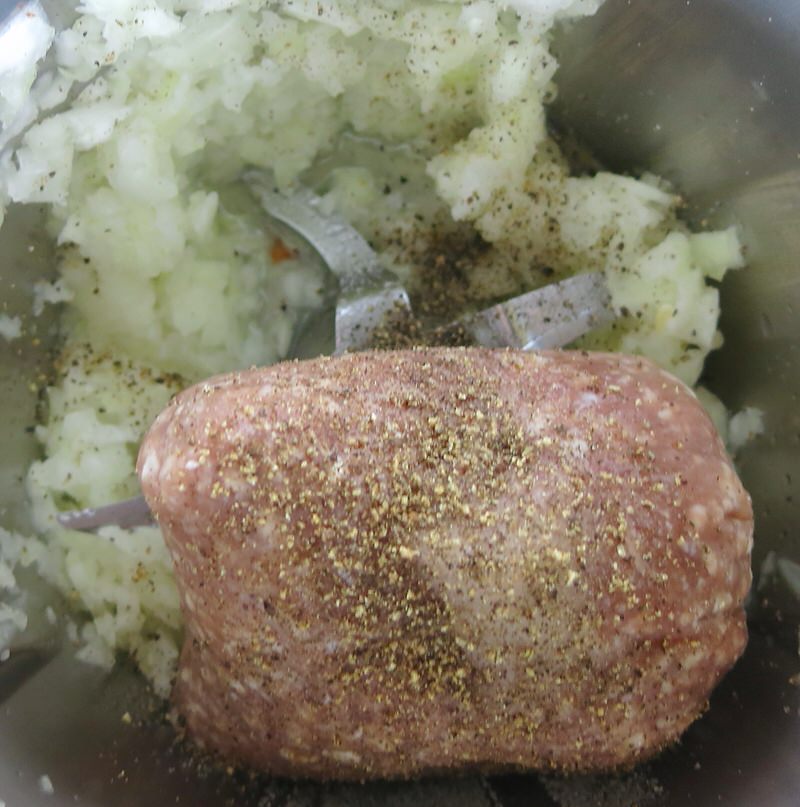
Russian Dumplings: Mis en Place
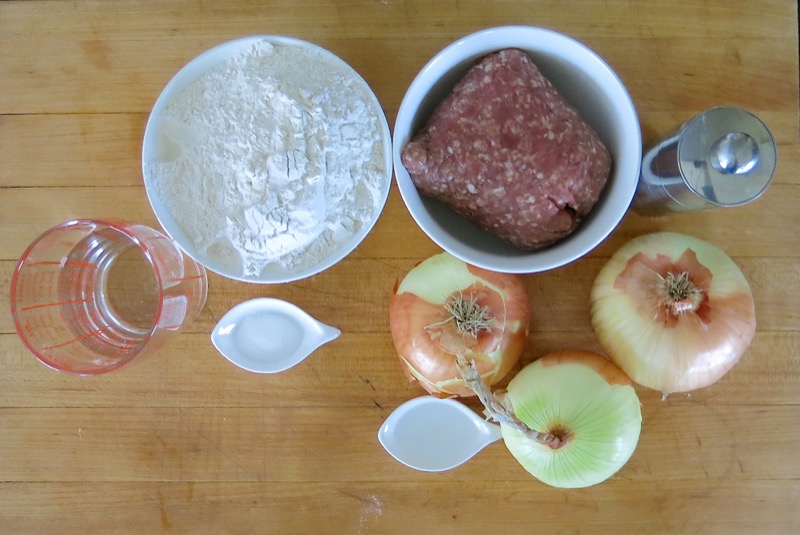
Know-your-farmer fatty ground beef, onion, vinegar, salt and pepper in the filling; flour, water and salt in the dough. Everyone has these ingredients in their home kitchen, right? No excuses!
Russian Dumplings: Making the Dough
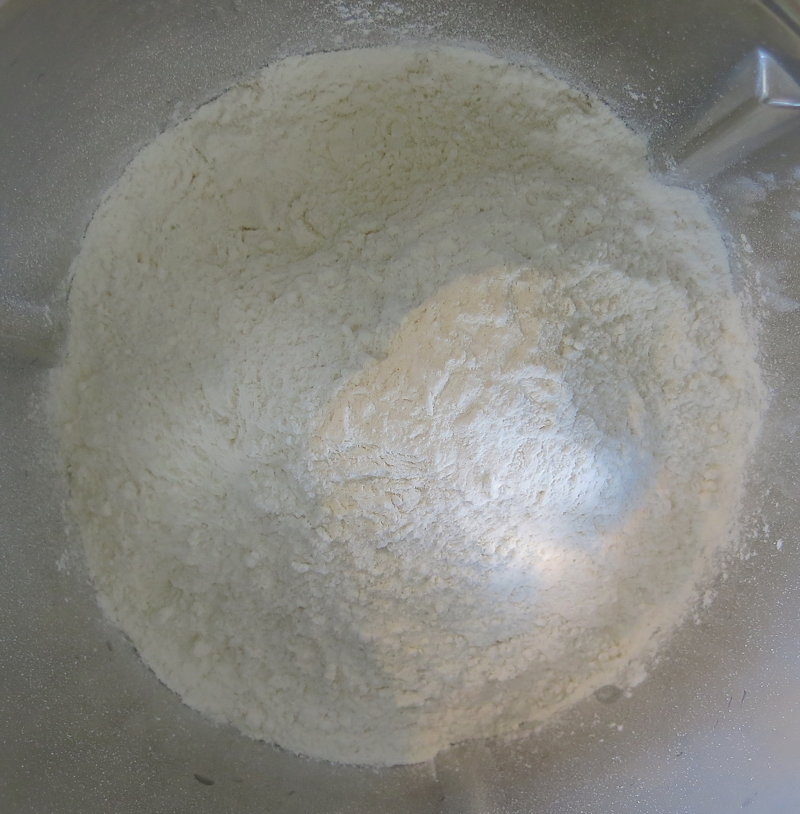
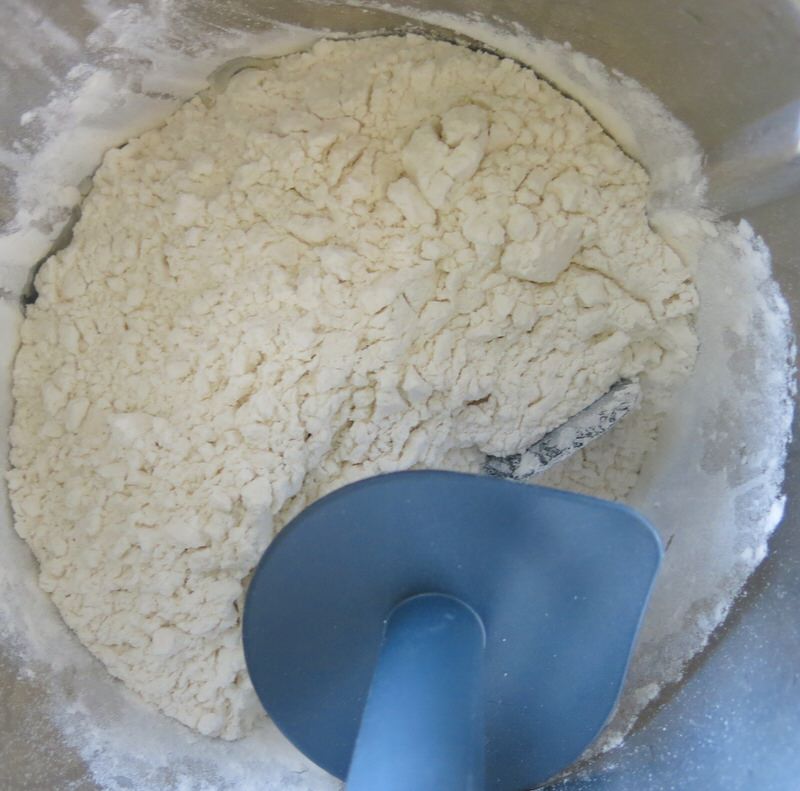
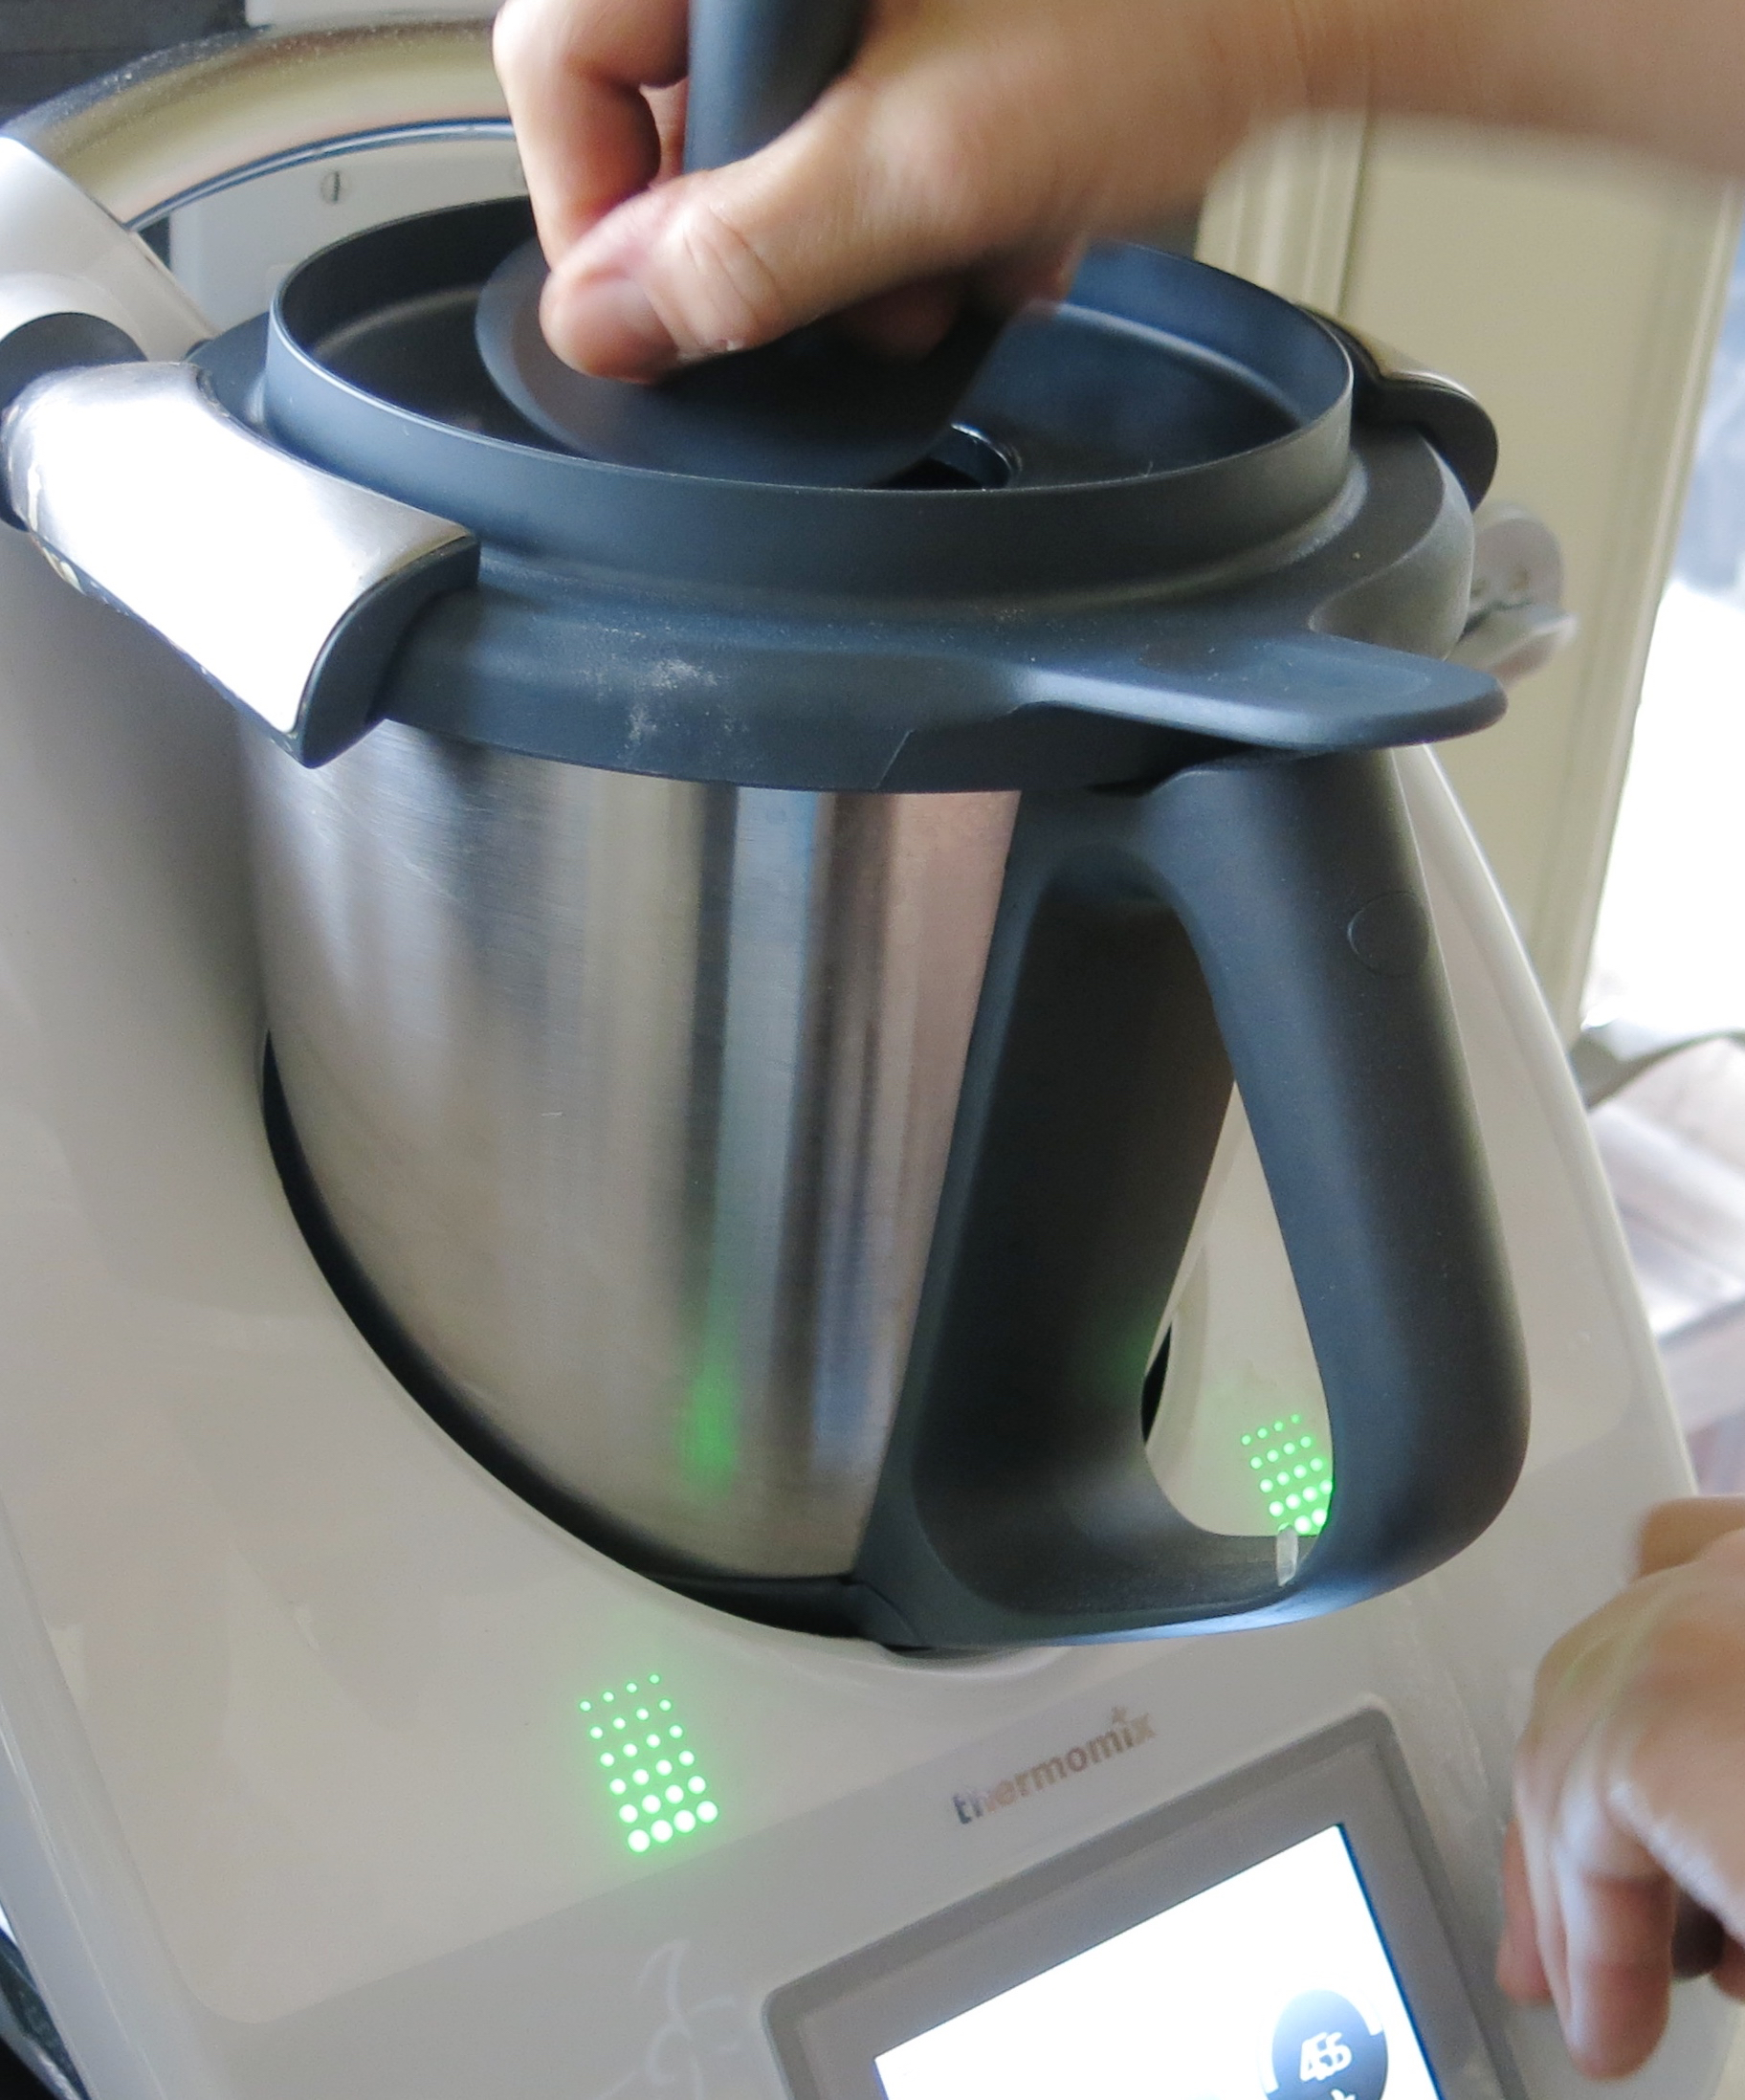
Weigh water into TM bowl; add salt and mix until dissolved. Add flour and stir it into the water with the spatula, then knead. If you don’t own a Thermomix, and that would be most of you, make this dough the same way you make any of your doughs. It can be brought together carefully in a food processor or a stand mixer.

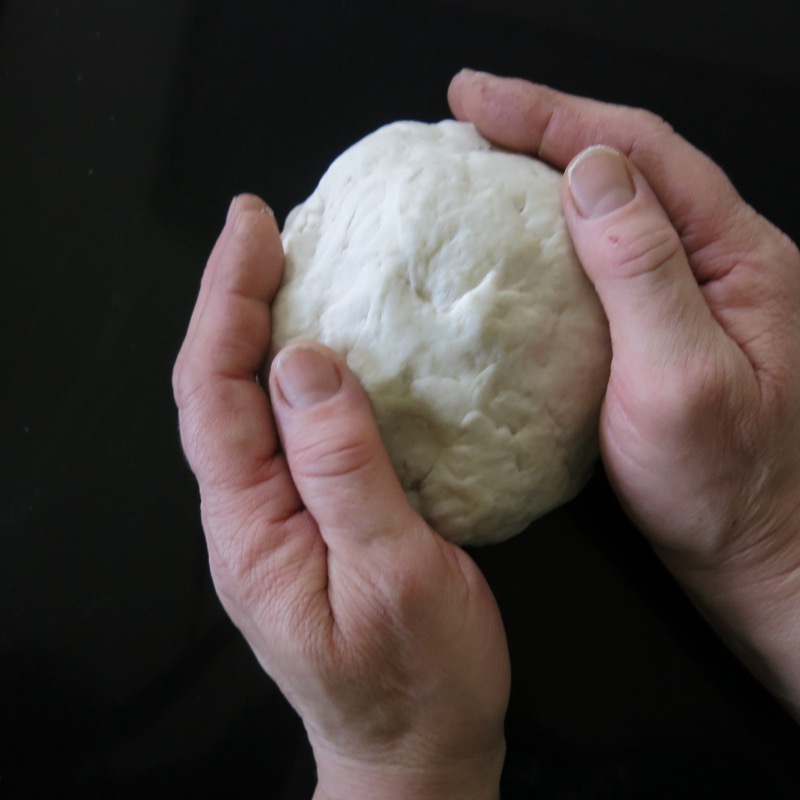
Remove the dough from the Thermomix bowl and form into a ball; set aside to rest. You will see the Thermomix bowl remains almost clean due to the texture lovely Russian Dumpling dough and the ratio of flour to water: 2 to 1.
Nadja’s hands are strong. She is a hard working German woman who immigrated from Kazakhstan several years ago: a mother of 4, grandmother of 6 and barely 50 years old. These hands tell a beautiful story unto themselves.
Russian Dumplings: Making the Filling
This recipe originated from the Asian ancestry in Kazakhstan which shares borders with Russia, China, Kyrgyzstan, Uzbekistan, and Turkmenistan. Kazakhstan is a mix of over 100 ethnic groups including Kazakhs (63% of the population), Russians, Uzbeks, Ukrainians, Germans, Tatars, and Uyghurs which would most definitely provide a fertile foundation for fusions of various Eastern cuisines. Clearly, the more traditional Asian dumpling has morphed into simple farm home food fare traditional in most Russian homes. The manner with which the dumplings are folded, pinched or shaped also reflects various ethnic practice. The Boraki shape is a traditional Armenian shape.
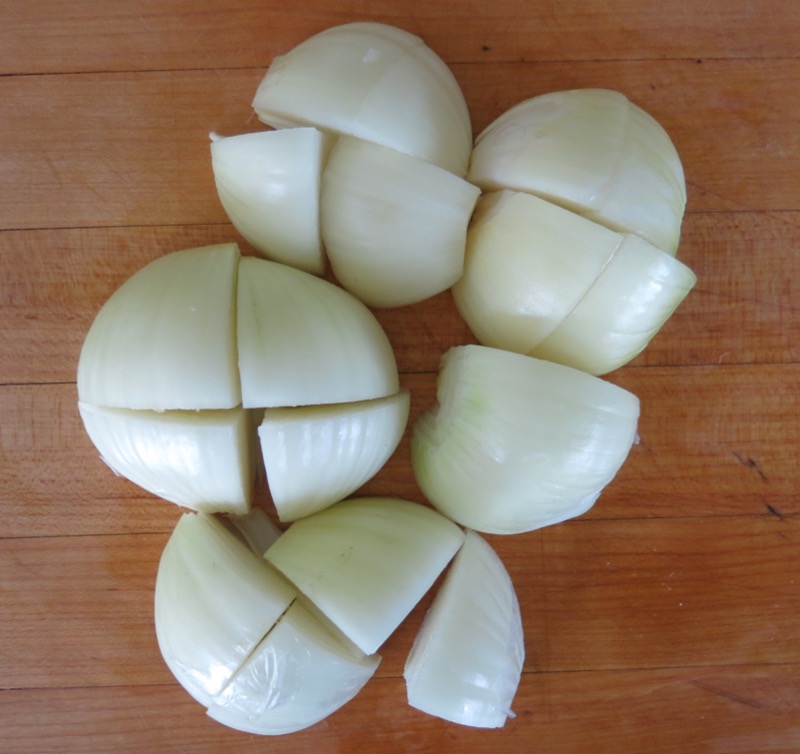
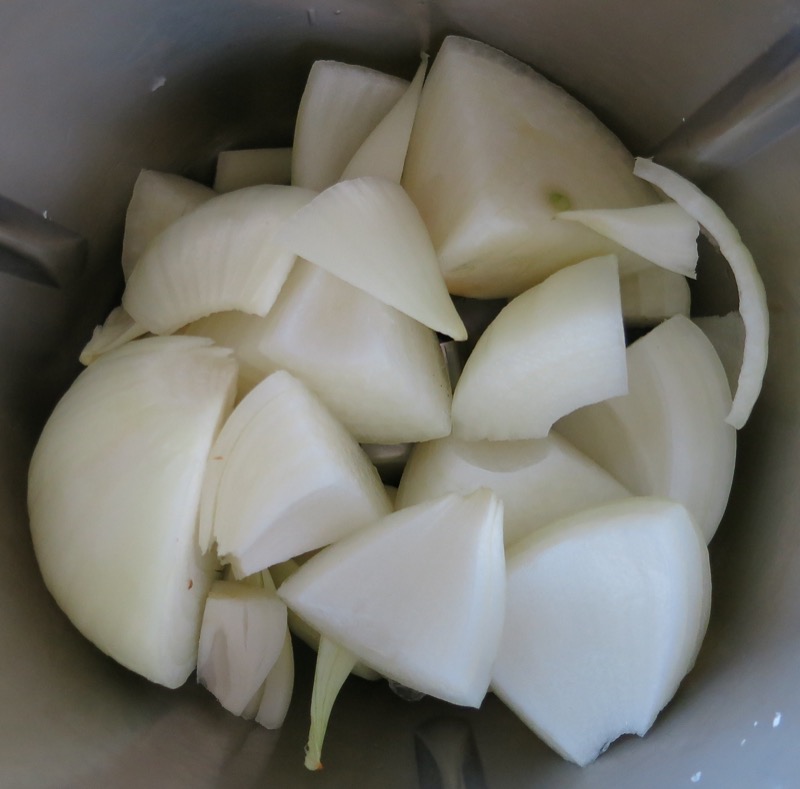
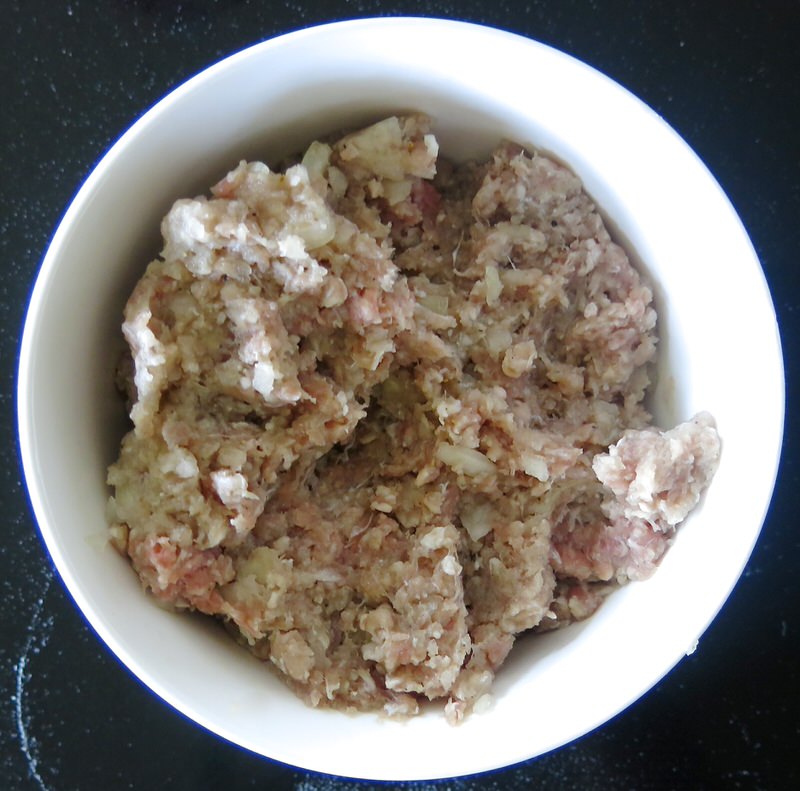
The original recipe she shared with me was equal weight of meat to onions: 500 grams of each. It was tasty, but I am married to an uber carnivore, remember? She also told me the ratio varied depending on who was making it. What Vanja and I prefer is 500 grams of beef to 250 grams of onion. Far left and middle, above, is the amount of onions used with Nadja. The last image is half of the onions which is the amount Vanja and I prefer.
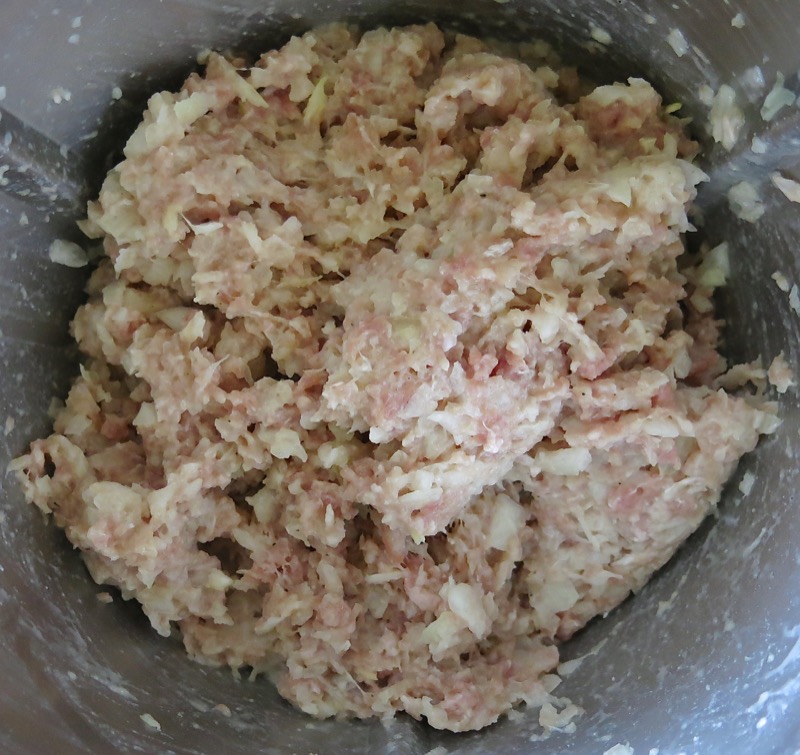

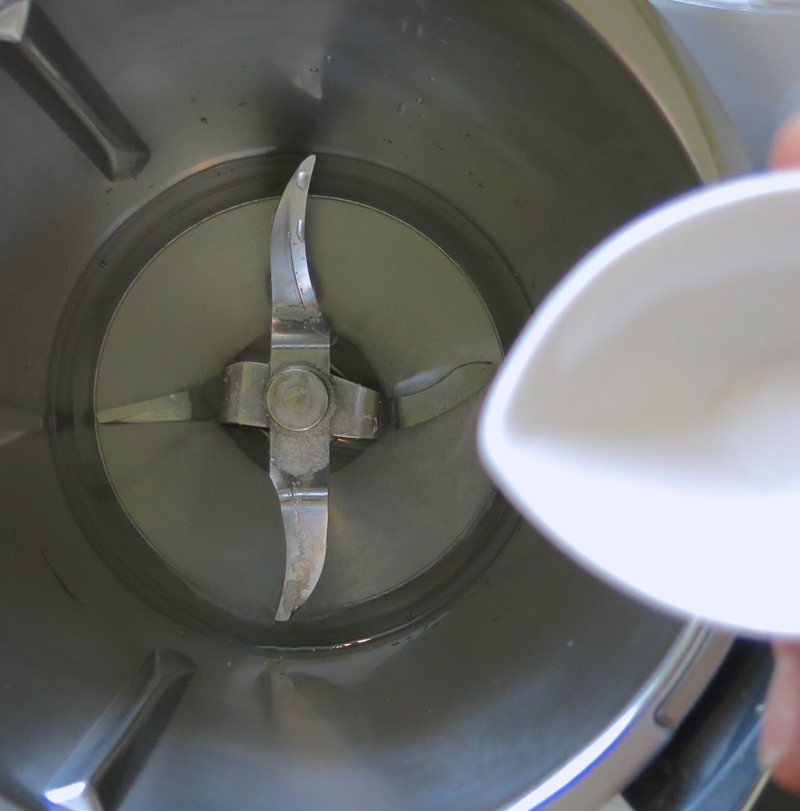
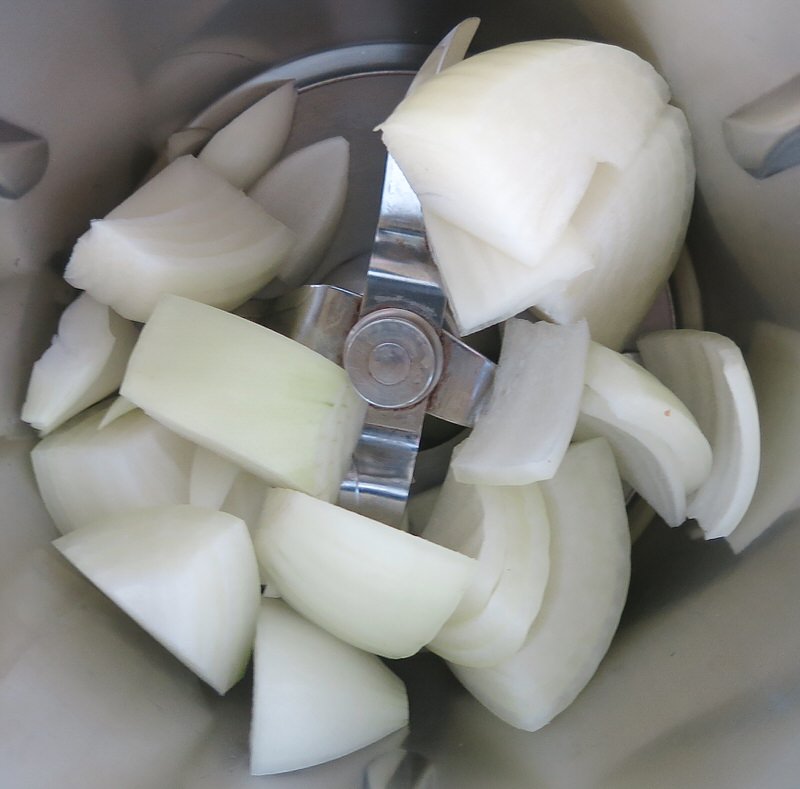
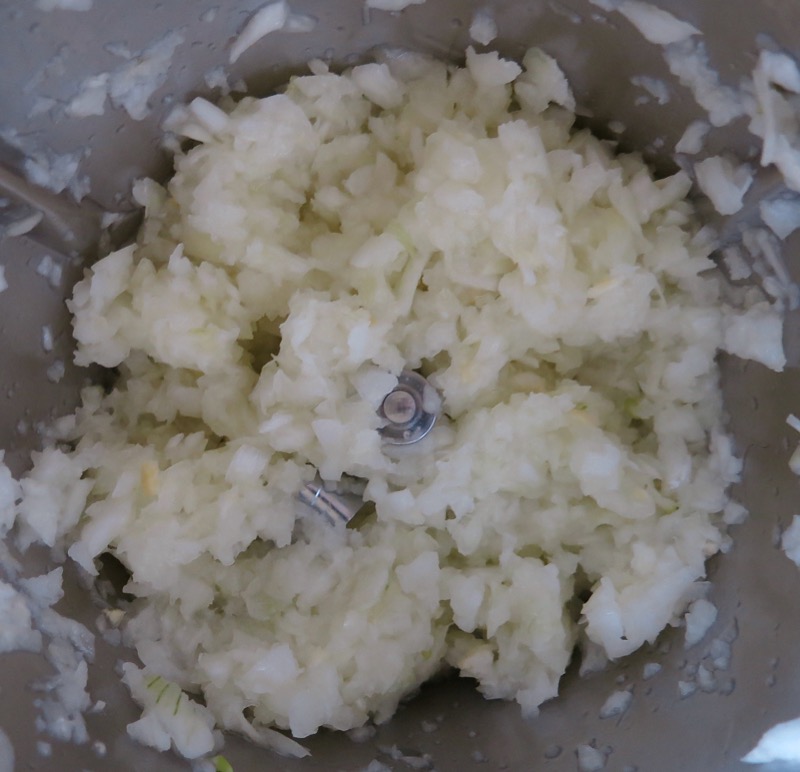
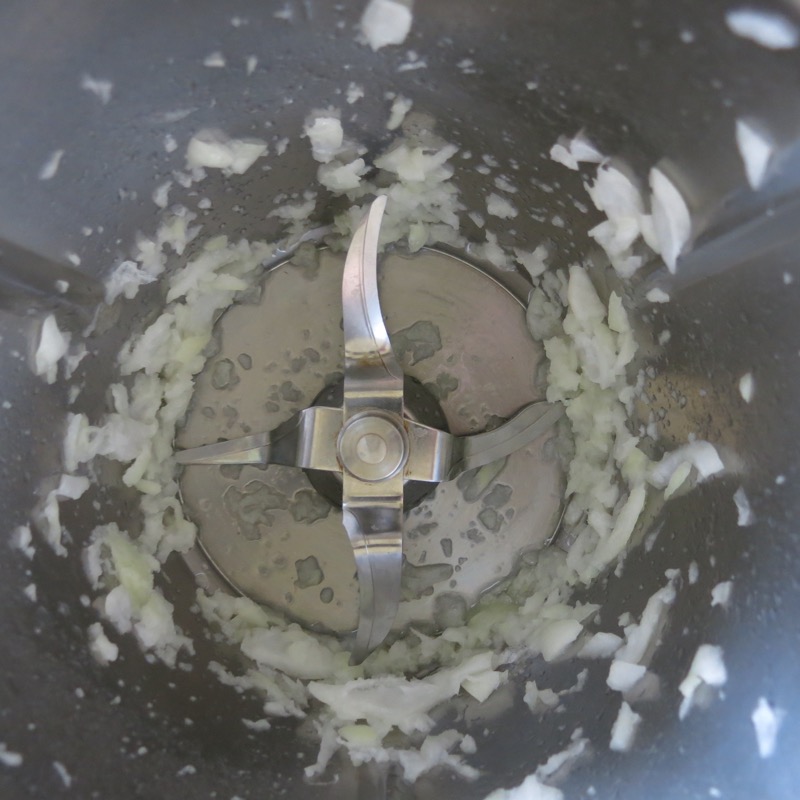
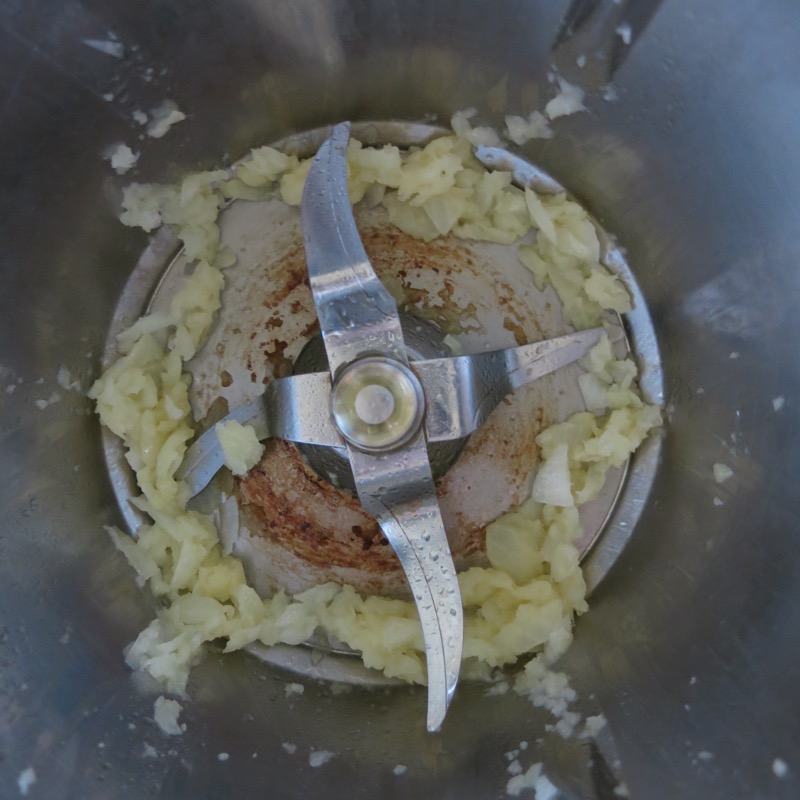
Nadja is very skilled with the Thermomix and uses techniques I have never used. For example, when chopping the onion, she used the spatula as a plunger to keep the onion close to the blades, like Thermomix owners do when making ice cream, but she did this within 6 seconds using three 2 second intervals and the onions were perfectly minced. I was able to follow her instructions and do it on my own getting excellent results every time. She used the same plunging technique and the same 6 seconds using three 2 second intervals when adding the meat. Usually, I simply work the meat in with my hands as I don’t like the pasty effect that mixing meat with the machine can create when over-worked. Using her technique, the meat was mixed in only 6 seconds and the texture was perfect.
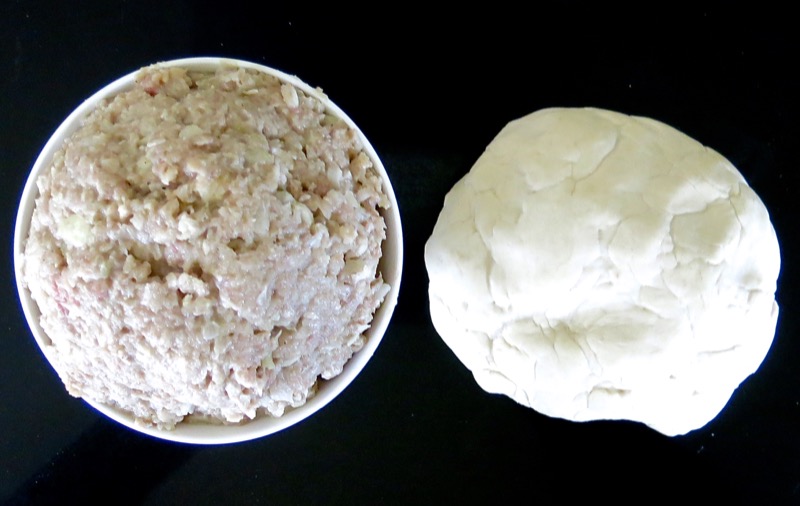
Above are the dough and meat mixture heavy with onions from the session with Nadja.
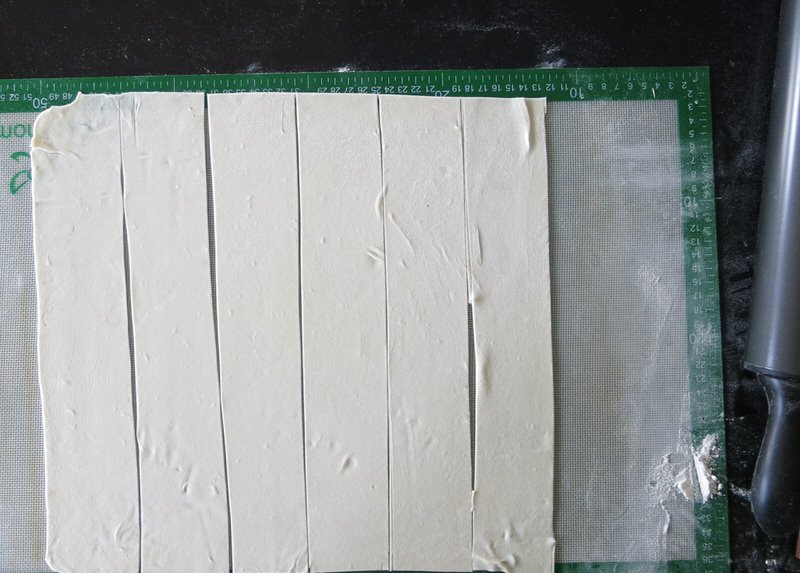
Russian Dumplings: Rolling the Dough
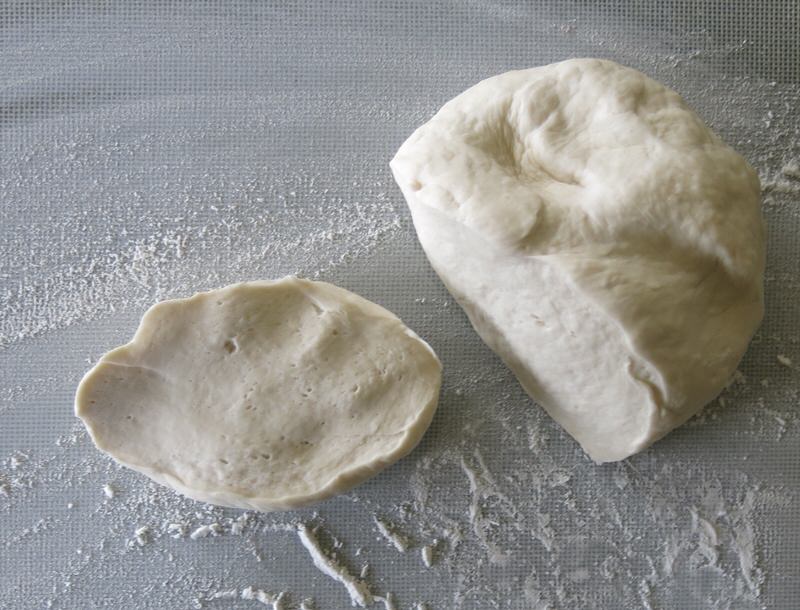
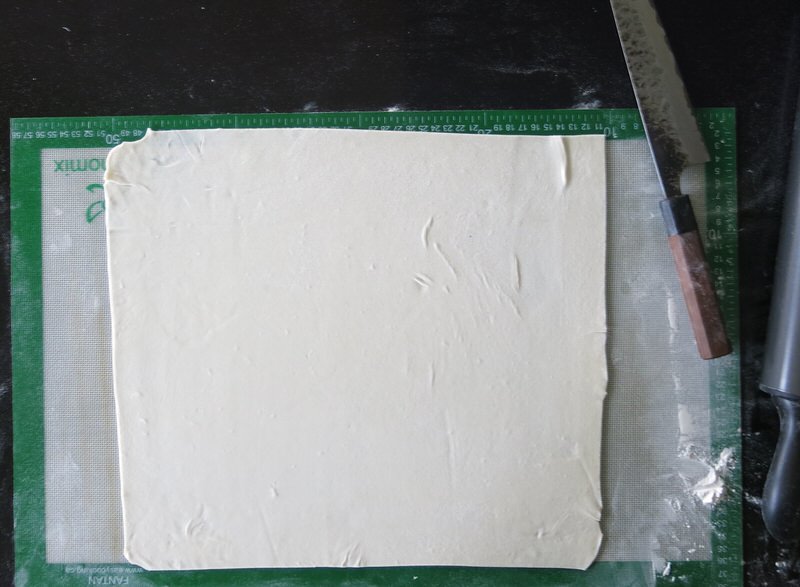
The dough is a very lovely dumpling dough; pliable and easy to roll. You can use a pasta roller. I have one but chose to roll by hand. The ball is best cut into thirds as each portion will roll out into a paper thin large rectangle perfect to work with. Roll on parchment paper or a pastry mat with considerable pressure, dusting both sides lightly at each turn until the dough almost completely covers your rolling mat or is a 1/2 baking sheet size.
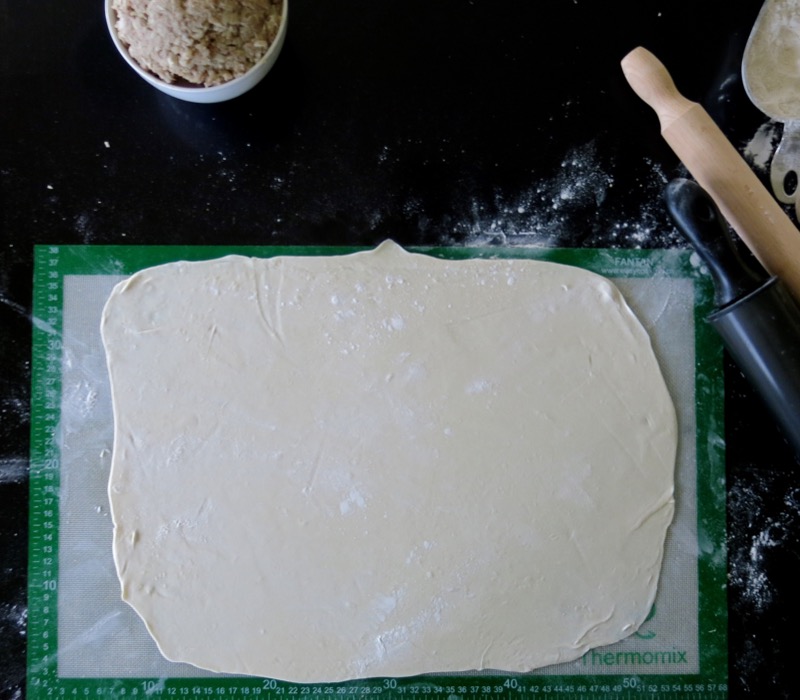
If you can read through it, you know you have rolled it thin enough. If you can almost read through it, it will work just fine as well.
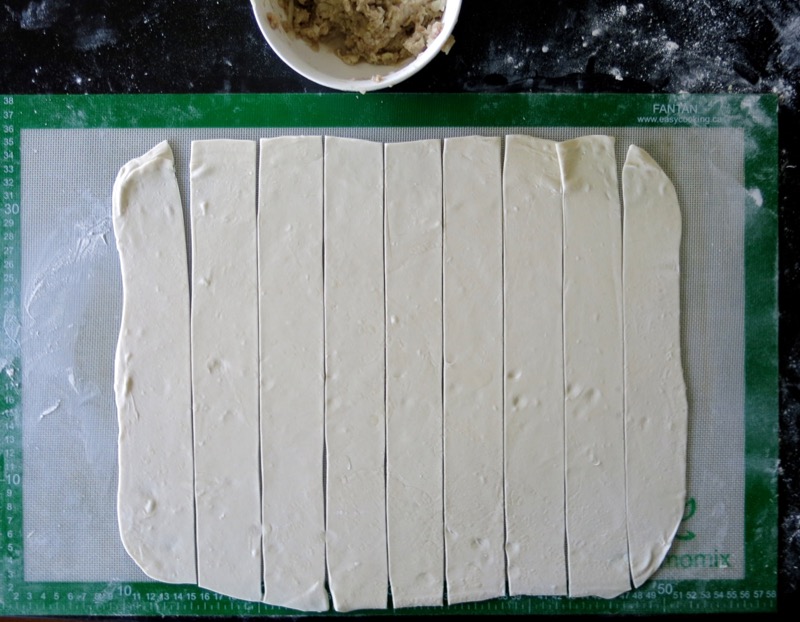
Trim the edges, adding the trimmings back to the ball of dough, and slice the rectangle into several equal 2 1/2 to 2 1/4 inch horizontal strips. Above the strips are thinner and there are 9 strips per sheet; below the strips are wider with only 6 strips per sheet. However, you make them is personal preference. I found we preferred more meat within each pinch.
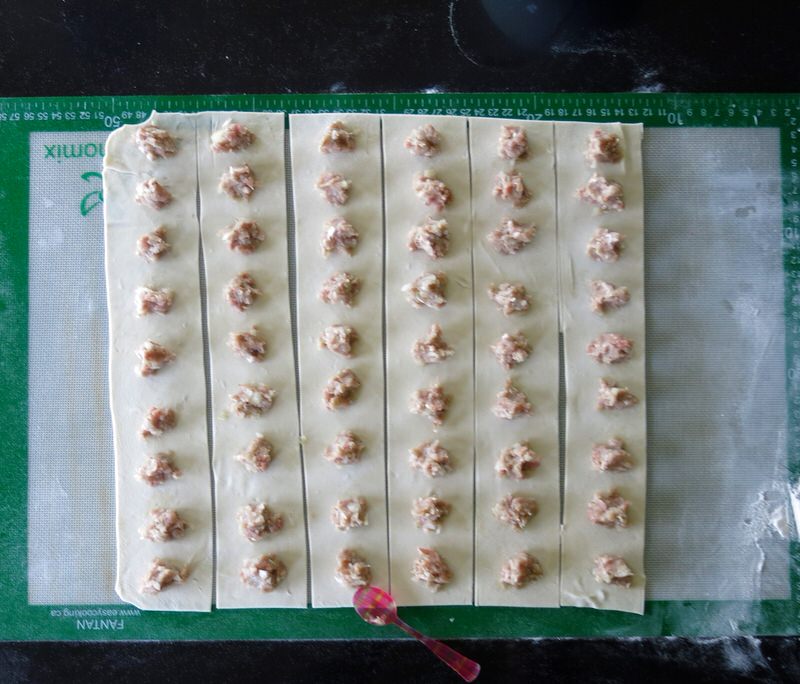
Nadja demonstrated tiny 1/4 teaspoons of filling between narrower strips of dough which were lovely delicate pearl-like Russian Dumpling strands of goodness. A more substantial teaspoon of filling between wider strips of dough with the filling pushed close to each other after each pinch was my preference.
Russian Dumplings: Filling the Dough
Above, the Russian Dumpling is formed by simply lifting the dough up around the filling and pinching it together between each portion of filling.
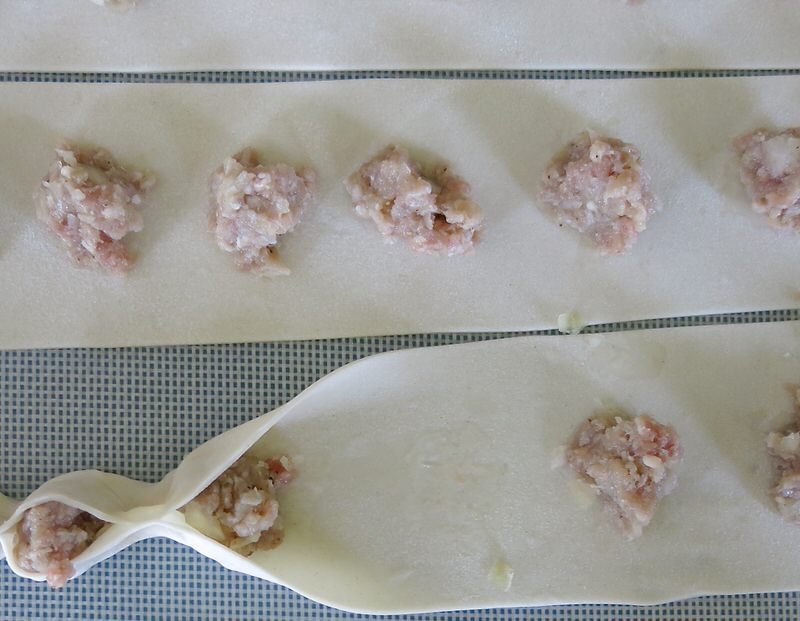
We laid out the meat close together, then started to pinch. What I discovered, over time, was that I like to get as much meat into each strip as possible, so I push the next portion of filling closer to the last pinch and generally add 2-3 more portions of meat per row. Above left is the meater filling; above right is the filling Nadja and I did together with equal portions of meat and onion.
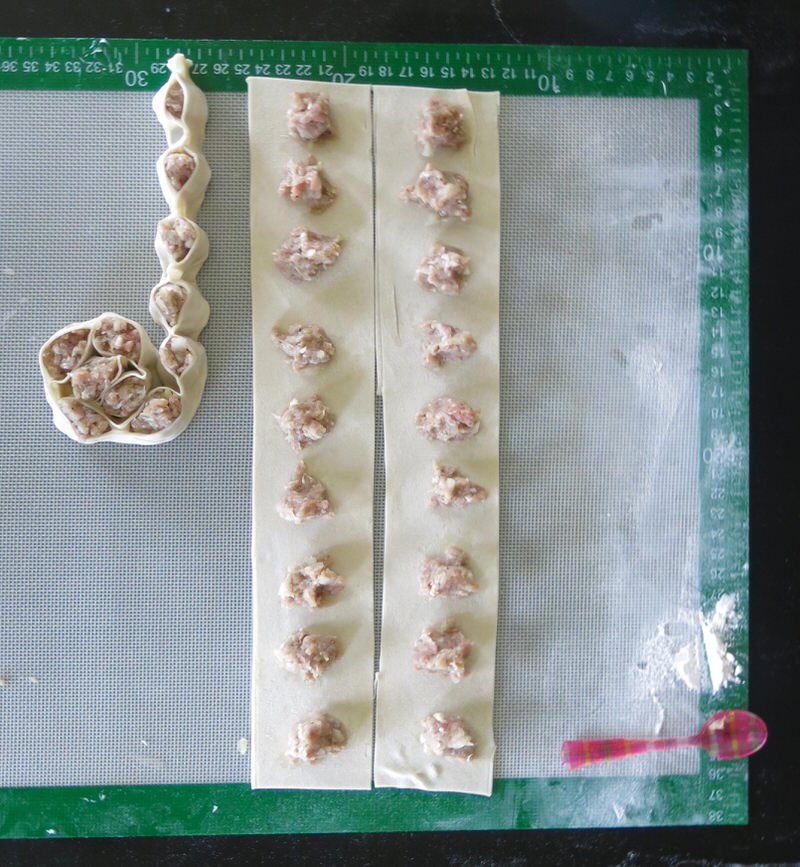
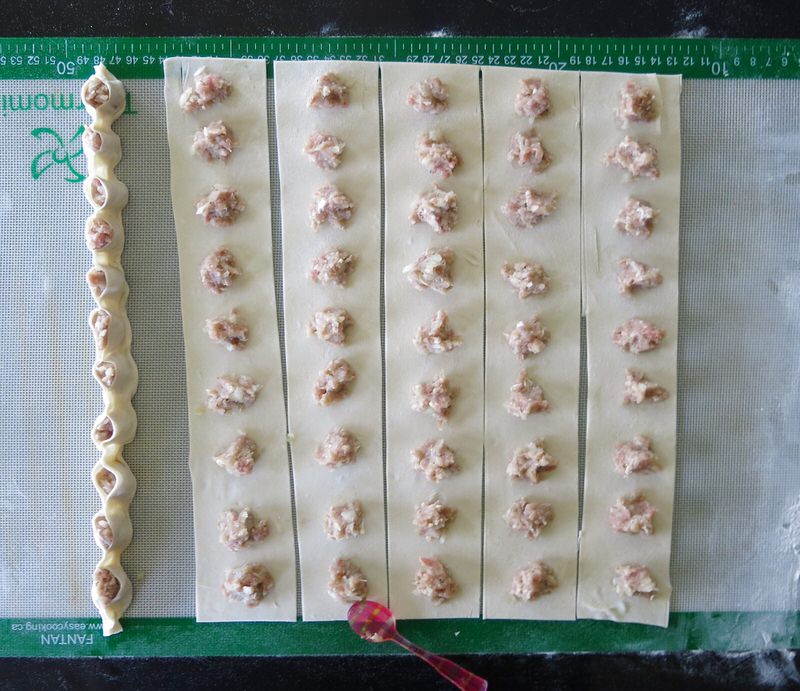
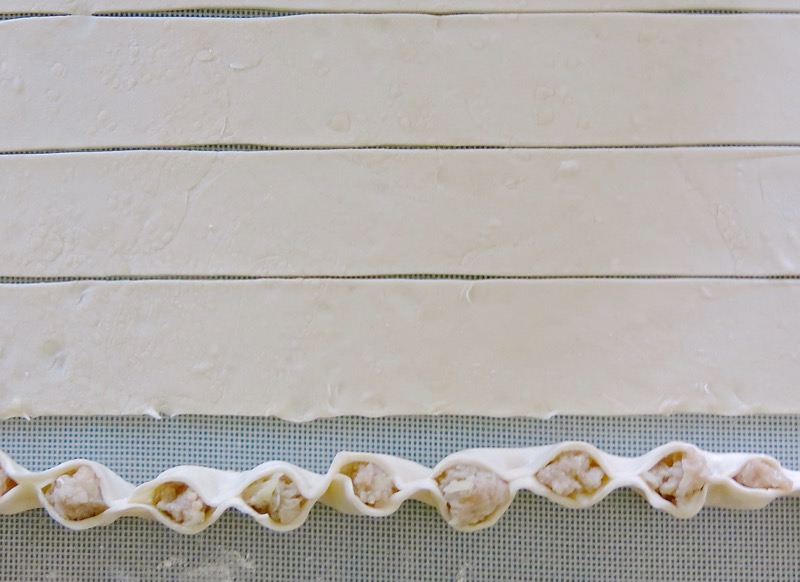
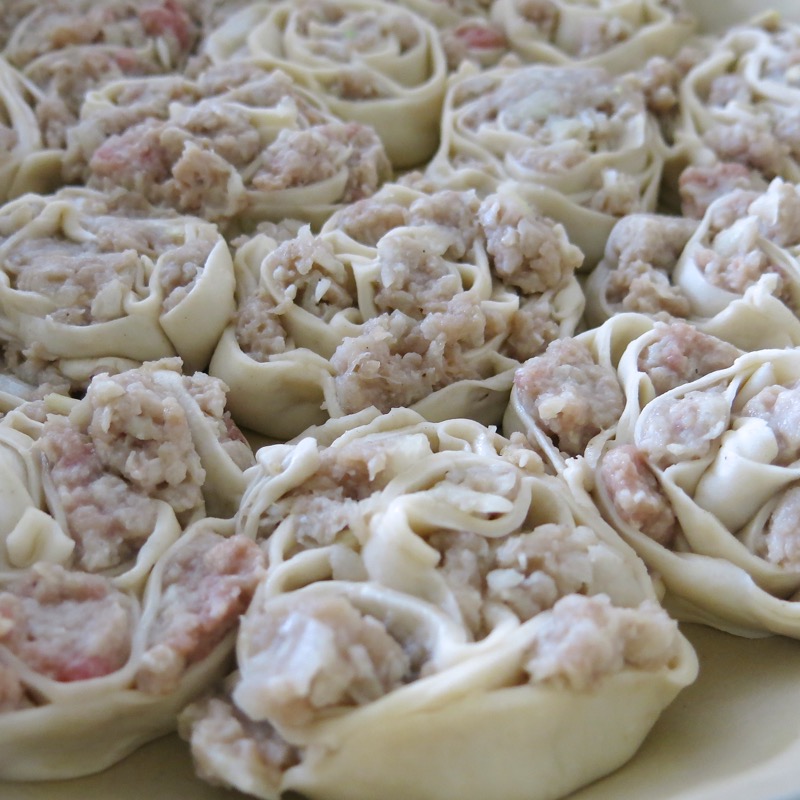
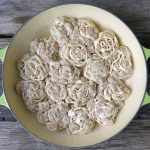
Once the strips are pinched, with both ends also pinched snuggly together, the strip is then rolled into itself in a spiral to form a circle.
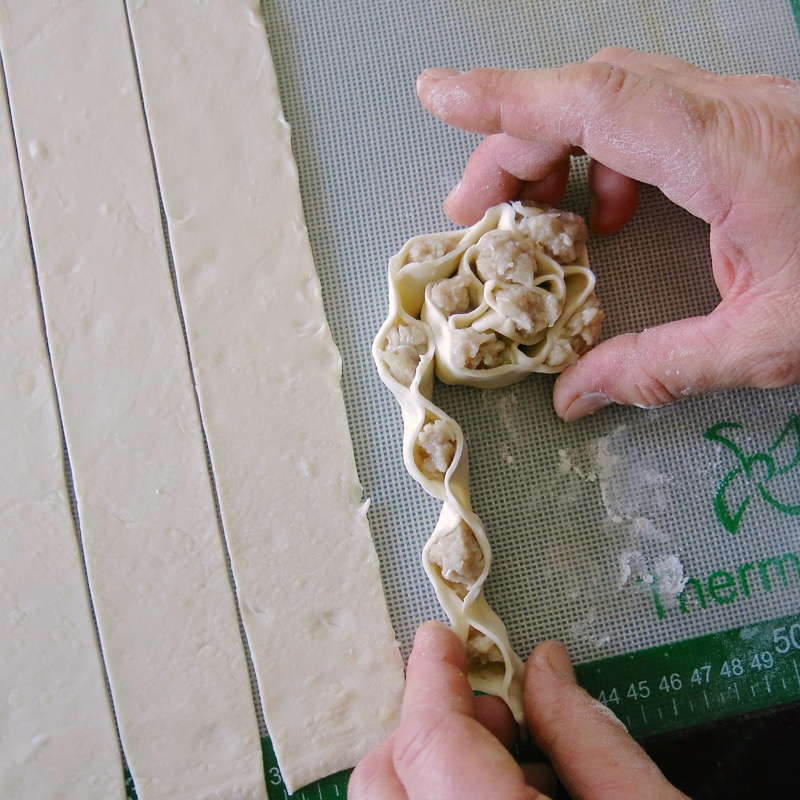


The end is tucked in neatly.
Russian Dumplings: Cooking the Dumplings
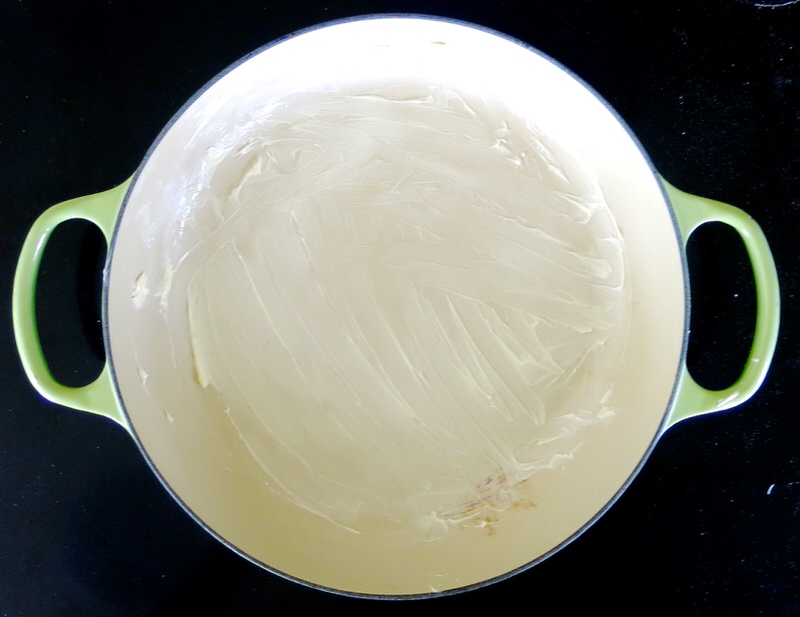
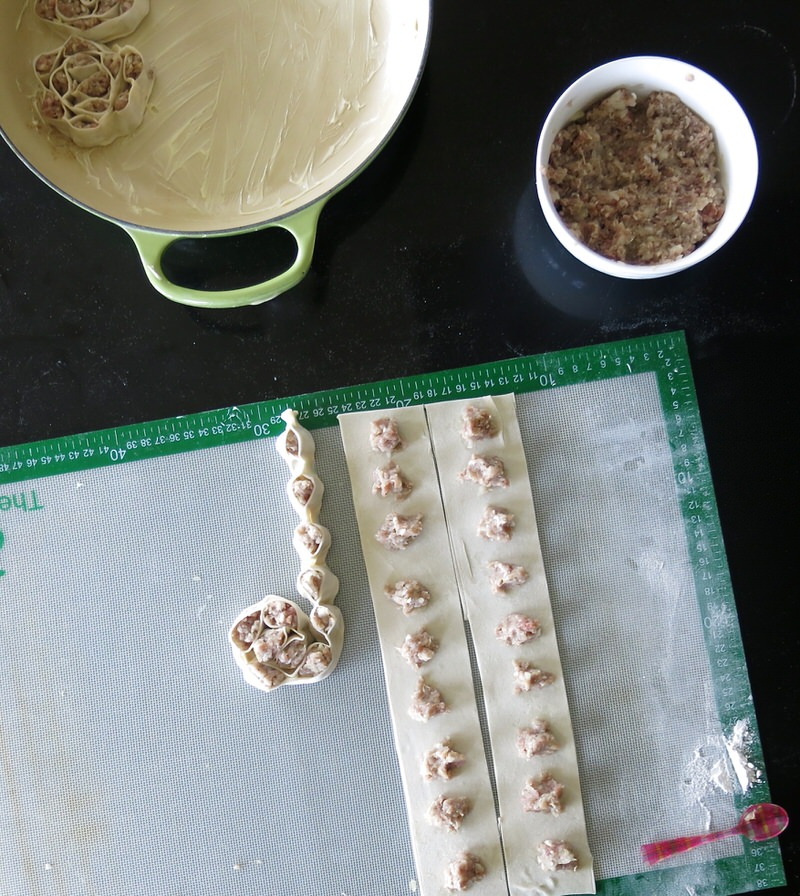
When simmering or when steaming, butter the pan or the steamer deck liberally.
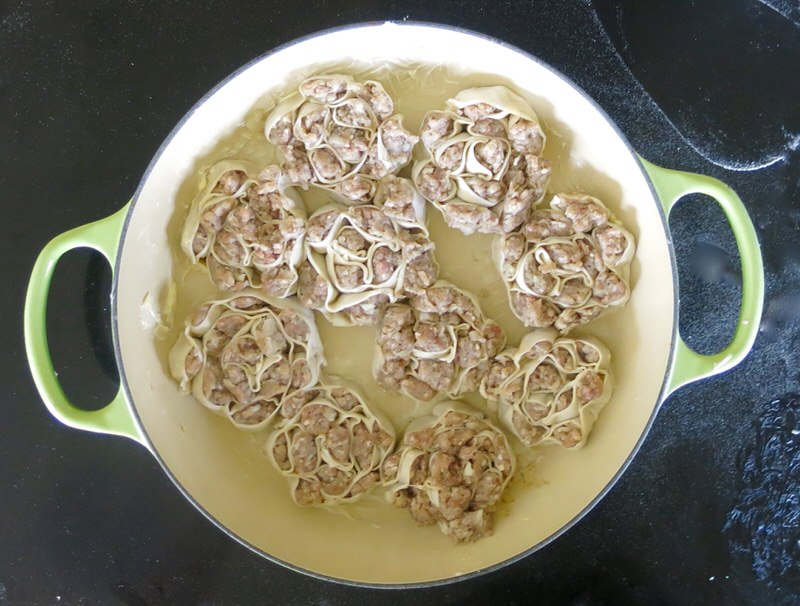
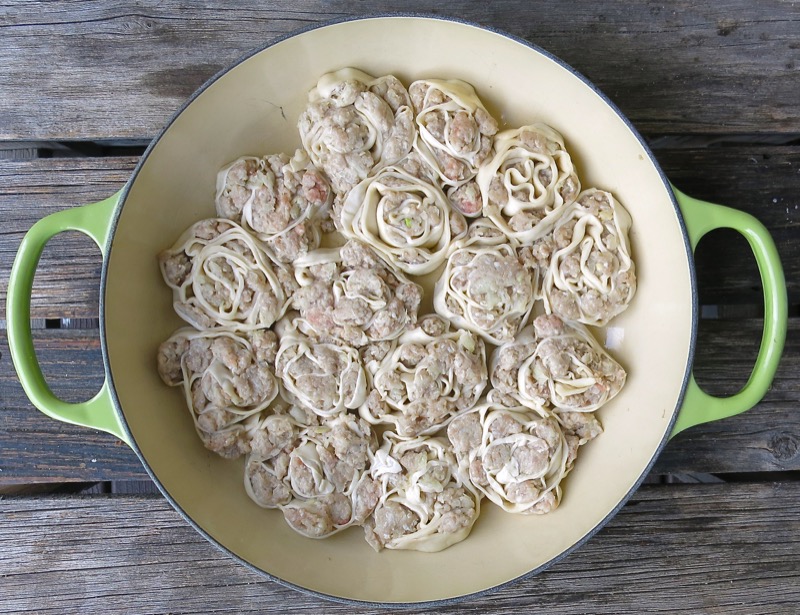
Place Boraki into the pan, snuggled close together, but not touching, if possible. They will expand and they are easier to remove when not stuck together. Of course, for a family dinner, it hardly matters if there is a bit of sticking together.
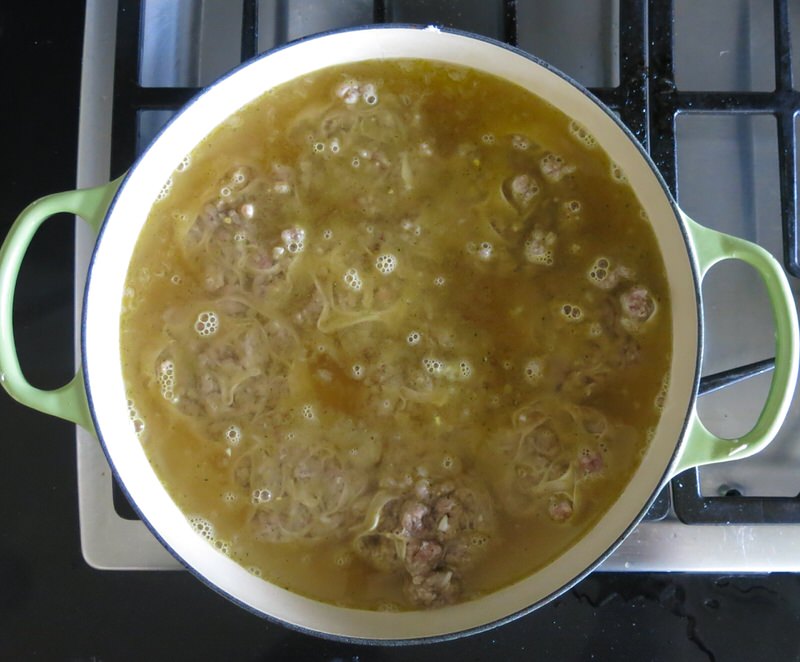
Gorgeous homemade know-your-farmer beef broth is poured over just to cover the Russian Dumplings, and they are simmered slowly for 25 minutes.
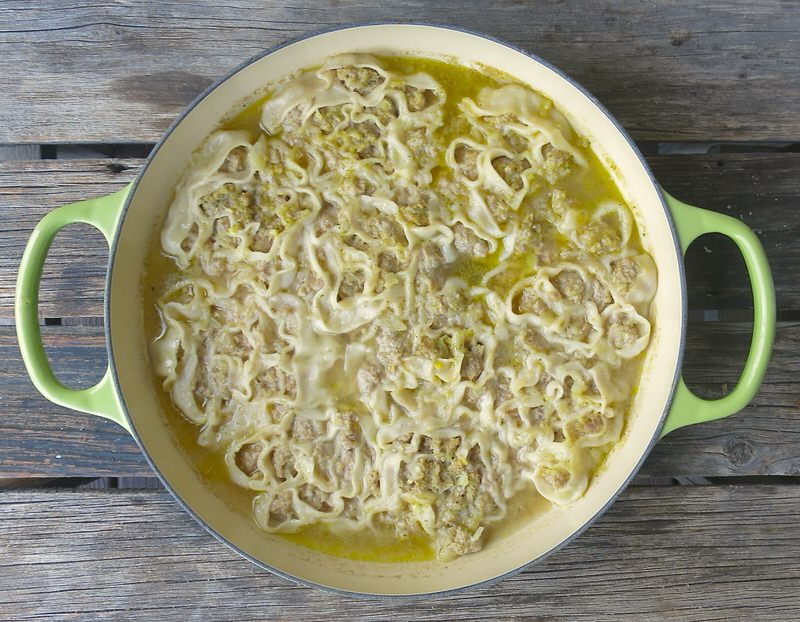
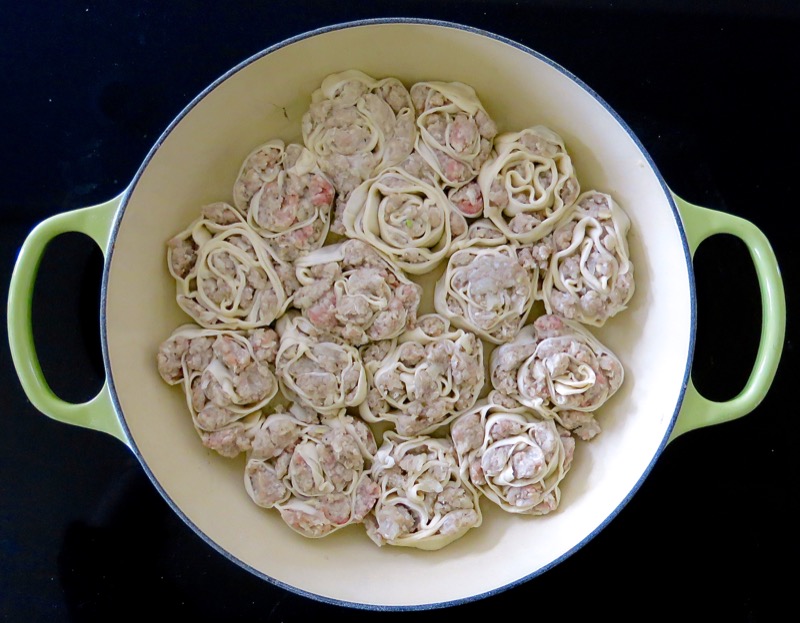
One Russian Dumpling shaped Boraki in a bowl with luxurious homemade beefy broth is exponentially satisfying. The possibilities endless. Once you make this, the addition of ginger, garlic, herbs, spices, with varied sauces and shapes will elevate your culinary skills to that of Dumpling Queen. I was so intimidated by this dish when I first saw it I did not believe I could ever make it without being taught in person. Of course, Nadja’s Thermomix techniques helped me use the machine to make these effortlessly. But, they are easy enough. Seriously. Very easy. Inexpensive, and totally provide a forgiving and delicious backdrop for your imagination.

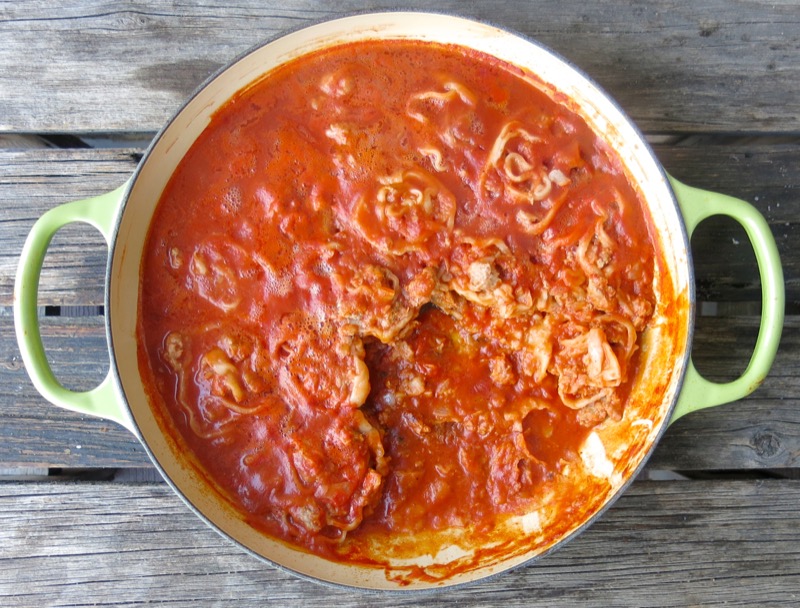
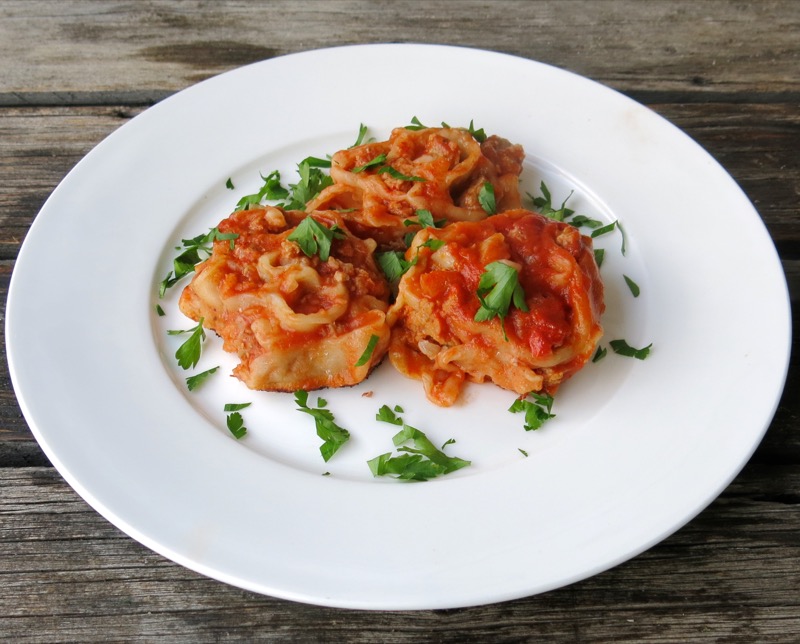
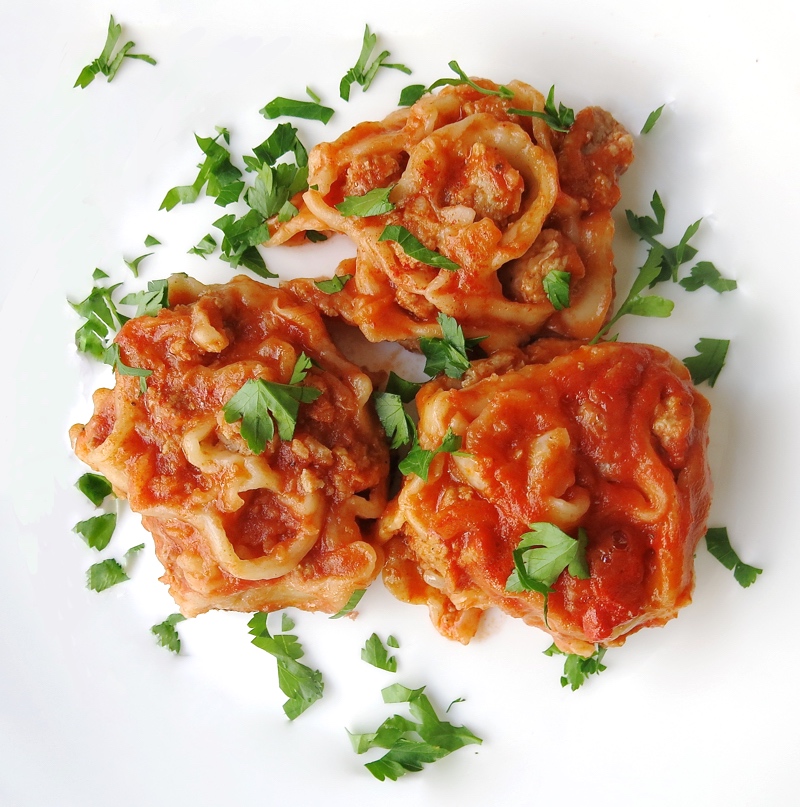
Simmered the same way in Simple Tomato Sauce.
Russian Dumplings: Other Shapes
“Russian Dumplings Part Two” will be posted soon sharing how to make these Mantji shapes, as well as others that Nadja taught me. I will also steam and deep fry them, as well as introduce the addition of another couple of simple ingredients to the filling.
Oh, what doors have been opened from this one hour lesson in my kitchen with Nadja. Yup. One hour. Fear of failure is my greatest enemy. Nadja demonstrated the simplicity of this dish. Of course, I am still not as fast or proficient as she is in making it, yet I am absolutely confident and motivated to take what I have been taught and work with it to make it my own. A learning experience is the most lovely gift. Cooking with a learned friend in my kitchen is absolutely my favourite thing to do.
Russian Dumplings: Simple Tomato Sauce
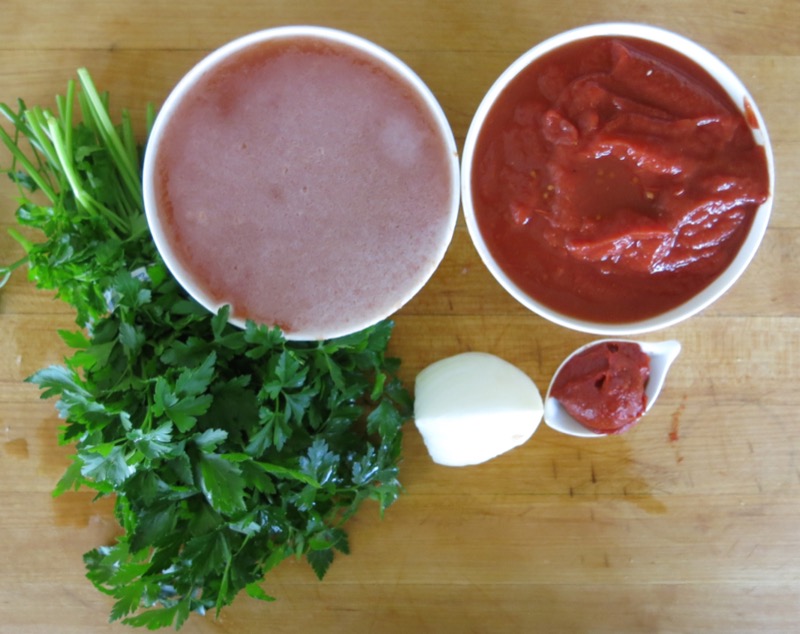
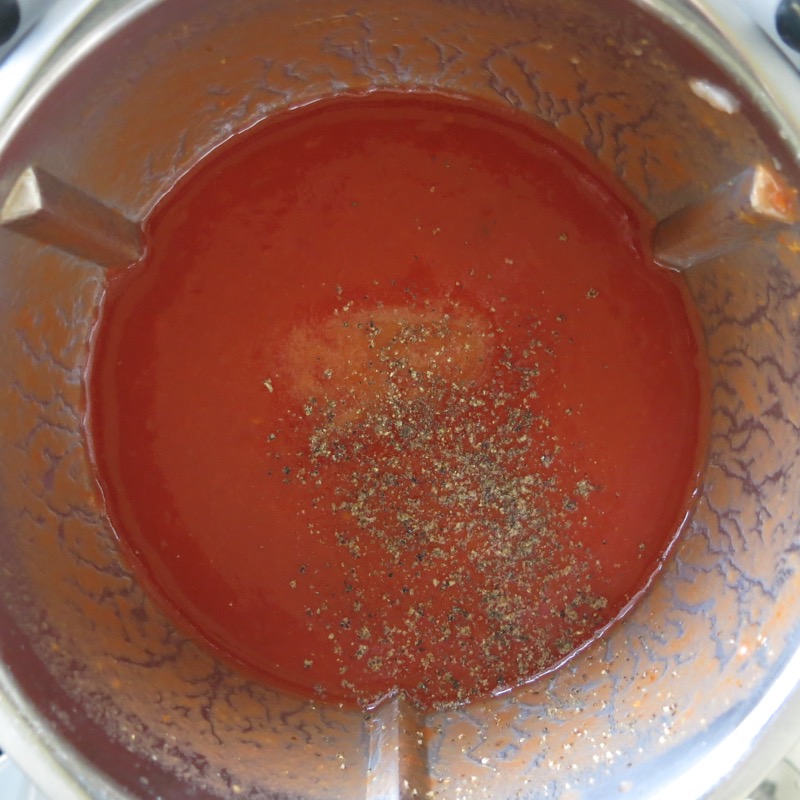
Keeping within the “simple is best” mantra of these Russian Dumplings, this tomato sauce has a small bit of onion, sauteed, a can of pureed tomatoes, a can of water, a tablespoon of tomato paste, and fresh flat leafed parsley for garnish. Salt and freshly ground pepper, as well, of course.
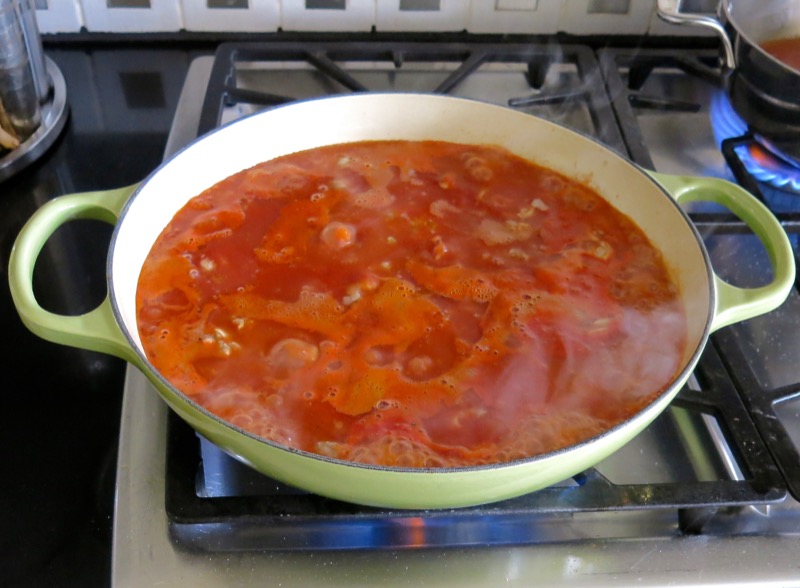
The Russian Dumpling shaped Boraki are just covered with the sauce and simmered as with the beef broth: twenty five minutes, then garnished and served.
Learn how to make Russian Dumpling Won Ton Soup, A Canadian Foodie Original Recipe, and Part 2 of this experience here.
Thank you, dear sweet Nadja, from the bottom of my heart. Watch for Part Two, and hopefully more lessons from Nadja to come
Russian Dumplings: Teigtaschen Boraki (Manji)
Valerie in the Kitchen with Nadja Kerstane from "A New Way of Cooking" making Russian Dumplings like Pelmeni, but in a traditional Armenian Boraki shape, also very similar to Manti or Mantu dumplings.
Ingredients
Ingredients for the Dough
- 250 grams or 1 cup water
- 1 teaspoon salt
- 500 grams flour
Ingredients for the Filling
- 250 grams or 9.5 ounces onion , cleaned and quartered
- 500 grams or one pound know your farmer fatty beef (40% fat)
- 2 teaspoons or 10 grams vinegar
- 1 ½ teaspoon salt
- ½ teaspoon freshly ground black pepper
Ingredients for a Simple Broth Sauce
- 1 litre organic beef broth
Ingredients for a Simple Tomato Sauce
- 50 grams onion
- 10 grams Olive oil
- 500 grams tomato sauce
- 500 grams water
- 180 grams tomato paste
- 1 teaspoon salt
- lots of freshly ground pepper
- ½ cup heavy cream , sour cream, yogurt, if desired
- 2 tablespoons fresh flat leaf parsley , finely chopped, if desired
Instructions
Instructions for Dough
- Weigh water and salt into TM bowl; mix together 2 seconds speed 2
- Weigh in flour; combine for 5 seconds on speed 4 until ingredients clump together
- Knead for 3.5 minutes; remove from bowl and set aside (bowl should appear “clean”)
Instructions for Filling
- Without cleaning TM bowl, weigh onion into TM bowl; using spatula through hole in lid, set time for 2 seconds and go from speed 1-6 plunging spatula through hole on lid to keep ingredients close to blade
- Set time for 1 second, with spatula through hole in lid, plunge immediately and turn speed directly to speed 6; check the ingredients and repeat one more time for ½ a second to a second, if needed (onion must be finely minced, but not liquid)
- Weigh meat into TM bowl; add vinegar, salt and freshly ground pepper
- Set time to 2 seconds and repeat the same fast plunging action with stopping and starting the mixing process going to speed 6 again exactly as with onions
- Repeat for 1 more second only, if needed (be careful not to mix meat into pate or paste consistency; mixing by hand works well at this point, too, but TM is much faster
Instructions for Rolling Dough
- Cut dough into thirds; lightly flour work surface and roll large rectangle to pasta thickness (1/16th inch or thinner): a pasta roller would work well for this if you have one
Instructions for Individual Parcels and Steaming (in Varoma for TM owners)
- If freezing, prepare baking sheet with parchment paper; set aside OR if steaming immediately, butter bottom and shelves of steamer (Varoma using Thermomix)
- Divide large rectangle into 3-inch horizontal strips; trim edges
- Divide each strip into 3 inch squares (approximate); place a generous dollop of filling in the middle of each square (a good meatball sized portion)
- Pull all 4 corners of pasta square up to meet in middle over meat; pinch together
- Pinch each of 4 sides together to close;
- Take 2 corners of pasta and pinch together to close; repeat on opposite side
- Place on greased steamer shelf or on parchment covered sheet pan; repeat until finished
- Freeze over night; pack into labeled and dated freezer bags until ready to use OR set over sauce or boiling water and steam for 20-25 minutes until done
- If using Thermomix, prepare 1 litre or more of sauce in TM bowl; set to Varoma and steam for 18-20 minutes or until done
- Serve immediately with favourite sauce or butter and salt and pepper
Instructions for Rope Rolls and Simmering in Pan:
- Lightly oil heavy skillet; set aside
- Divide large rectangle into 2-inch vertical strips; place 9 to 10 half teaspoon portions of filling along each strip leaving enough space to pinch dough together in between
- Pinch ends of rope together; pinch between meat portions along strip of dough ending by pinching the dough together after last portion of meat filling
- Roll filled pockets into circle; place into prepared skillet
- Repeat process until skillet is filled with rolled ropes: each is one portion and one to three portions per person is a serving
- Cover with a light sauce of choice; bring to boil, then simmer at medium-low heat for 25 minutes or until done
- Serve immediately with a tossed green salad and crusty bread for dipping into the sauce
Instructions for the Simple Sauce in the Thermomix Machine
- Weigh onion into TM bowl; chop for 0.5 seconds on Turbo
- Weigh in olive oil; sauté for 5 minutes at Varoma on speed 2
- Weigh in all other ingredients; place Varoma with pasta parcels on top ready for steaming
- Set time for 25 minutes, temperature on Varoma and speed 2; cook longer if needed (watch how long it takes to get to Varoma temperature; it will likely take 25 minutes to steam after that)
- Add cream, yogurt, or sour cream to sauce with chopped parsley, if desired; pour over pasta and serve immediately


Valerie:
It has been a while, how are you and family?
These dumplings sound delicious! I love dumplings. They are so homey and comforting.
I have saved your post and looking forward to the next.
Thank you both for sharing.
Wow, Valerie and Nadja, those dumplings are impressively gorgeous! Love the step by step instructions you gave us, you really need that to reproduce such a work of art!
Step by step is my “thing”, Nicoletta! I think it is the educator in me. I simply cannot resist. I love to see the process of each step when not familiar with a recipe, so I cannot post without including every little detail. Thank you so much for stopping by! Just got home from 2 weeks in Salt Lake City with my daughter’s family, so it’s back to my routine now, and hope to reconnect social media wise and blog site wise very soon!
Hugs,
V
I just stumbled onto your page, and have to say that these dumplings look amazing!! I’ve book-marked the recipe for future use, but meanwhile would like to comment on how impressed I am with your step-by-step instructions, pictures, and care of detail in your recipes….
Did notice, in the ingredients lists (for the FILLING), that the word *onion* seems to be missing in the first one?? Easy to pick up later in the instructions, though 🙂
Looking forward to making these soon, beef broth ones first 🙂 Thank you!
Thank you ever so much, KuklaCath!!
After your comment, I noticed the time etc was also missing, so this was an older draft of my recipe and have no clue how that happend. Have revised it now! Love this kind of support and sincerely appreciate it.
Please let me know how it goes for you. Would love to hear back from you.
Sincerely,
Valerie
These dumplings are the coolest shape I have ever made. Valerie explains the how to so well with beautiful words and pictures. Pretty easy to make and delicious to eat. I simmered them in beef broth, and sprinkled them with parmigiano. I would reduce the onion amount a bit for my taste, but definitely give them a try, they are worth every single bite. Thank you Valerie and Nadja for sharing these beauties with the world!
Thank you so very much, Emanuela!
Wonderful to get a nod from another who has tried the recipe and loved it! Now, hopefully, others will do the same. I was as inspired as you!
🙂
Valerie
This dish looks delicious but the “beef broth” looks like chicken broth to me. Also I couldn’t find ingredients for the Simple Sauce with the yogurt or sour cream? I only found instructions for that sauce. The tomato sauce didn’t appeal to me so I was hoping to understand the other sauce but it does not look like it is made of beef broth.
It was beef broth, Kathryn – and homemade by me, though I haven’t posted the recipe – but I do make it just like I do my chicken stock or chicken broth recipe on my site. I hope this helps?
Use whatever soup broth you enjoy!
🙂
Let me know how you like them, Kathryn!
🙂
Valerie