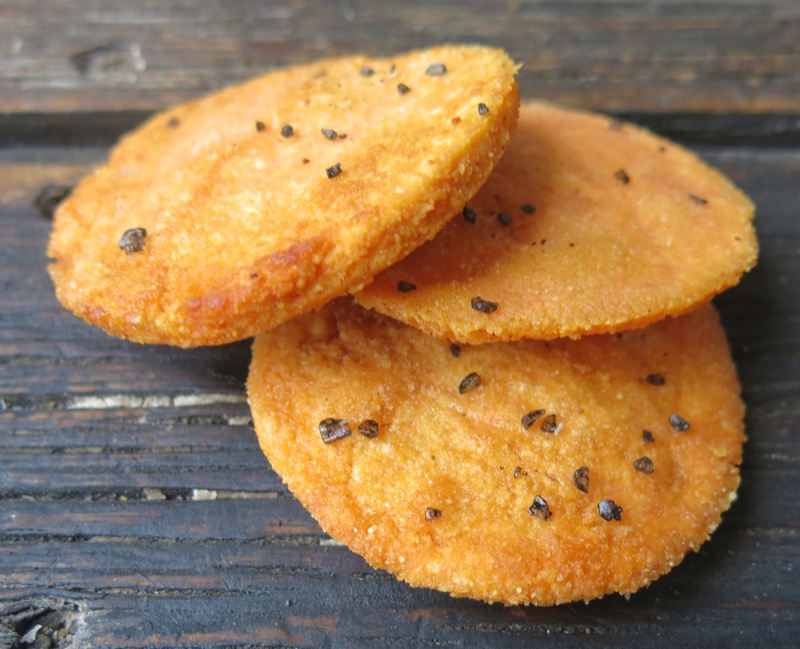
Red Lentil Crackers aka Tostadas or Tortilla Shells or Flatbread Alternative
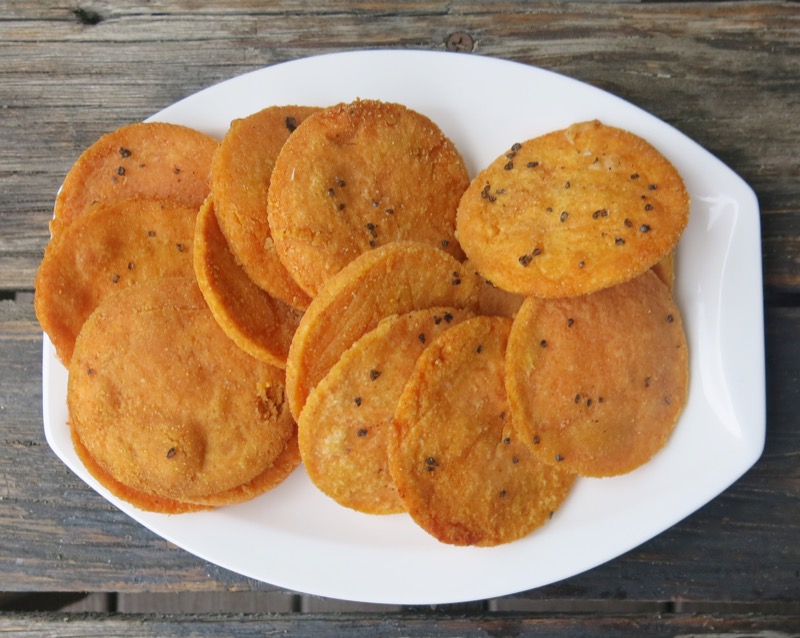
What a bright and lively coloured cracker for the holiday season, no? These little ditties are very nutritious, rather tasty and gluten free to boot! I have provided the simplest version of the red lentil crackers, but the possibilities, if you like to play with your food like I do, are endless. Add garlic, smokes Spanish paprika, freshly ground raw seeds or nuts, or tiny whole ones, for visual effect. Your imagination will most definitely take this already simple, tasty and very nutritious snack to the next level.
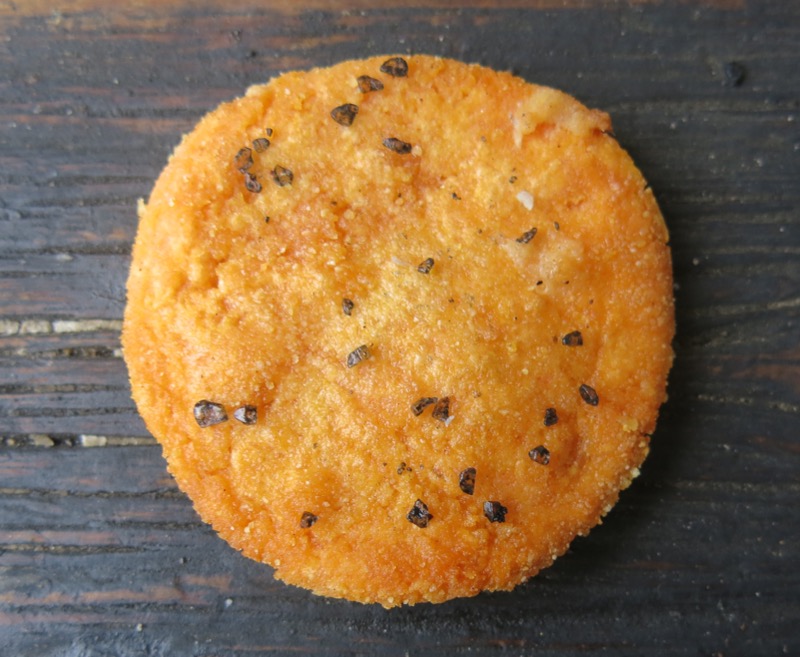
I added only black Hawaiian sea salt before cooking them. They do need salt, me thinks; however, the simple lentil flour and water combination makes a lovely dough and many times, less is more. I have also fried them in a skiff of coconut oil. Not much at all, but just enough to add that exotic flavour and a little fat to the party.
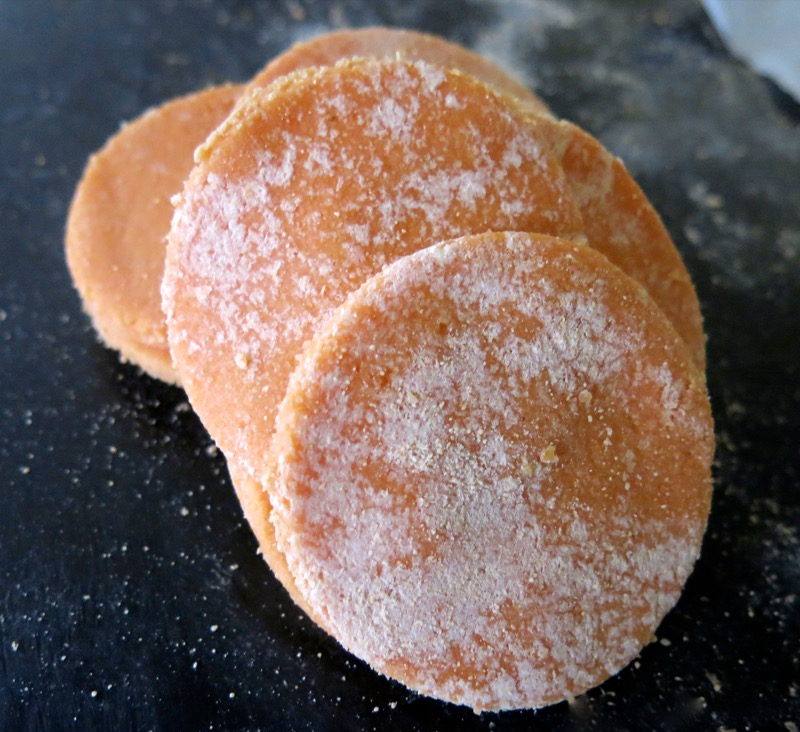
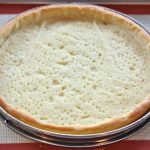
If thinking of making them larger, into a tortilla, which I have also done, they are chewy and don’t roll with ease. Better for a tostada or a hard shelled deep fried tortilla. De-licious like that, but not so good for you unless you have a Philips AirFryer. That is a perfect little machine for making a stiff well shaped red lentil tortilla like the deep fried kind, without the fat: delectable and crunchy. These bright orange rounds are a welcome relief from the constant deluge of rice crackers served to our Gluten Free friends over the holidays. I first made them just for me when looking to enhance my nutritional intake with something I could easily digest! Recently, I made them for our friend Drew when he came for dinner. They were a hit: nutritious, delicious and economical. Now, that is a winning combination.
Red Lentil Crackers: Making the Lentil Flour
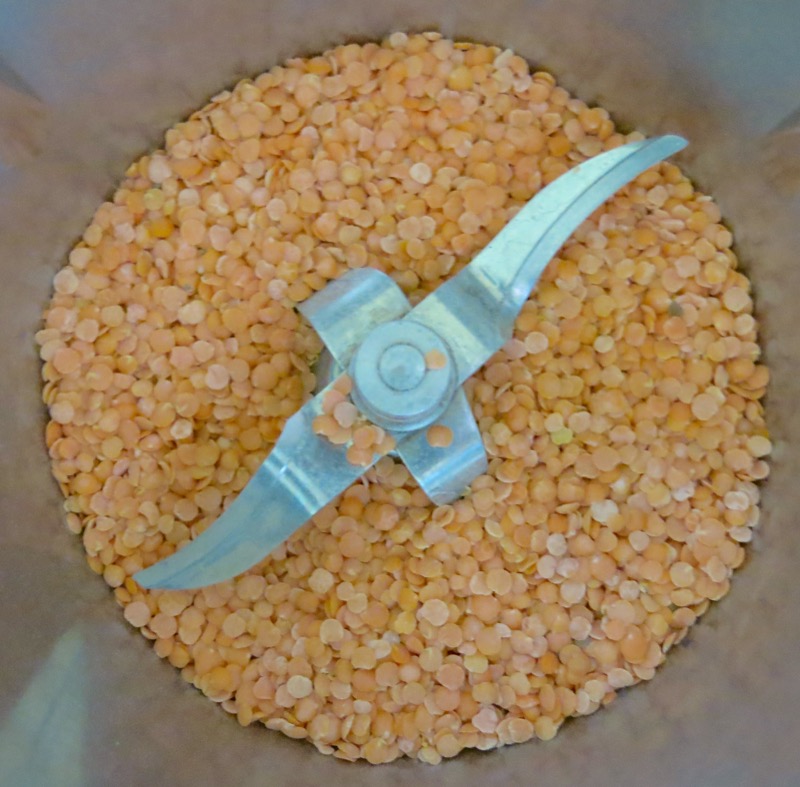
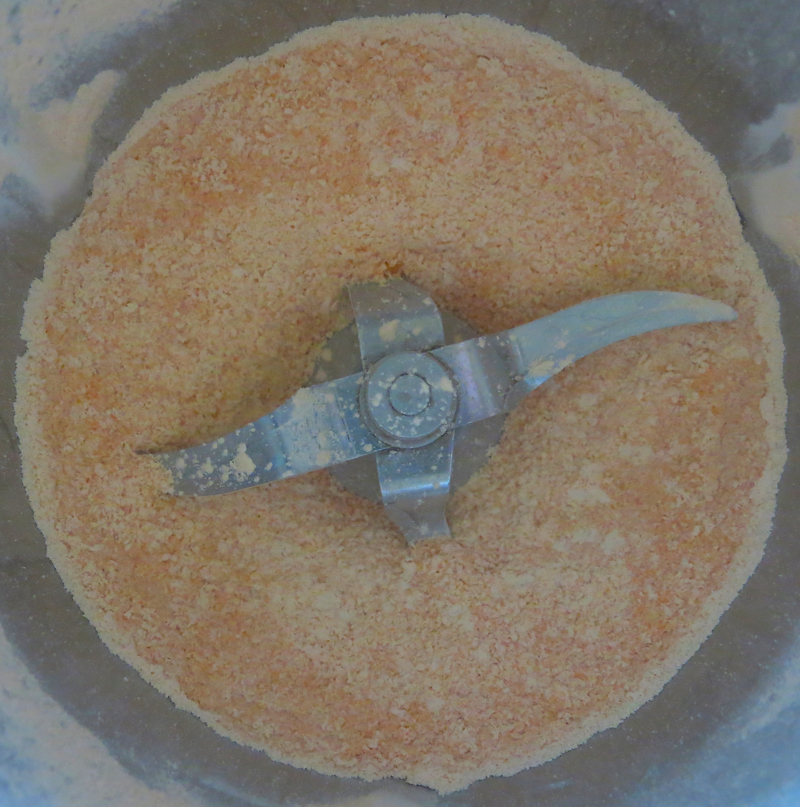
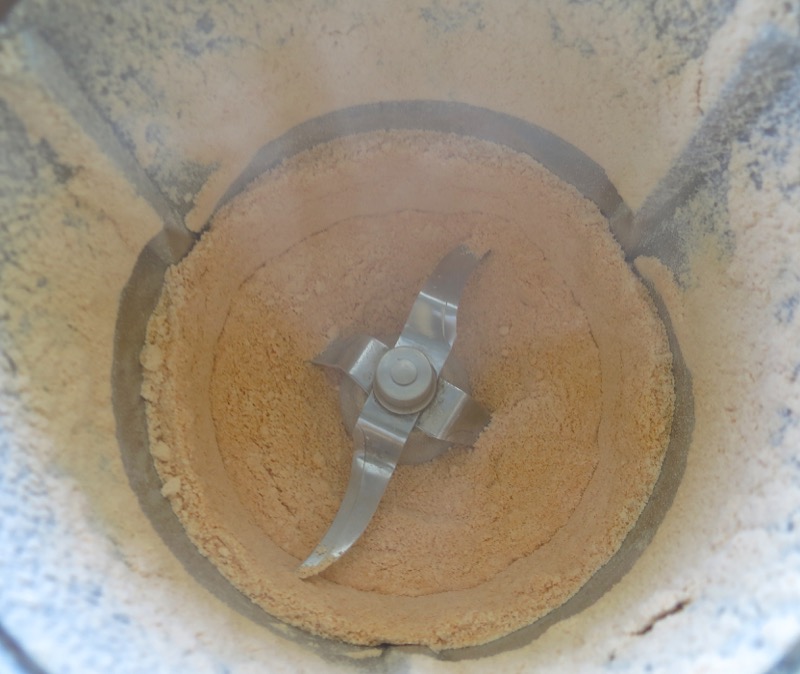
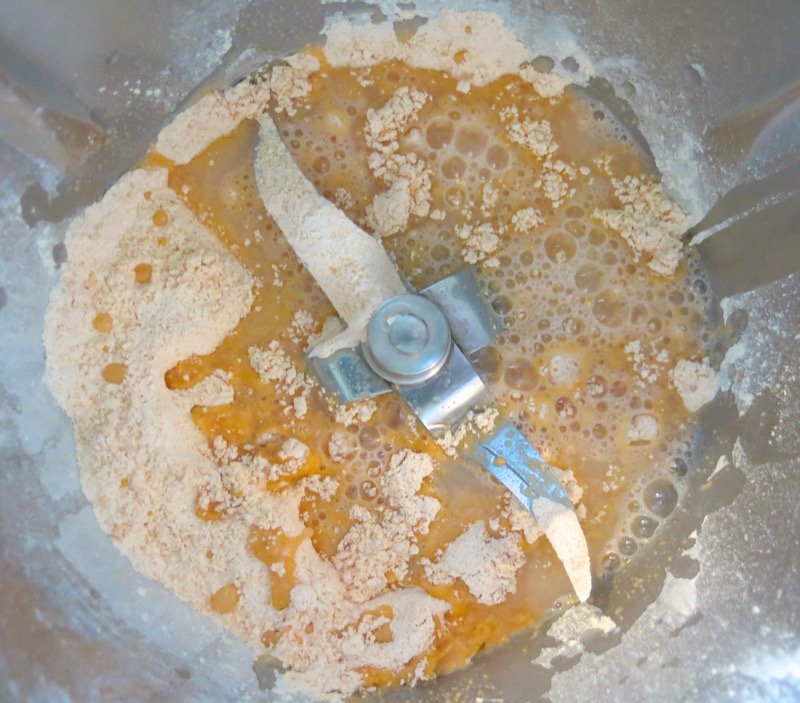
I use my Thermomix machine for everything, and it is spectacular at grinding grains into find flours, but try your blender. The finer the flour, the better the resulting cracker will be, so give it a go. The middle photo shows the flour too coarse.
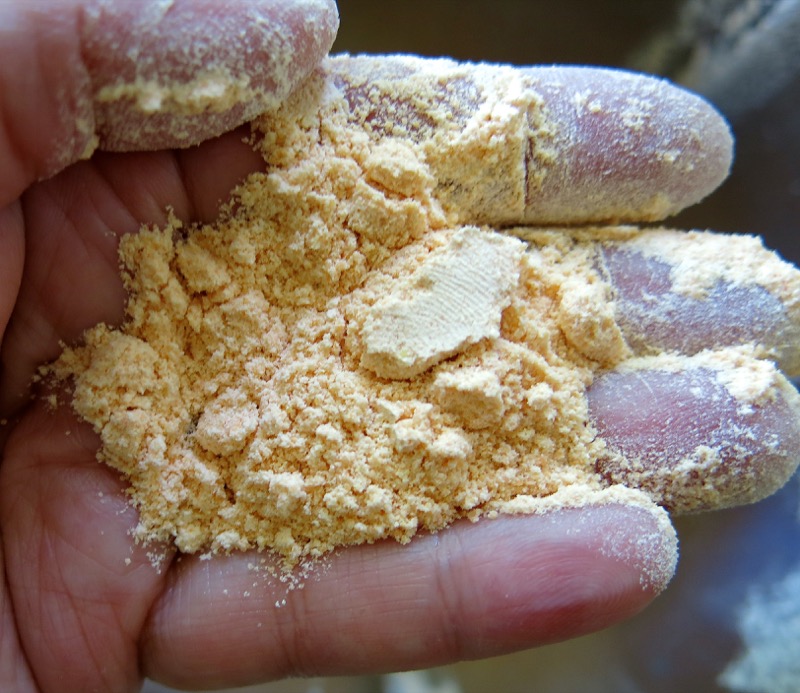
250 grams lentils equals 250 grams lentil flour, if you clean the bowl out well. Can you see the powdery fine texture I was able to achieve with my thumb print in the flour in the above photo?
Red Lentil Crackers: Making the Dough
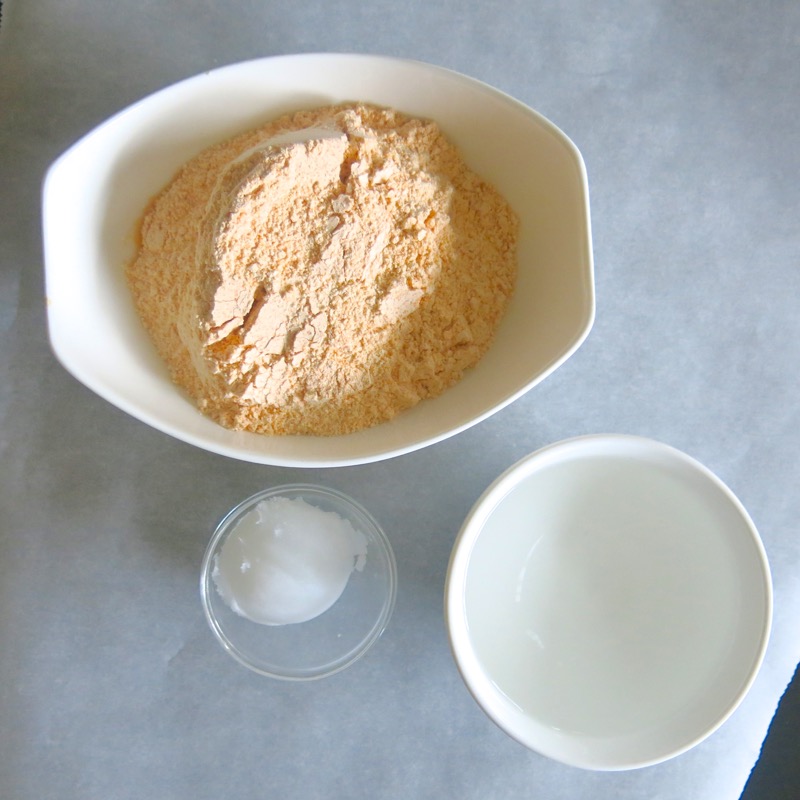
The ratio is very simple: 2 parts flour to 1 part water for the dough. You will most definitely need extra flour for rolling. I suggest milling a good 2-3 cups of lentils and starting with one batch of the dough using 1 cup of the lentil flour. I added 2 teaspoons of coconut oil as that is what I used to fry the entire batch of crackers made with.
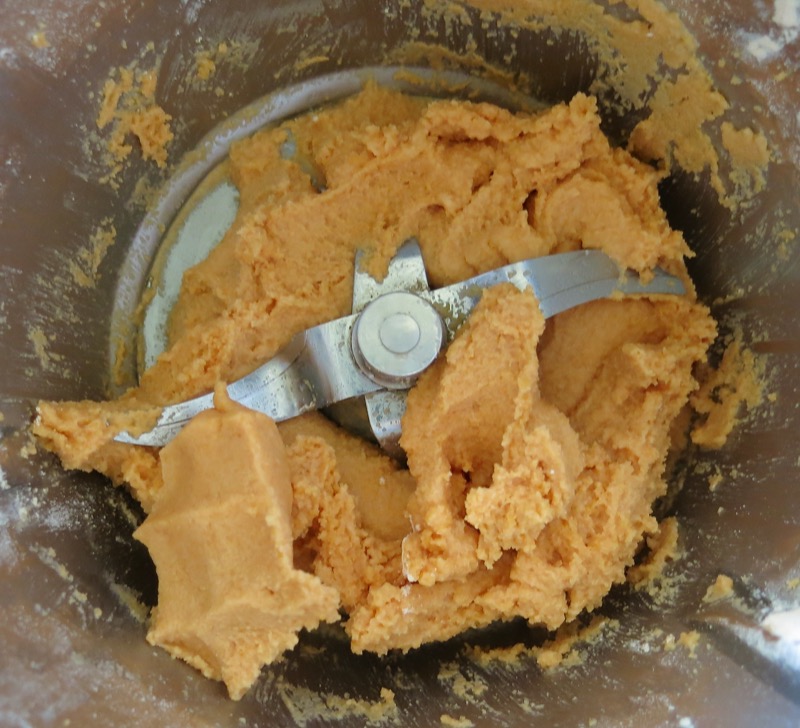
Mix to combine. Dough will be soft and supple. Above, right, you can see how my finger marks are left in the dough I squeezed.
That is such a beautiful dough. I didn’t grind nuts or seeds into it, and if I was added them, I would grind them separately, as they both contain considerable oil. Ground nuts are much easier to work into the dough than mill with the lentils, and they would add texture, flavour and colour for a more rustic cracker.
Red Lentil Crackers: Rolling out the Dough
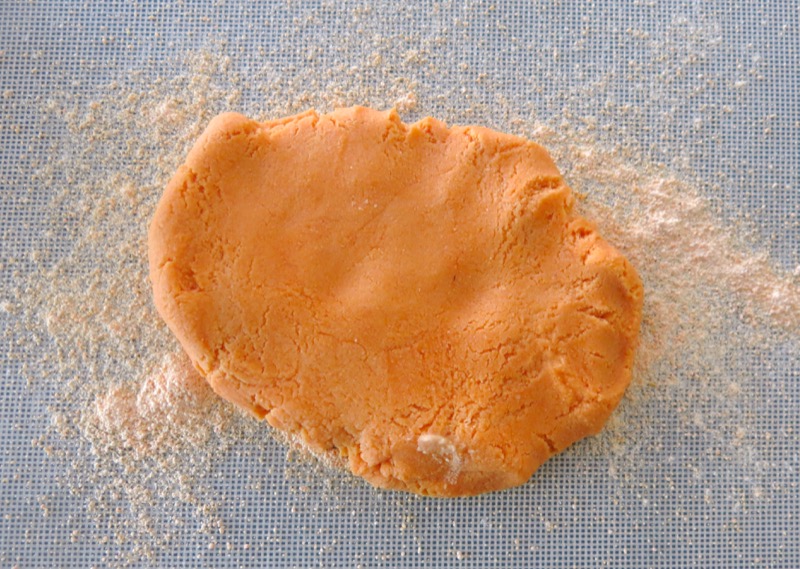
No need to refrigerate this dough, but it is important to flour the mat well with the lentil flour and I used parchment paper over the dough. Use that, or a sleeve on your rolling pin to avoid any sticking.
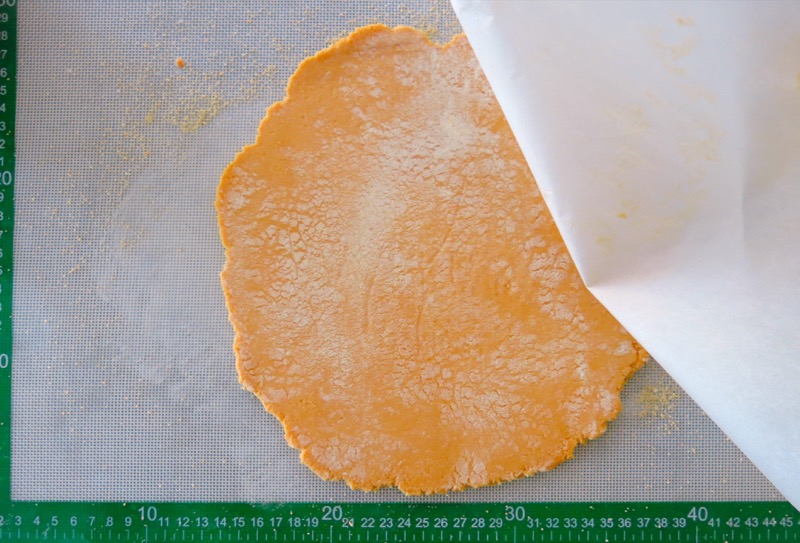
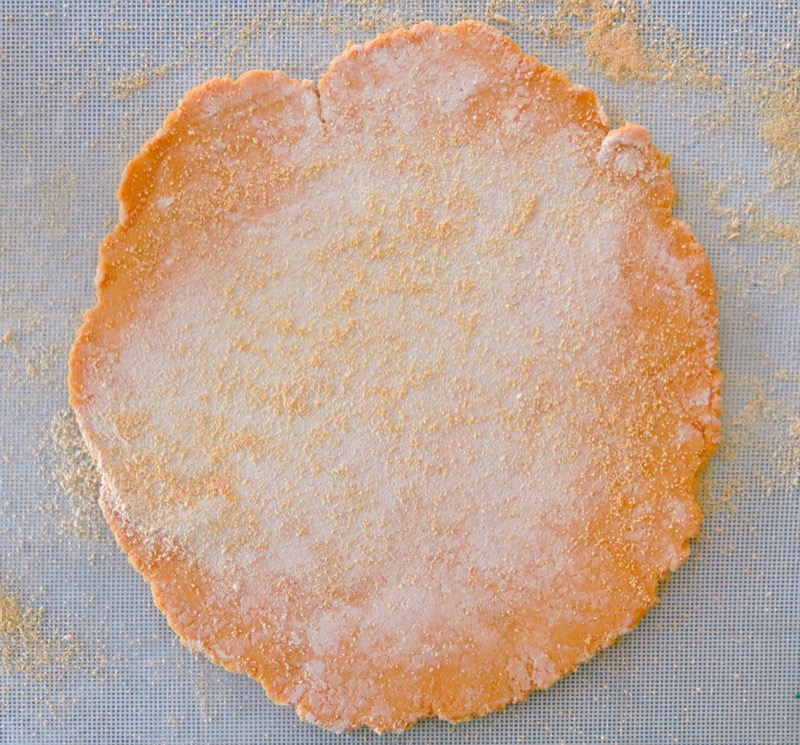
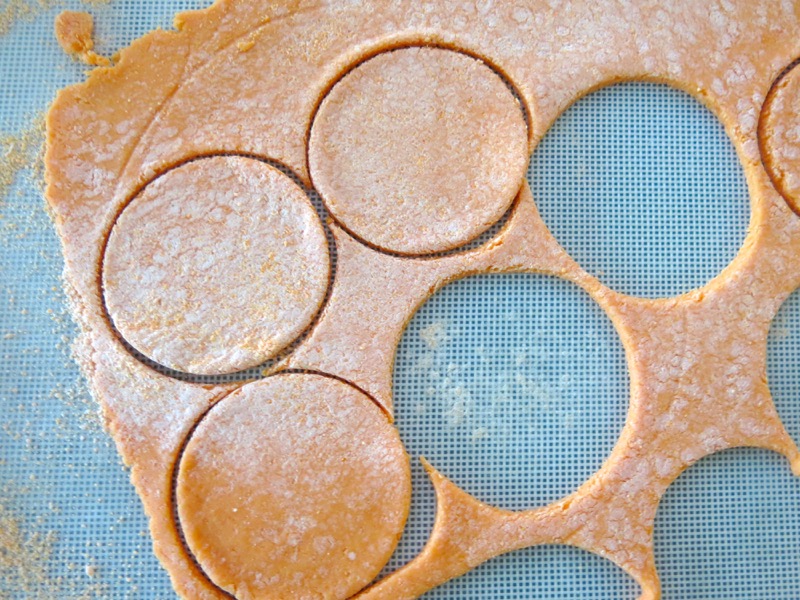
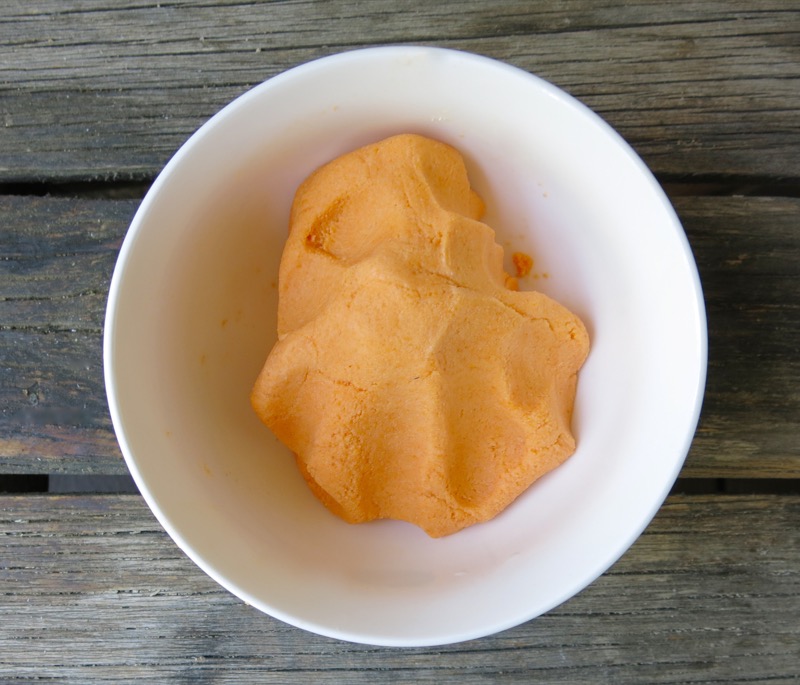
Gorgeous dough. I used a three inch biscuit cutter.

I like them substantial, but not thick. Above, right works for me: about 1/8th inch thick.
Ready to bake or fry.
Red Lentil Crackers: Frying the Crackers
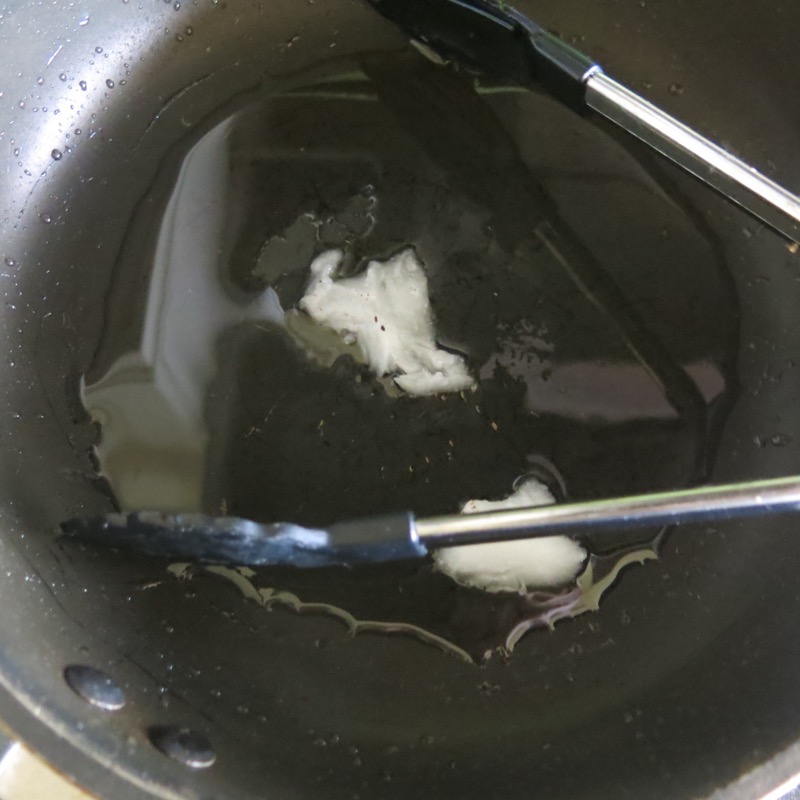
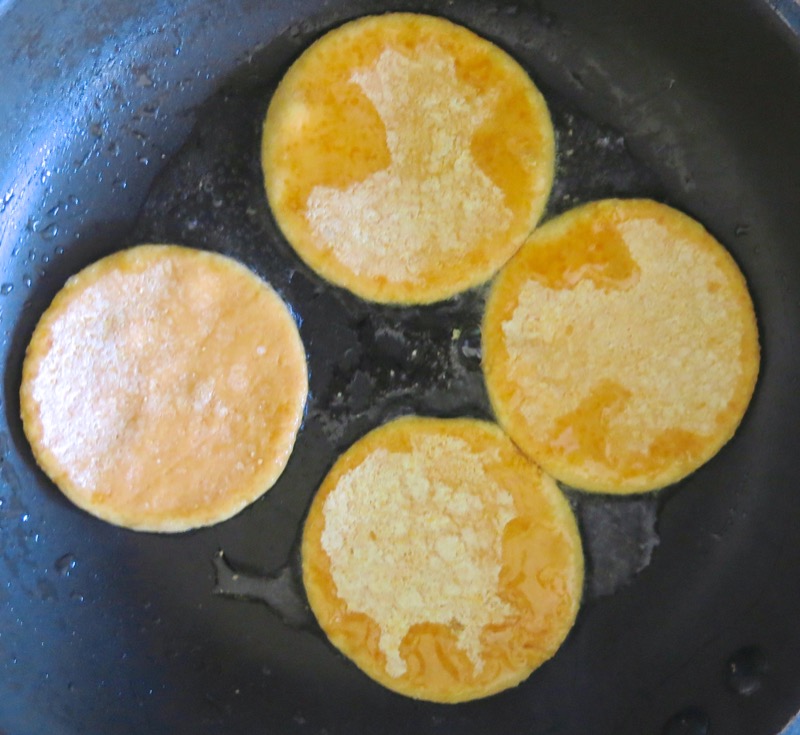
I melted the coconut oil, and removed it, leaving only a skiff per batch, for frying and flavouring, which you can see in the photos. Not much oil, but enough.
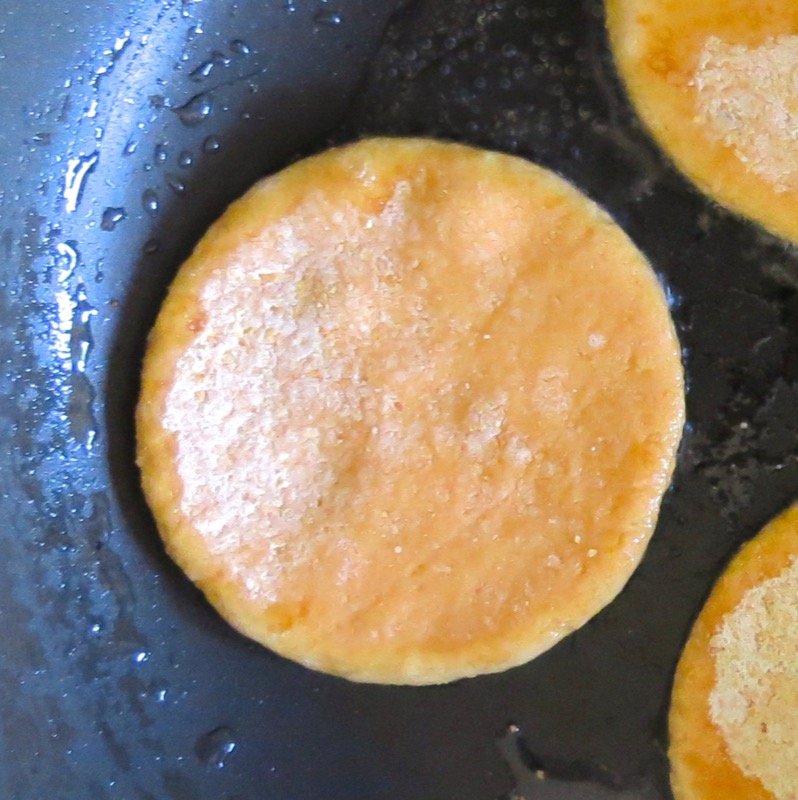
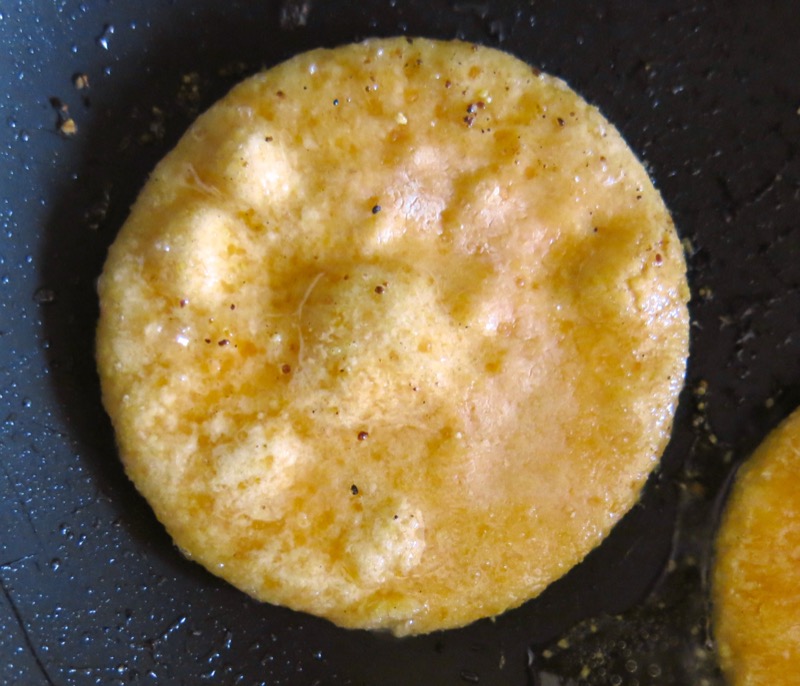
Do not take your eyes off the pan. On medium high heat, these will cook in 30 seconds. As soon as they start to bubble, as on the right, flip them. Leave them about 15 more seconds, and remove to a paper towel to soak up excess coconut oil. It was also at this stage, just before the flip, that I added the Hawaiian Black salt and it did seem to stick to the crackers after they flipped over onto it.
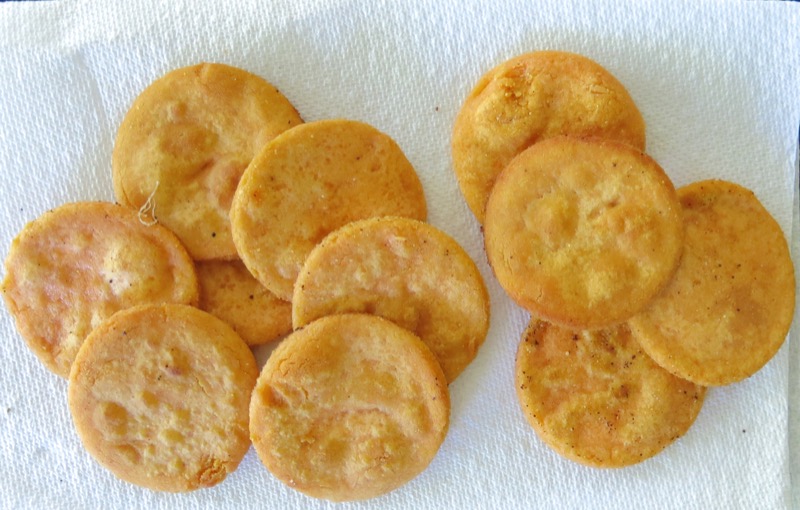
One cup of lentil flour makes twelve 3 inch crackers. If one is missing, I didn’t eat it.
Red Lentil Crackers: Serving the Crackers

In a basket with spreads, dips, cheeses and whatnots is always easy, but with a dollop of homemade yogurt cheese and Vanja’s dad’s Homemade Ajvar sprinkled liberally with Hawaiian Black Seasalt; sublime comes to mind. Spectacular colour with the flavour to match. Bear with me for a moment while I contemplate the experience.


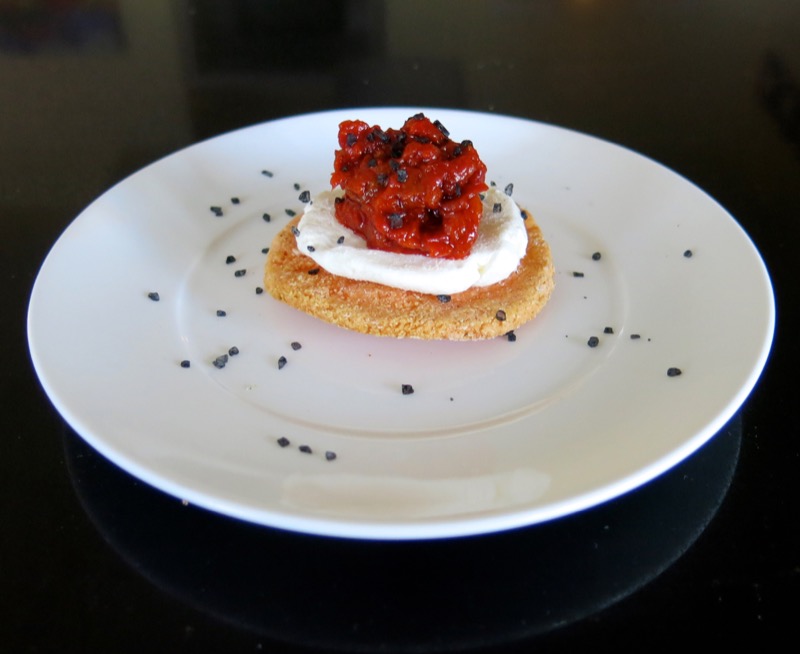
Whatever you add, they are tasty on their own, and just so darn pretty. Do you agree? Happy Holidays!

Red Lentil Crackers
Ingredients
- 1 1/2 cups red lentils
- 1/2 cup water
- 2 teaspoons coconut oil
- pinch of salt
Instructions
Making the Dough
- Mill red lentils in food processor or blender to create a fine flour; set 1/2 cup of red lentil flour aside
- Place 1 cup of the flour, 1/2 cup water and a pinch of salt in mixing bowl; combine until dough is formed
Rolling the Dough and Cutting the Crackers
- Generously flour work surface with red lentil flour set aside previously; place mound of dough ontop floured work surface
- Roll dough to 1/8 inch with rolling pin covered in a sleeve or over parchment paper covering dough (to avoid sticking)
- Cut out with 3 inch round biscuit cutter; place cut out discs on floured surface until all are ready to fry
- Continue to cut out discs, re-rolling dough and flouring board, until complete
Frying the Crackers
- Place paper towel covered plate nearby
- Heat skillet to medium high; melt coconut oil in pan, pouring out excess and reserve
- Fry 4 discs at a time; turn or flip as soon as bubbles appear (in about 30 seconds)
- Fry 15 more seconds or so; remove to paper towel covered plate to cool
- Repeat process until all crackers are fried, re-oiling the pan each time
- Store in air tight container, or freeze; crackers will be crisp, but do not have a "snap"


Totally lovely, lovely!
Thank you, thank you! You can’t believe how happy I was to see something new, that I cqn eat without substuting, and that I haven’t already made, one way or another. It felt like Just Specially for Me!!
I’m going to try making flour with my Nutri-Bullet … but I might make them thinner and cook them without oil, to make them kind of like chips. Homemade lentil chips.
I’ll bet they’d cook like papadams. And maybe would work in a hot oven. My once iron tummy is too rusty to deal with much heated fat!
Frances!
Well, that is wonderful to hear! Cannot wait to hear how they turned out for you and what you did with them. Yes, they definitely bake stovetop somewhat like papadams, but are “chewier”.
🙂
Happy Holidays!!
Valerie
LOVE, love, love the idea and the simplicity of these crackers, Valerie! Cannot wait to try them. I have a big jar of red lentils just calling their name 🙂
Cannot wait to hear how you enjoy them, Margaret.
Happy Holidays!
Valerie
I think this is a great recipe but it didn’t work out too well.
Just don’t use a a Nutri-bullet – it doesn’t get the lentils into a fine enough flour and they turn out super grainy and thick. They’re edible but not particularly enjoyable.
AWWWW! Maddie! Yes! To make this recipe, you need a powerful blender or a Thermomix. The lentils must be ground to a powder like flour – and it does make a delicious cracker!
🙂
Valerie
Hi interesting ….can i roast and use lentils as it would grind easily..and also can i bake these????
Hi Sona,
I have not roasted the lentils. I learn by trying. 🙂
Of course you can bake them! Let me know how it turns out!
🙂
V
Did not work at all….????. Maybe flour not fine enough? This is third (unsuccessful) attempt. Oh well attempt four may work????????♀️
Were you using a Thermomix, Bev? That would be the only machine that can make the flour fine enough. The recipe is a 5 out of 5 with the instructios. I am so very sorry it didn’t work for you.
🙁
Valerie
Valerie how long would you bake them for & what temp?
Thanks
Helen, this would be a guess, but 400 degrees, well heated, on a parchment-lined baking tray for 6-10 minutes. They will puff a bit and then be a little browned on the bottom, not necessarily on the top. Let me know how it goes. You could also fry them in a non-stick pan without fat.
🙂
This worked very well for me. I use a coffee grinder to make the lentil flour. It was very fine.
Good idea, Andrew
Glad to hear it!
Valerie
You mention coconut oil. Would something like Avacado or Olive oil work out as well? These look good
Hi Mark,
I haven’t tried another oil, but don’t see why not?
Let me know how it goes!
🙂
Valerie
Yummy!!!! I can’t wait to try these! I’m already planning the different flavours I will add to them…
Thank you for sharing your recipe, my friend!
Hope you enjoy them as much as we do and I am sure we will learn some great tips from you once you get started! That is the beauty of what we do! Everybody’s great idea can always be improved by another person’s great idea!
XOOX
Guess I should have read the comments before even trying to grind my red lentils. I have the heaviest Cuisanart processor they make but could not get anywhere close to a “flour” from the lentils. WIll now be cooking them and trying to make do with a pretty pasty mix.
Wish you would have been very specific in the recipe about needing one of these heavy duty and expensive mixers in order to accomplish the task. I don’t always read the comments right away so missed that point completely. Just saying “Mill red lentils in food processor or blender” certainly doesn’t tell the whole story here.
There are others that have had great success with a regular blender. Maybe your lentils were moist? They need to be super dry and are very easy to make into a flour.
Sorry, you had a bad experience.
I wish you future success
Sincerely
Valerie
Can a person add herbs or other flavourings to the dough without messing with the end result? Thanks so much!!
Hi Elaine,
Already answered you privately, but yes – dried herbs and spices can be added without any problem.
Let me know how it went!
Sincerely,
Valerie
The dough doesn’t get that consistency. I bough the flour, and is wet even dough I add more and more flour 🙁
You should not have to add more and more flour, Maria. You are the first I have heard from with this problem. Fortunately, all others love the recipe. One person had trouble grinding the lentils fine enough. I am wondering if that was your problem?
These are very easy and work perfectly every time. So sorry to hear – not for you.
I really have no clue how to help without more information.
Sincerely,
Valerie