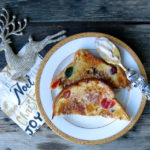
Baby Shower Babyface Sandwich Cookies for Amy and Heidi Marie
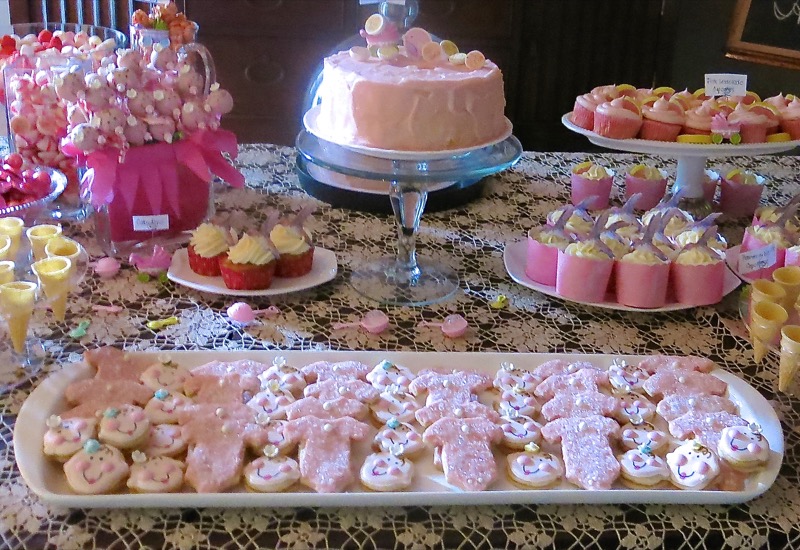
Every good Baby Shower must have a theme. And, I did. It was “Baby Girl”! Not so original, but pretty darn sweet and so much fun for me to plug away at over the long winter months. I usually do things in twos. Chocolate and Vanilla. Fruit and Nut. That kind of idea. So, I made two kinds of cookies. This one was the shortbread sandwich cookie after the fashion of my somewhat famous Christmas Shortbread Sandwich Cookies.
Best to do something tasty and familiar. Something I know I can do and that tastes really delicious. But, one thing I have never ever done is decorate a cookie with Royal Icing. Never ever. It was mighty intimidating. I read. I watched videos.

I knew I had to make the icing one consistency for the border to hold the icing on the top. I then had to make the icing on the top thinner to flood over the cookie and leave a clean surface to decorate.
My eyesight it not what it used to be. Not even close. My hands were the steadiest in the town. No longer. But, I rose to the challenge. I was motivated and I like learning new things. I recall watching Martha Steward decorate sugar cookies with Royal Icing a zillion times in the later 80’s and early 90’s. If she could do it, I could do it.
My second concern (right after “can I really do it?”) was that I have never eaten a cookie decorated with Royal Icing that tasted good. Why make something to eat if it isn’t delicious? These cookies must have Royal Icing and they must taste delicious.
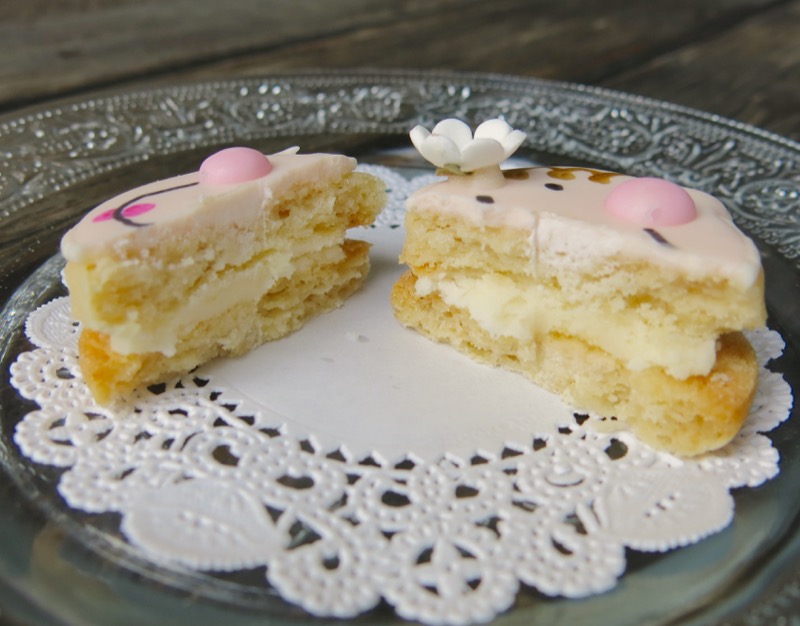
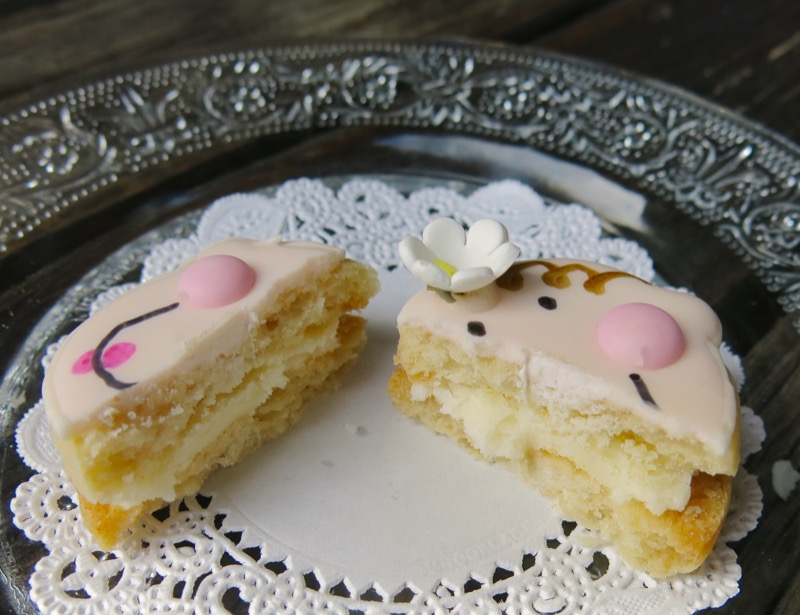
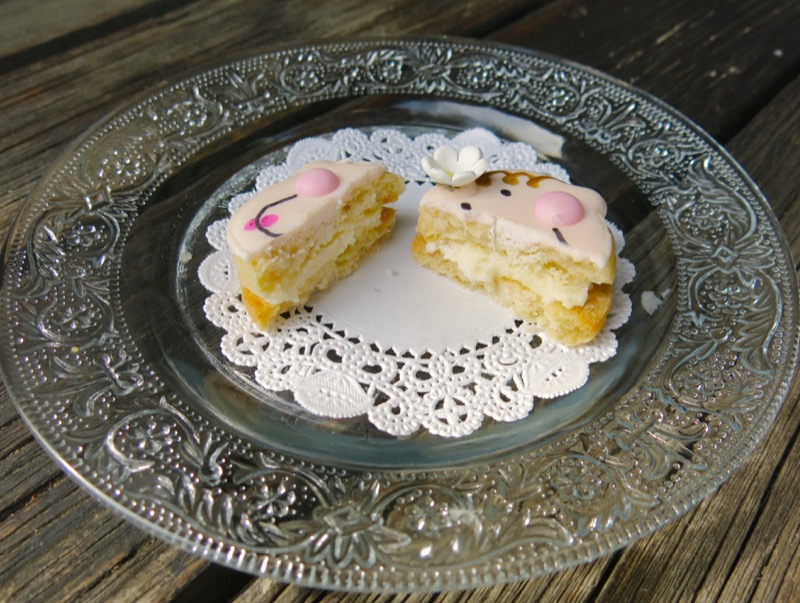
My traditional family shortbread cookie was part of the answer to that, and the scrumptious almond butter icing in the center was the other part of the solution. My hope was that these two components would counteract the usually flavourless and sometimes cloyingly sweet affect of the Royal Icing.
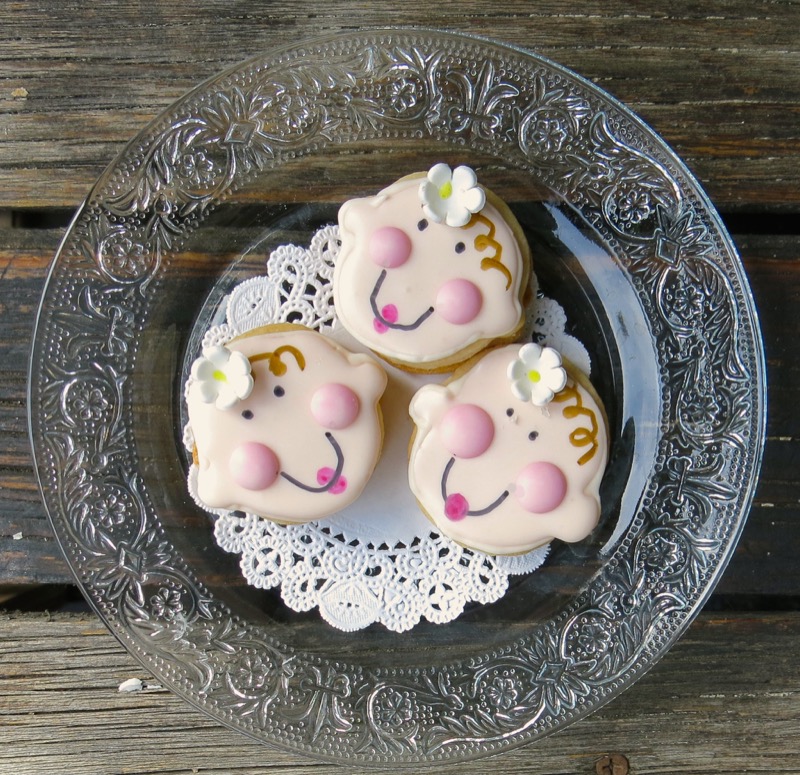
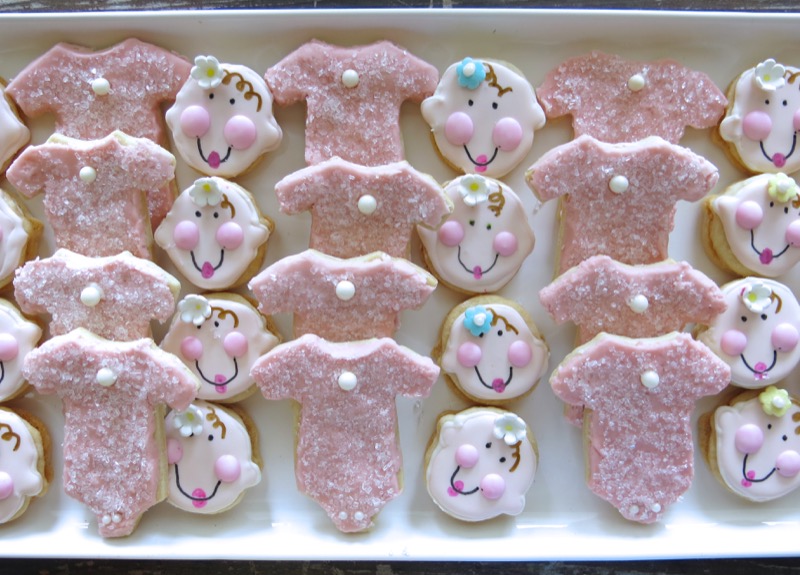
The cute factor didn’t hurt, either. Are these cookies not adorable? I looked at so many images on google and on blogs and everywhere I could find them. Then, I decided to “wing it”. I had decided simple is best. I would use the royal icing for the cheeks. My initial idea was to lay the pink icing into the surface icing so each little cheek was a blush of pink. However, I didn’t have the time to do that fast enough.
So, I decided to do a chubby little pink cheek, instead. There is more to this story. Much more. Read on.
Babyface Sandwich Cookies: Making the Dough
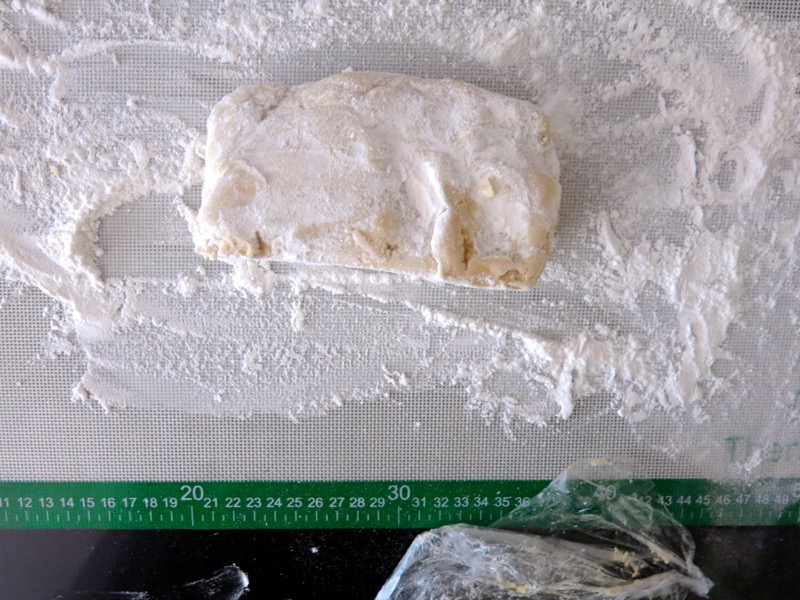
The post about how to make these cookies is here. This is the post about decorating them, really. You will not regret learning how to make this dough. It is done differently than the traditional cookie. The sugar and flour are combined, and then the butter is cut in and the dough is kneaded. Best to skip over to the other post for the instructions if you are planning to make it.
For now, I only made one batch of the dough as I really only needed 24 cookies. That was my goal. Twenty four guests were expected at the Baby Shower, so I needed 24, or less, of each item. And, because I come from a family who does more, not less, it would be 24 so if they weren’t eaten at the shower, they could be taken home.
Babyface Sandwich Cookies: Making the Cookies
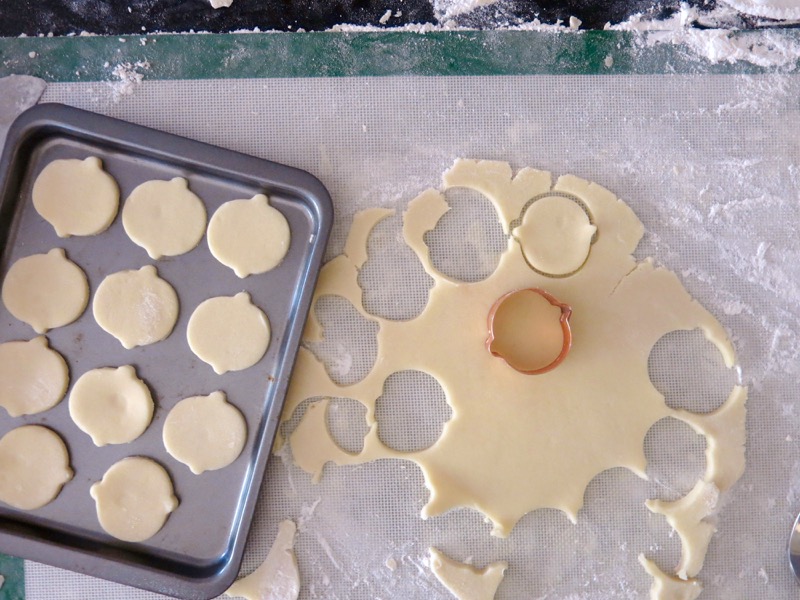
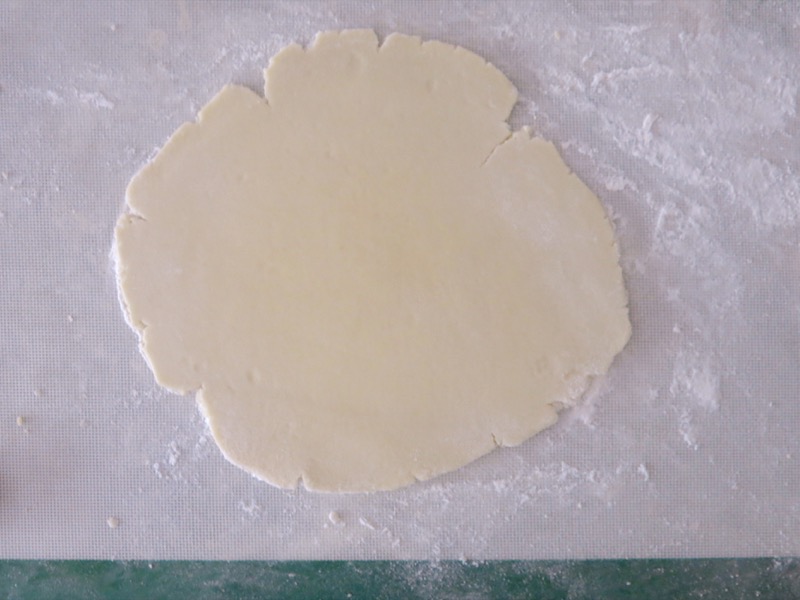
I wanted a sturdy cookie, not a delicate little morsel. It had to hold up to handling, so I rolled the dough out to 1/8th of and inch instead of 1/16th. The cookie cutter? Yes, I could have used a circle. I considered that. But I really liked the baby to have little ears, and no just little ears that I drew on a circle. Of course, when I found I could buy such a cutter, I had to do so. Of course, I wanted everything small, so the “mini babyface cookie cutter”, it was. It is handmade, from the US and cost dearly, really (exchange, postage, duty). Yet, what do I do? It was a small price to pay for the enjoyment I had making these cookies!
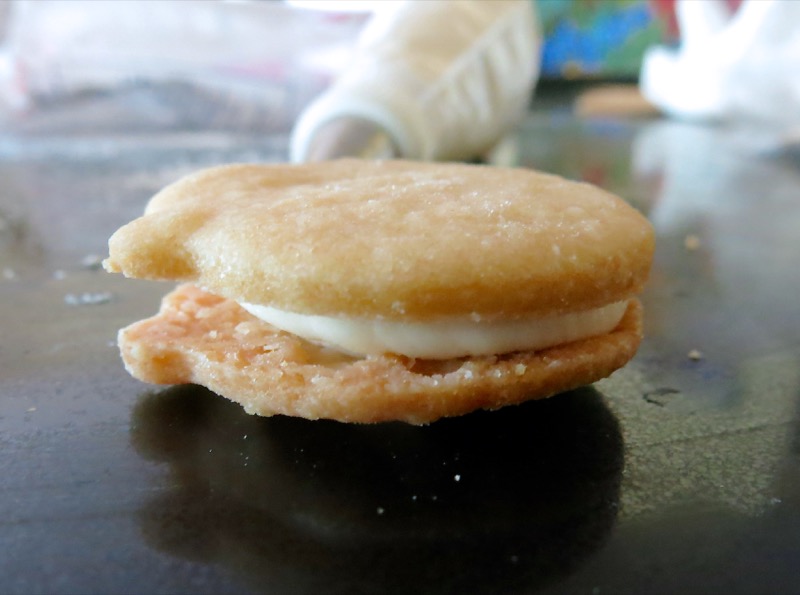
Babyface Sandwich Cookies: Making the Cookie Sandwiches
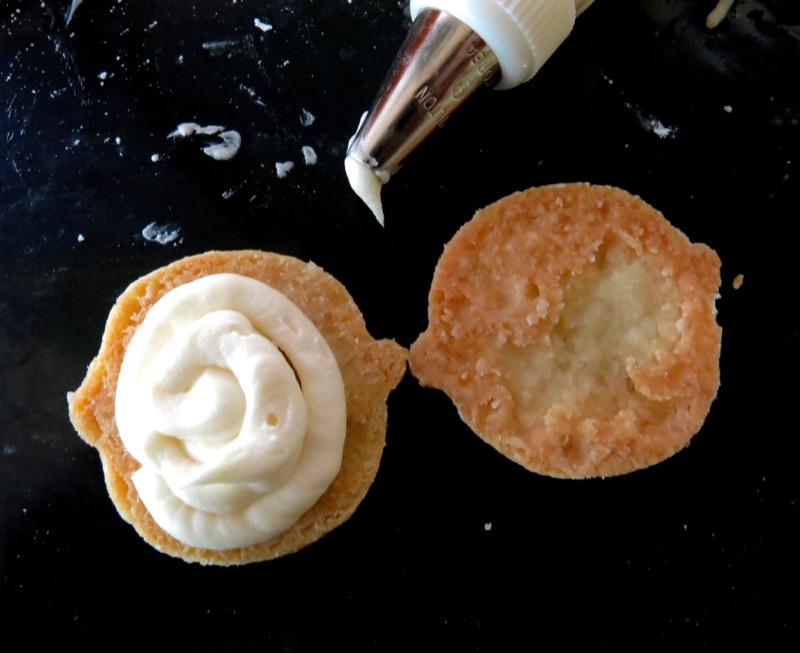
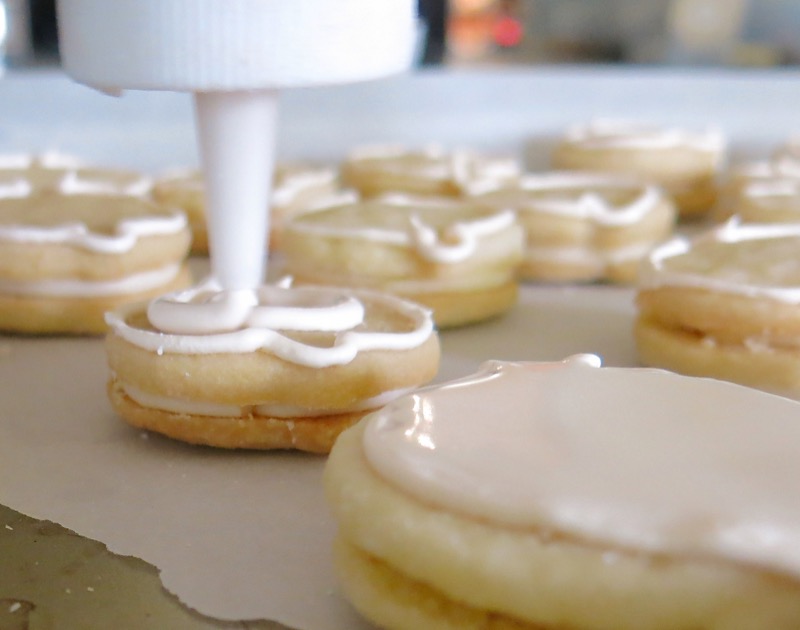
I usually do not pipe my icing onto the centre of my sandwich cookies, but I had to use a piping bag for decorating the face, so thought I would do so to reacquaint myself with the piping bag. It had been awhile. I can promise you, at this point, the cookies were as delicious as my Christmas Shortbread Sandwich cookies. Hands down. Of course, at this point, they were exactly they same cookie: different shape, different colour.
Babyface Sandwich Cookies: Working with Royal Icing

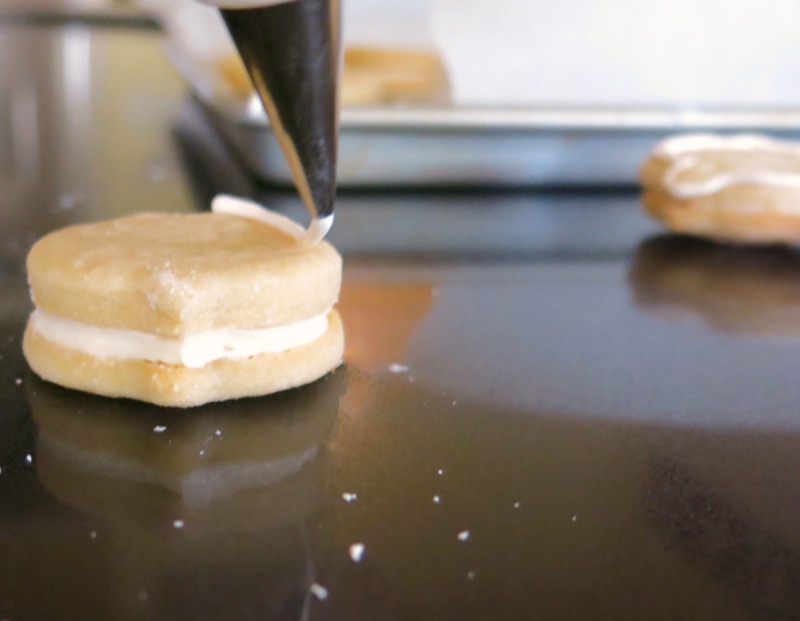
I don’t get in a tizzy when working through a project at my age. I take my time. I used to need four hours of sleep a night and could put the energy bunny to shame. No more. Today was the day for making the royal icing, outlining the cookies, and flooding them. They have to sit over night once iced, for the frosting to set, so the decorating part would happen tomorrow. I had enough on my plate this day. I wrote about making the icing separately. But, suffice it to say, that I got it! I did it. I understood it and I was able to do it again. (I didn’t want to, but I had to. Read on.)
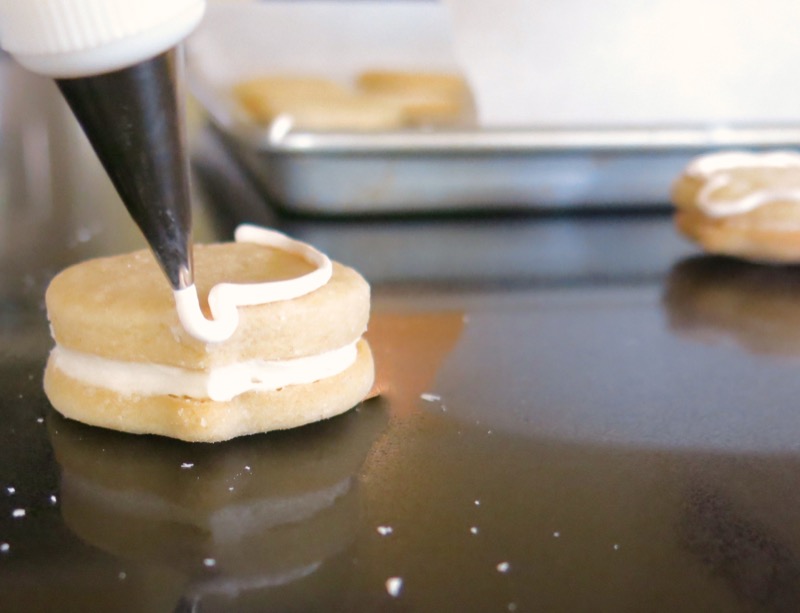
My hands were pretty steady. I don’t lack the confidence to “go for it”, so I just did. Getting the right colour wasn’t easy, but I was happy with the colour. Laying down the borders was not hard. I made 26 cookie sandwiches so I could have 2 to practice on.
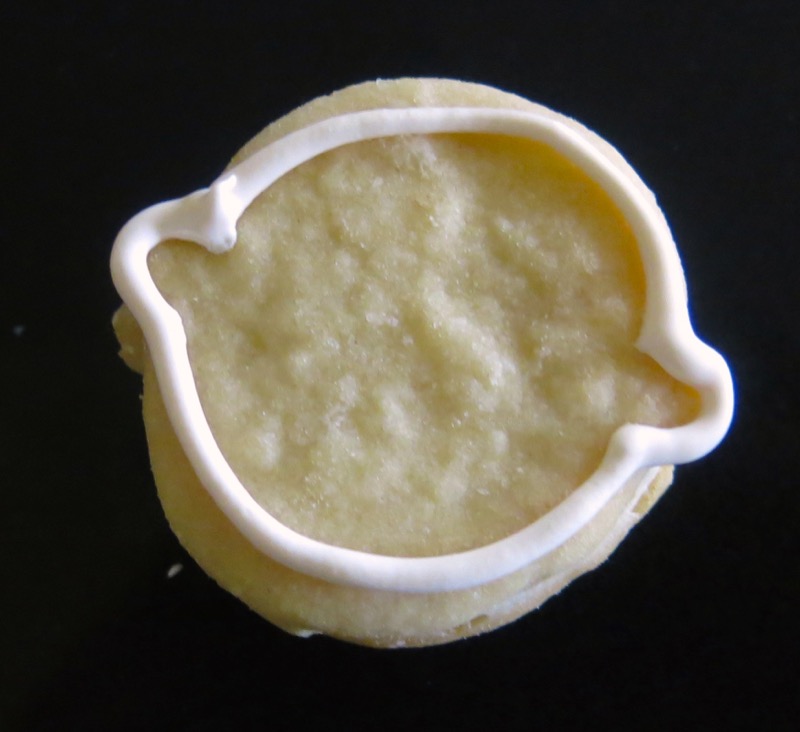
Flooding the cookies was not hard. Getting the correct consistency with the icing was not as difficult as I expected. I just took it slow. I found I could use the end of the squeeze bottle to nudge the runny version of the royal icing for the flooding the top of the cookie into place. Most people suggest a toothpick. I found that this worked best for me.
It is important that the border is the same colour as the flood.
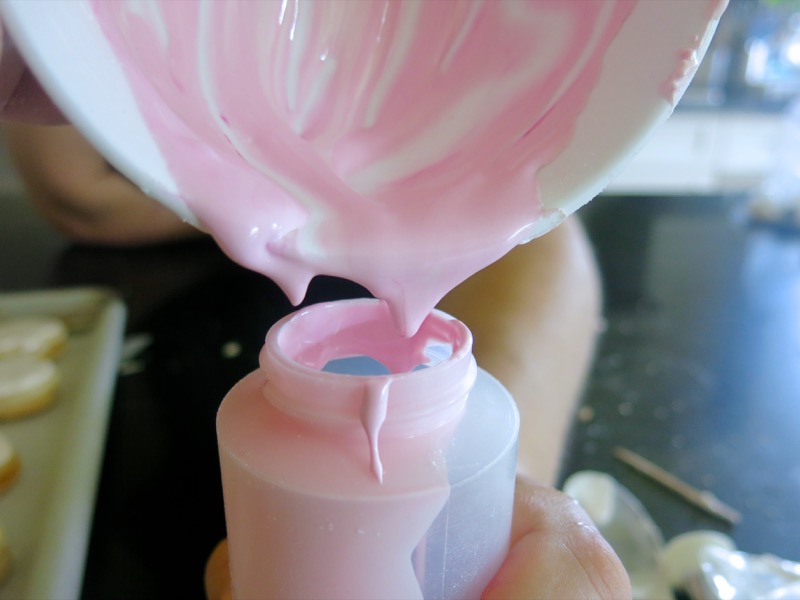
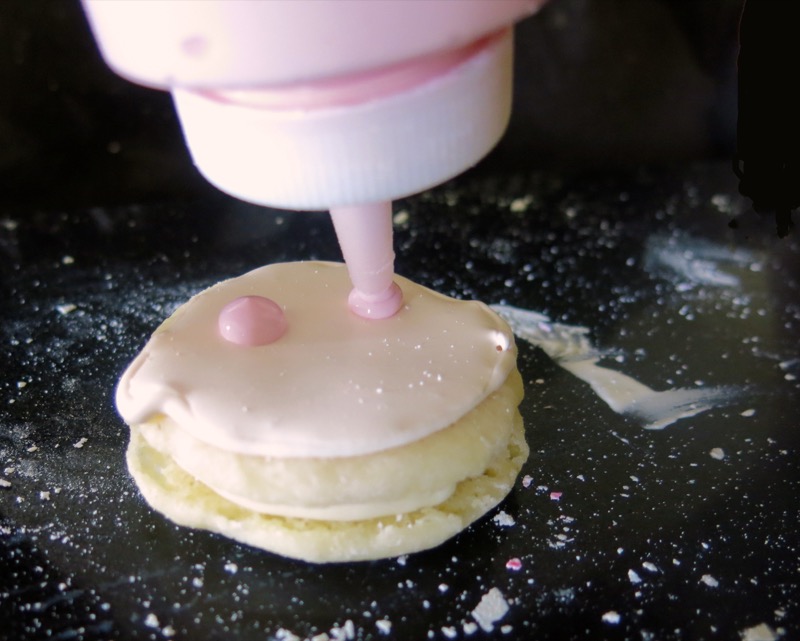
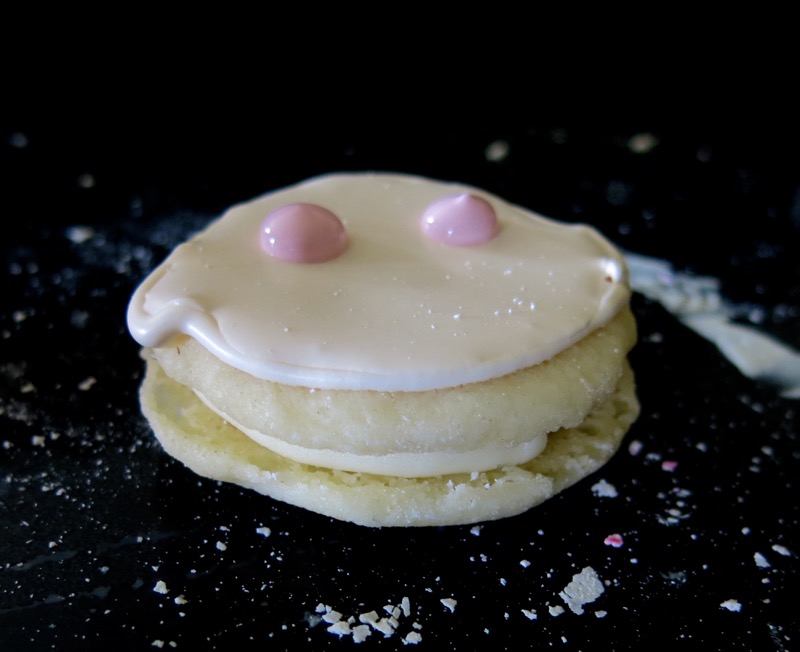

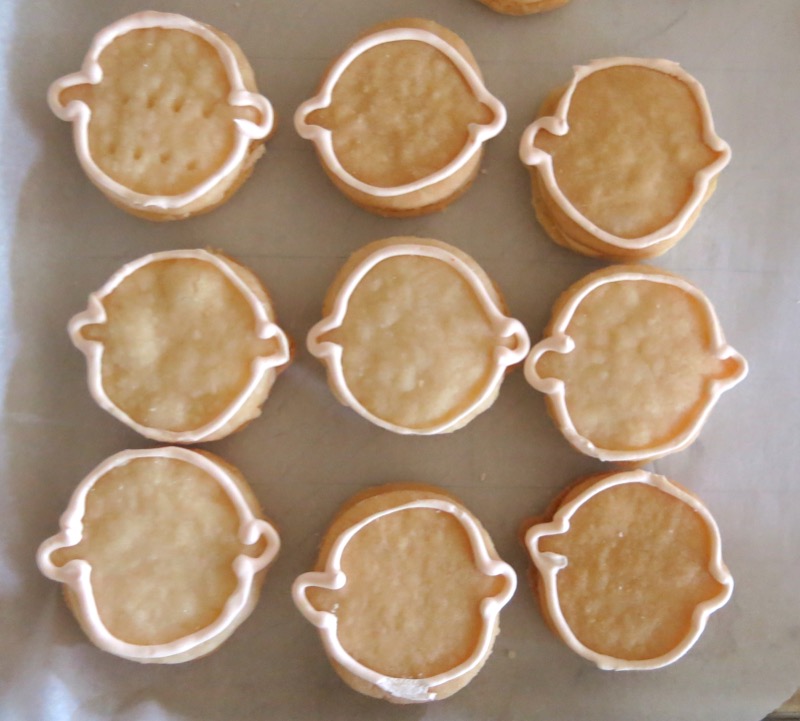
Remixing the leftover royal icing used to flood the cookies with pink for the cheeks was not difficult. If I had another squeeze bottle of the Royal Icing in pink when I was flooding each top, I could have used the pink icing for the cheeks at that time. If the icing hasn’t set for long, the pink icing (same consistency) will fall down into the base and sit there like a little blush polka dot on the cheek. That was my original intent. But, alas, I did not think to have a second bottle of the pink icing and I didn’t know how much of the icing I would need to cover the cookies, anyway. Thus, chubby cheeks! So cute! I placed them almost in the middle of each face height-wise, a little to the bottom of the ear.
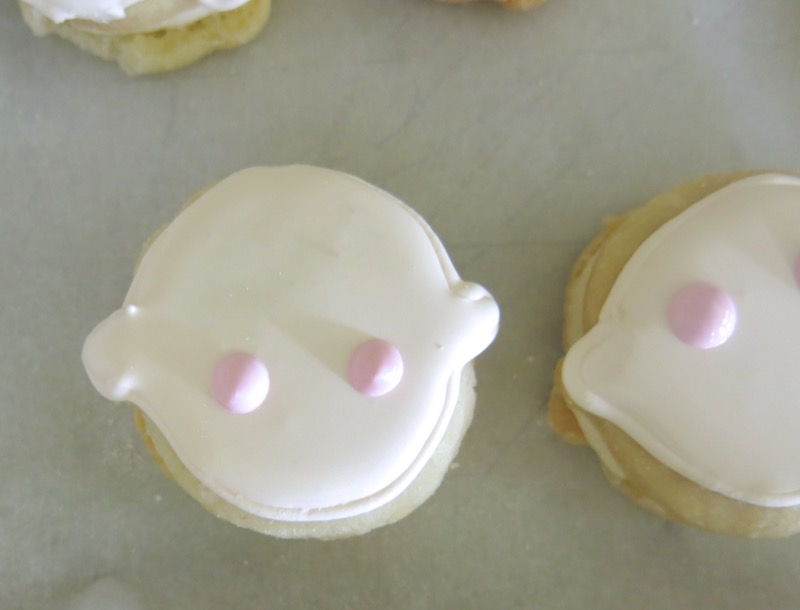
Once that was done, the cookies sit over night to cure.
Babyface Sandwich Cookies: Decorating
How many days did I work on these cookies? Hmmm…
- Day One: made the dough
- Day Two: cut out and baked the cookies
- Day Three: made the cookie sandwiches with the almond butter icing
- Day Four: made the royal icing, flooded the top of each cookie and added chubby cheeks
- Day Five: decorated each cookie
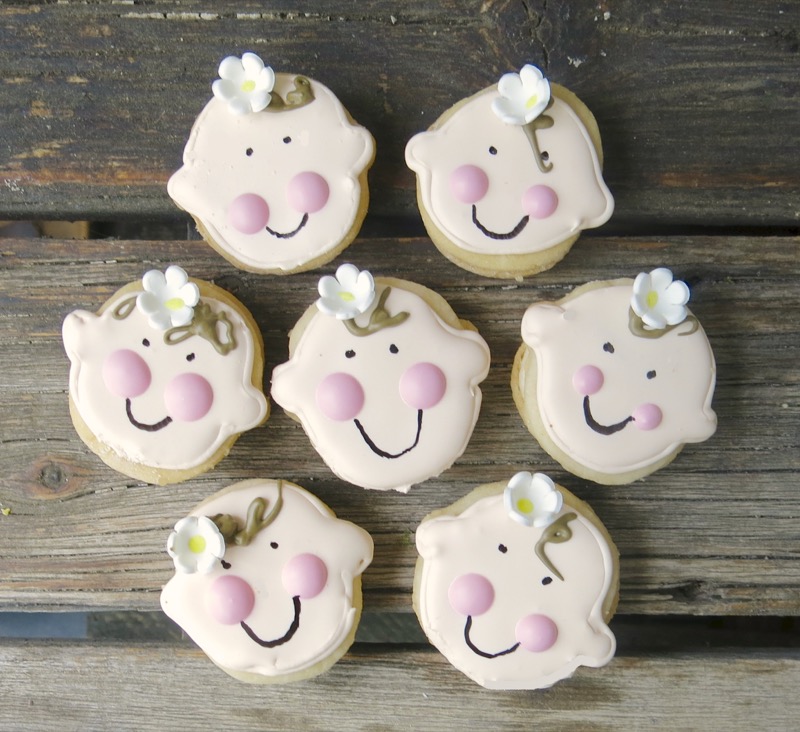
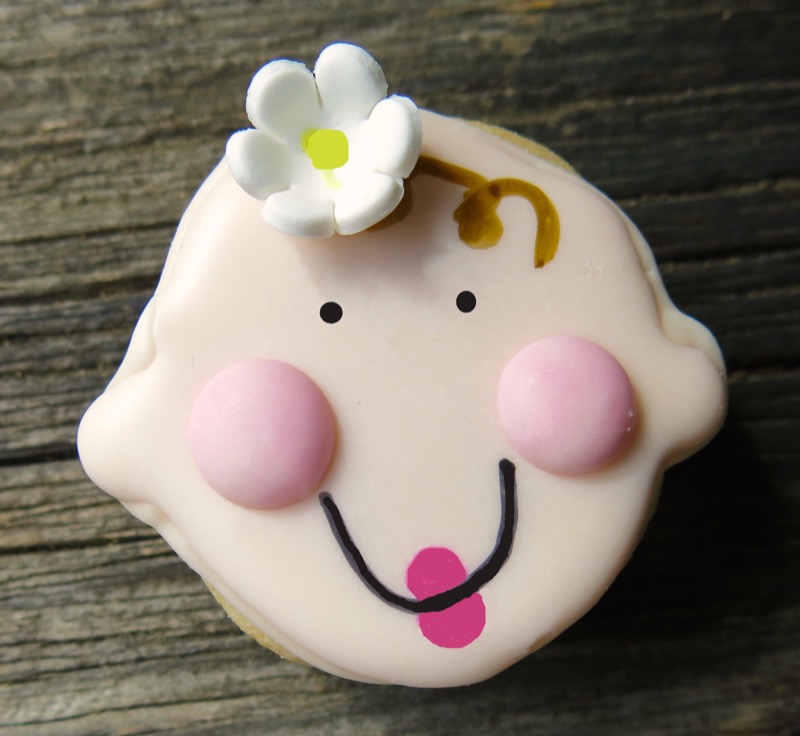
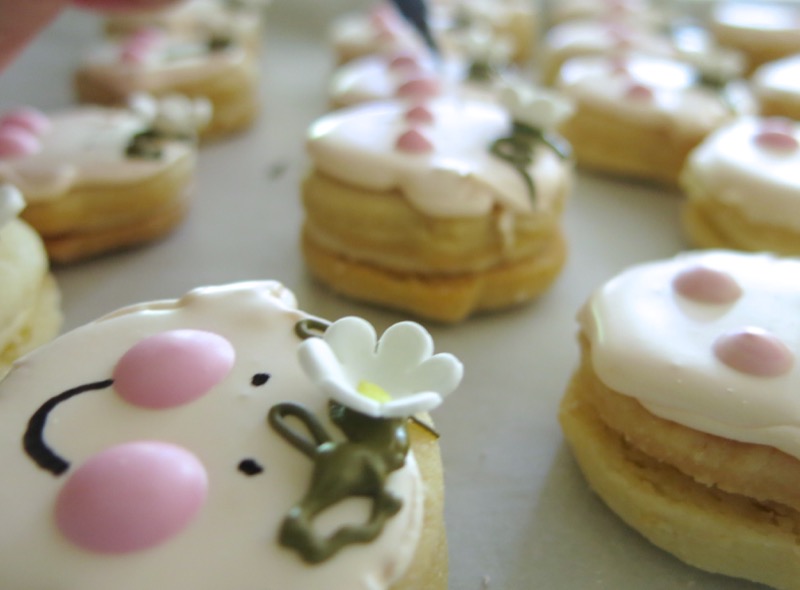
This is day five. Easy peasy. Add the hair first. I took the remainder of the pink royal icing in the squeeze bottle and used my Art 101 knowledge. Mixed all the colours together to get brown. Actually, it was not a nice brown, but on such a cute little face, it looked adorable. I squiggled on the brown curly hair first.
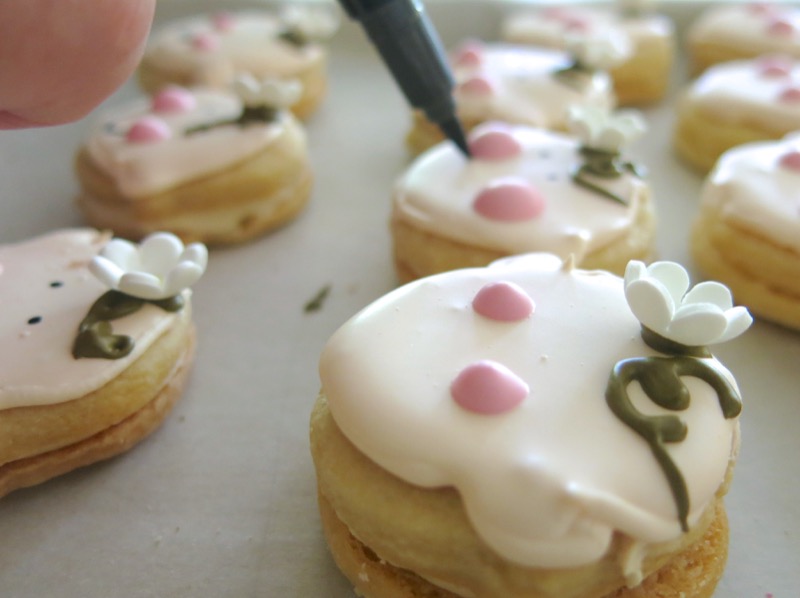
Plopped the little flower strategically amid the curly brown locks, and then dotted my “i’s” and painted on a big u-shaped grin. Happy. Happy. Happy. Even the homely little faces were adorable.
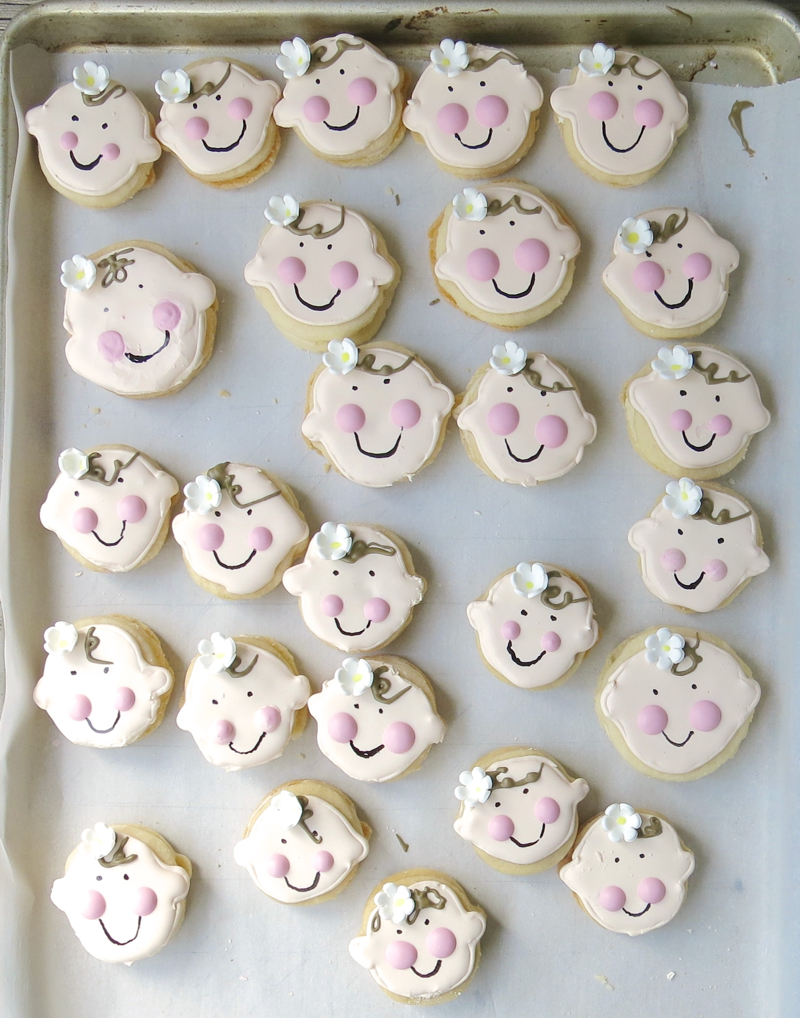
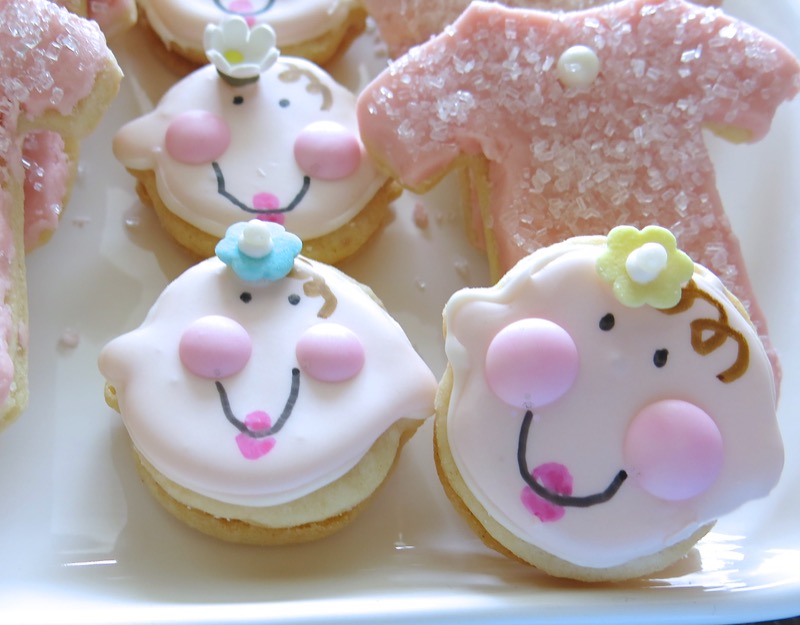
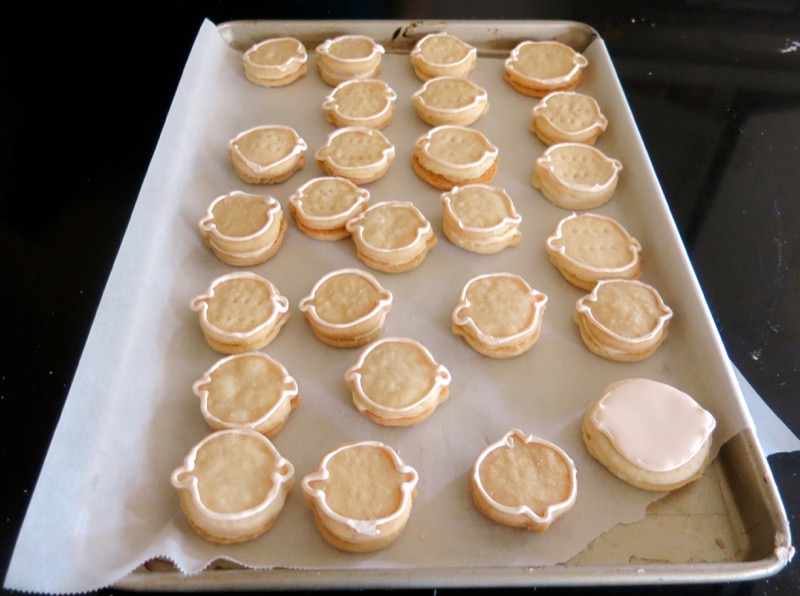
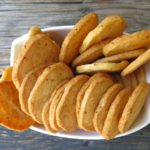
I took a quick pick before hitting the freezer with these little works of art. If you scroll to the top, you will see the second image has a few of these pulled off of the tray and onto the famous “A Canadian Foodie Photo Bench”. Glad I did that. Glad, and sad. Because….
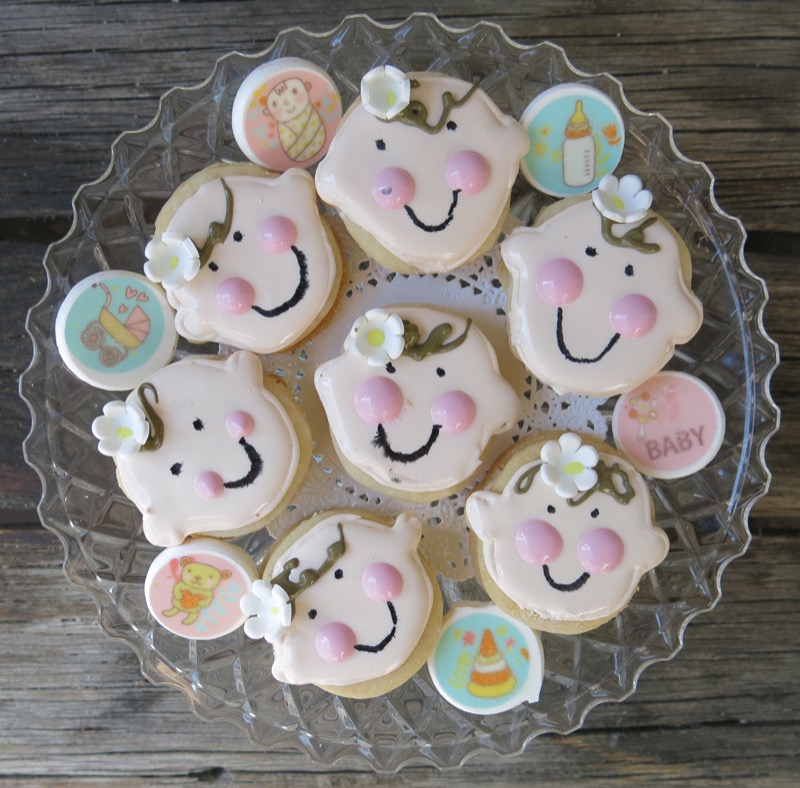
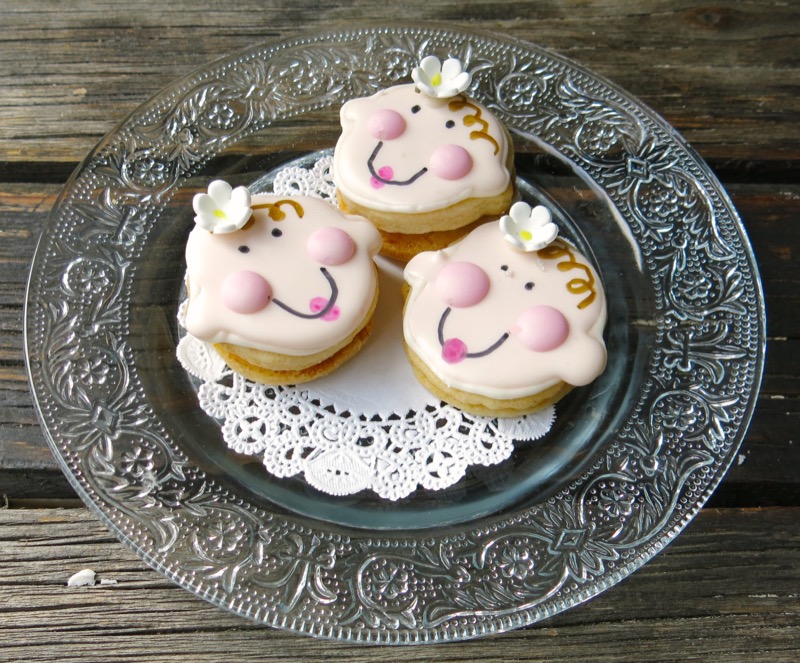
Look what happens when you can’t see. Yes, I had purchased two boxes of edible pens but somehow, someway, I picked up the wrong black pen to make the smiles and eyes. When out of the freezer for a little photo opp with the lovely little meringue kisses, the smiles and eyes ran… and ran… and ran… See? Look again! Oh, what to do? Take a break, that’s what.
Which is exactly what I did for a good couple of weeks. Maybe a month. I couldn’t really face making them again until I breathed it all out. Then I was able. Yup. All over again. I wanted these little ditties to be “purdy”. Not gruesome! And, I wanted to succeed. Was this the only mistake I made while preparing for this shower? Heck no! Wish it was!
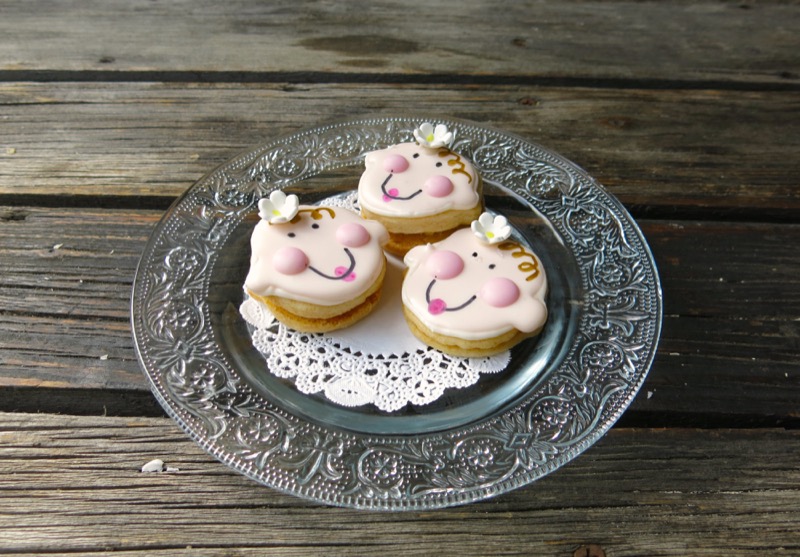
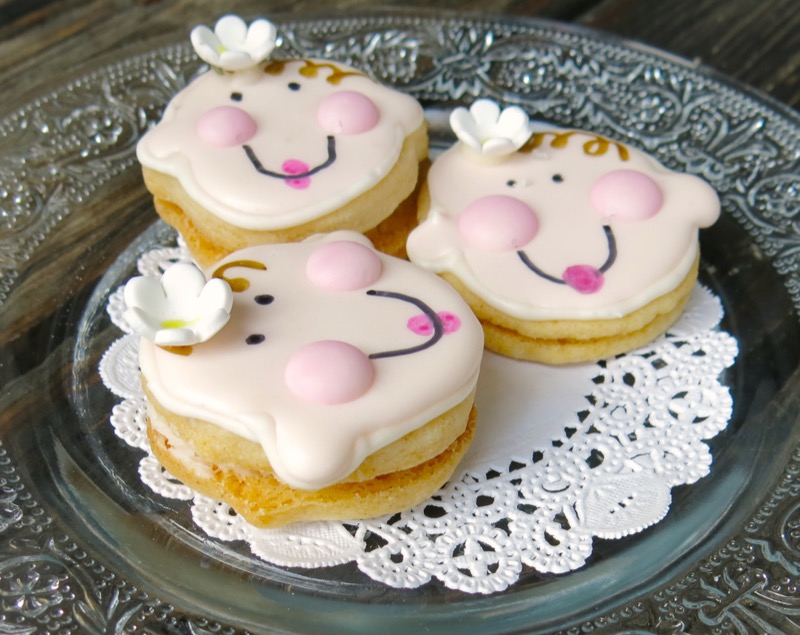
When making the second batch, I found myself out of almond extract. Oh dear. They are much cuter, but not as tasty. I also opted to draw on the hair and add pink lips. I actually tried green eyes, and blond hair, so they could be more like Heidi Marie…. but, black eyes was a must, and the hair had to be brown, too. It was too pale with the pen. Maybe yellow royal icing hair would have worked, but we were way past midnight on that call.
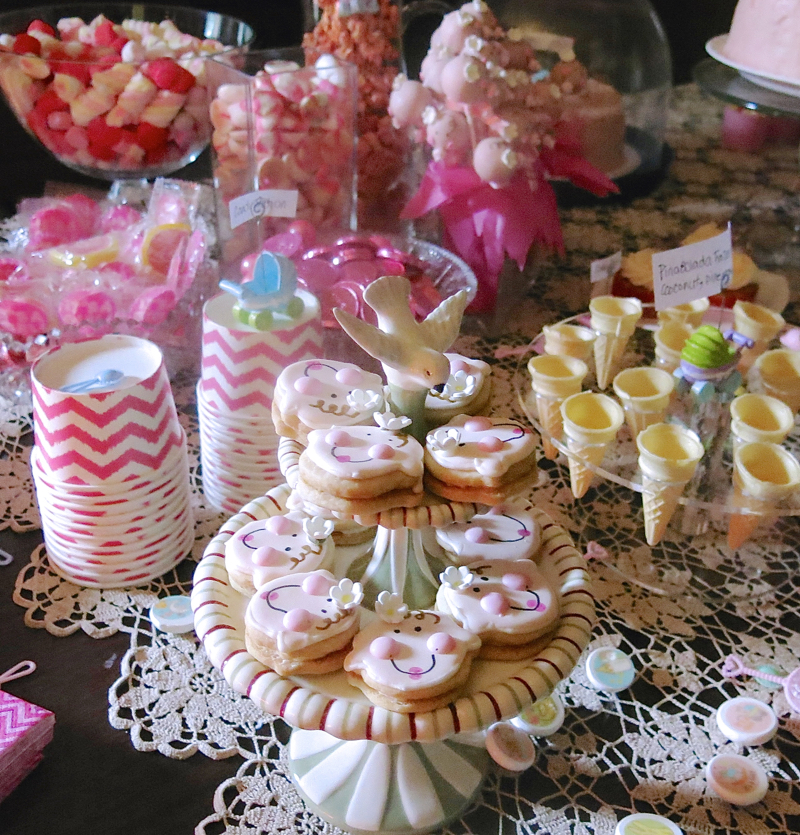
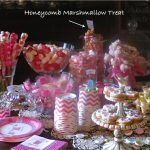
Interestingly, I made 36 cake pops and 24 babyface cookies. The treat bags were filled with goodies from the desert buffet, but there were still 3-4 of these cookies left behind. Let’s just say, they were thoroughly enjoyed!

Baby Shower Baby Face Shortbread Sandwich Cookies
The cutest and easiest little cookies to make for a baby shower! Delicious shortbread with a touch of almond and a wee bit of personality, to boot!
Ingredients
Ingredients
- 250 g or 2 cups of flour (minus 2 tablespoons or 15 grams to be replaced with cornstarch)
- 20 g or 2 tablespoons of cornstarch
- 100 g or ½ cup of Berry sugar
- 225 g or 1 cup of unsalted butter
Ingredients for Almond Butter Icing:
- 1 cup of unsalted butter , room temperature
- 3 cups of icing sugar
- 2 teaspoons of pure almond extract
- 8-12 drops of green food colouring
Other ingredients
- One batch of royal Icing , below
- 24 Wilton miniature daisies
- Black and Brown edible ink pens (pink for lips?)
Instructions
Take it slow; plan the project:
- Day One: make the dough
- Day Two: cut out and bake the cookies
- Day Three: make the almond butter icing and form the cookie sandwiches
- Day Four: make the royal icing, flood the top of each cookie and add chubby cheeks
- Day Five: decorate each adorable little babyface
Instructions
- Preheat the oven to 325ºF
- Weigh sugar and flour into TM bowl; mix well 5 seconds on speed 3
- Weigh in butter; turbo 2 seconds 4 times
- Divide into two equal portions; wrap in plastic and refrigerate
- Roll cool dough to ⅛ inch on pastry cloth using a rolling pin cloth cover
- Cut out shapes; transfer to tray and dock decoratively
- Bake for 8-9 minutes, until a very light golden on the bottom (still white on top)
- Cool on rack
Instructions for Almond Butter Icing:
- Mix all ingredients together until the consistency of play dough; refrigerate in a sealed container
- Take out of the fridge 15 minutes before needed; place in pastry bag
Making the Sandwiches
- Place two cookies outside down; ice inside of one cookie
- Top with second cookie; both bottoms should be inside of the cookie sandwiching the icing
Decorating the Baby Faces
- Prepare the Royal Icing; outline each cookie with the outlining mixture in a pastry bag with a thin tip
- Flood inside of each cookie with the flooding mixture in a squeeze bottle; shaking each in the air to move it around and using a toothpick to encourage the flood (I found my squeeze bottle tip did that best)
- Add a drop of red to remaining royal icing for pink rosy chubby cheeks; place in squeeze bottle
- Add tiny dots mid cookie just by ears for rosy cheeks; if you do this immediately after flooding each cookie, dots will settle into the face and be at the same level as the surface icing (if your first experience, you may need another person for this part – I did it after finishing all cookie surface flooding and the dots sat on the surface making adorable chubby cheeks)
- Set on sheet overnight to dry
- Mix ½ of remaining icing from the squeeze bottles with green food colouring and add a little more sugar to make a stiffer outlining mixture; place in pastry bag to make hair; you may need to add blue and red to get a richer brown
- Place in pastry bag to make little curl on the forehead; add daisy at top of each curl (it will secure daisy and hide beginning of curl)
- Using edible pen, draw on smiles, and dot your eyes; if not using the icing for the hair, use the brown pen to make your curls
- I added pink lips with my pink edible pen
- Set on sheet to dry; freeze or store in tightly sealed container until event
Notes
(http://www.coppergifts.com/cookie-cutters/pc/Mini-Baby-Face-Cookie-Cutter-p4698.htm)


Valerie, I wish In had been to that baby shower, you did such a beautiful job of the goodies. What a lucky mom.
35 years ago I lived with an extremely controlling man who insisted that icing had to be two inches thick but threw a tantrum that any two year old would have been proud of if it was too sweet or too thin a layer. Not wanting to change the flavour by adding lemon or lime I discovered vinegar, plain old white vinegar. You can’t taste it and it cuts the sweetness. Start with 1/2 teaspoon and adjust until it tastes right to suit your palate. It took a long time to realize that the relationship was doomed to fail but I did learn this trick so all was not lost. Add this one to your repertoire, Brendi